
Do you want to know more about the world of PCB soldering and designing? Do you want to learn about the PCB Soldering process and its importance in PCB manufacturing? PCB Soldering can be a tricky topic for new electronics enthusiasts to get into, especially if you have no prior experience with it. So today we will go over the basics of PCB soldering. This guide will serve as an excellent jumping-off point if you’re looking to head to more in-depth information after this or as a perfect refresher if you already have some background in soldering, but are looking to brush up on the basics.

What is PCB Soldering?
Soldering on PCBs is another term for the process of soldering electrical circuit boards. This type of soldering is one of the most basic for anyone who’s wishing to work with electronics and electrical circuits must learn. There are many different ways you can complete the soldering process, the most basic explanation of the soldering process is that it’s a way of joining two small pieces together on the surface of the PCB, which stands for Printed Circuit Board. There are several different ways to perform soldering on PCBs, but it generally breaks down into two main types:
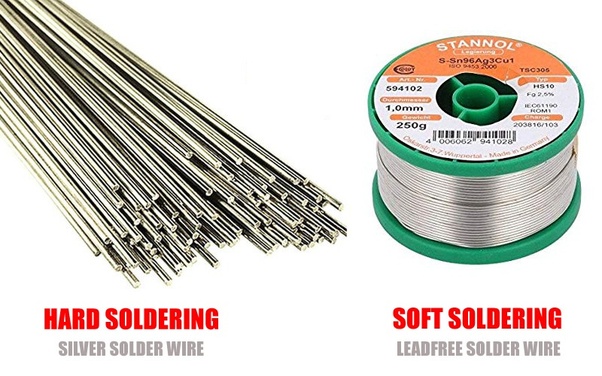
1) Soft Soldering
Soft soldering is the process for attaching small components onto larger PCBs. These small components will usually have a low-liquefying temperature that will begin to break down under the high temperatures of the heat source.
2) Hard Soldering
A process that uses a solid solder to join two different metal elements together by spreading throughout the holes of the components that become unlockable as they’re exposed to high temperatures. As a process, hard soldering is made up of two smaller sub-processes known as silver soldering and brazing.
Equipment You Will Need
You will need the following equipment to ensure good PCB Soldering
- Soldering Iron
- Solder Flux
- Soldering Paste
- Small Sponge
- Side Cutters
- The PCB
- First-Aid Kid (For Emergencies)
Steps To Exceptional PCB Soldering
1) Ready Your Iron
Begin the tinning process by warming up the iron thoroughly and letting it rest until it reaches its full heat. Once it fully heats up, coat the tip thoroughly with solder flux, making sure to cover the entire tip. You’ll need to use plenty of solder flux to do so, and some of this will likely drip. Keep a wet sponge ready for this. Once you’re certain the entire tip is fully tinned, wipe it off with a wet sponge to get rid of any excess flux residue.
2) Prepare Your Surface
A Good soldering job starts with a clean surface. To ensure your PCB board is clean and ready for soldering, use a cleaning pad to wipe the surface clean of any dust and debris. You may also use an acetone cleaner to give it an additional wipe down if available.
3) Arrange The Components
Even if you’re working with an exceptionally complex circuit board, you’ll likely only be soldering one or two components at a time. Begin this step by selecting a few small components and placing them where they belong on the board. Bend the leads as you find you need to and insert the component into the holes where they belong. If you’re having trouble getting the piece to stay still once you aren’t holding it in place, try bending the leads so that they rest at a 45-degree angle along the bottom of the board.
4) Introduce Some Heat
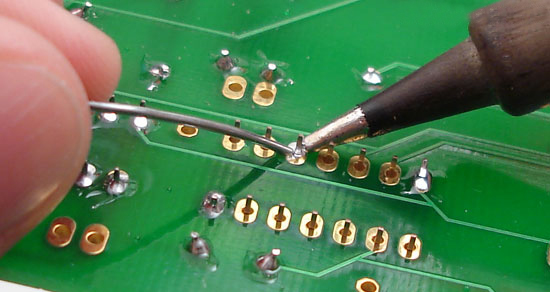
Start adding a very small amount of solder to the tip of the iron. This solder is not what’s going to hold the components in place but is to conduct heat from the iron to the board. To properly heat the joint, hold the iron so the tip touches both the board and the component lead. Once the tip is in position, the solder you applied earlier will make contact with both the lead and the board, heating them up and preparing them for soldering.
5) Add Solder To The Joint
Once the lead is heated, start the soldering by touching the tip of a strand of solder flux to the soldering iron tip and the lead. If you’ve heated this space correctly, the solder should flow freely and the flux should begin to liquefy. Keep adding solder around this joint until it’s entirely coated, forming a small mound. When you’ve reached this point, stop adding solder and remove your iron from the area.
6) Inspect The Solder Joint
Once the joint has finished cooling, conduct a small inspection of it. If the connection looks good, move on to trimming the lead. You’ll do this by using side cutters to cut at the very top of the joint.
Tips & Best Practices
Follow these tips and best practices to improve your PCB Soldering Skills
- When you’re preparing your iron for Soldering, wipe it off with a wet sponge to get rid of any excess flux residue. Because it might solidify on the tip and may become difficult to remove later.
- As you are setting up the surface and the board for soldering, try to give both a blast of compressed air to get rid of any small dust or metal particles
- Solder smaller electronic components first and work up to the bigger ones.
- Try to avoid overheating, If you notice an area starting to bubble, remove the heat immediately. Wait for it to cool and then heat it again
- Once you’re finished with all your soldering, make sure to clean up any extra flux from the board.
In Conclusion, By following these steps and adhering to these guidelines you can take your PCB Soldering skills from an amateur to an expert level.
Related posts:
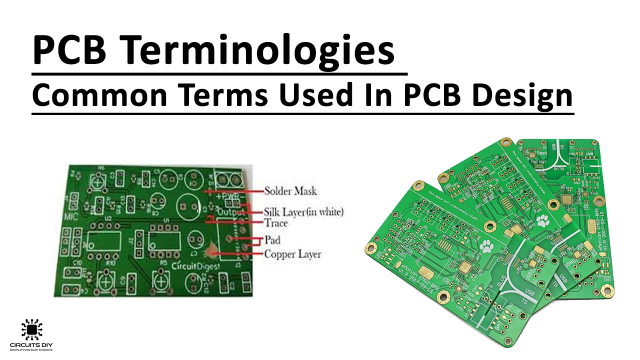 PCB Terminologies - Common Terms Used In PCB Design
 Multilayer PCB | Types of PCB
 Key Environmental Factors To Manage During SMT Manufacturing
 PCB Troubleshooting Tips & Techniques - A Complete Guide
 6 Tips to Reduce PCB Size for Your Projects
 Aluminum Core PCB |Their Design Benefits/Limitations And Applications


3 thoughts on “PCB Soldering Techniques & Best Practices For Absolute Beginners”
Comments are closed.