In this project, we are making a project of a simple water level indicator circuit. Water overflow is a major issue it can create a mess and also wastes a lot of water. But with a simple water level indicator, you can overcome this issue easily. This is one of the simplest circuits that anyone can make whether they’re familiar with electronics or not.
This circuit can be built in a few minutes and you just need an LED, 470 ohms resistor, and any kind of battery of 5-12 volts. To detect the water use two probes and attach them to your desired level in the water tank and connect the battery.
Hardware Components
The following components are required to make Water Level Indicator Circuit
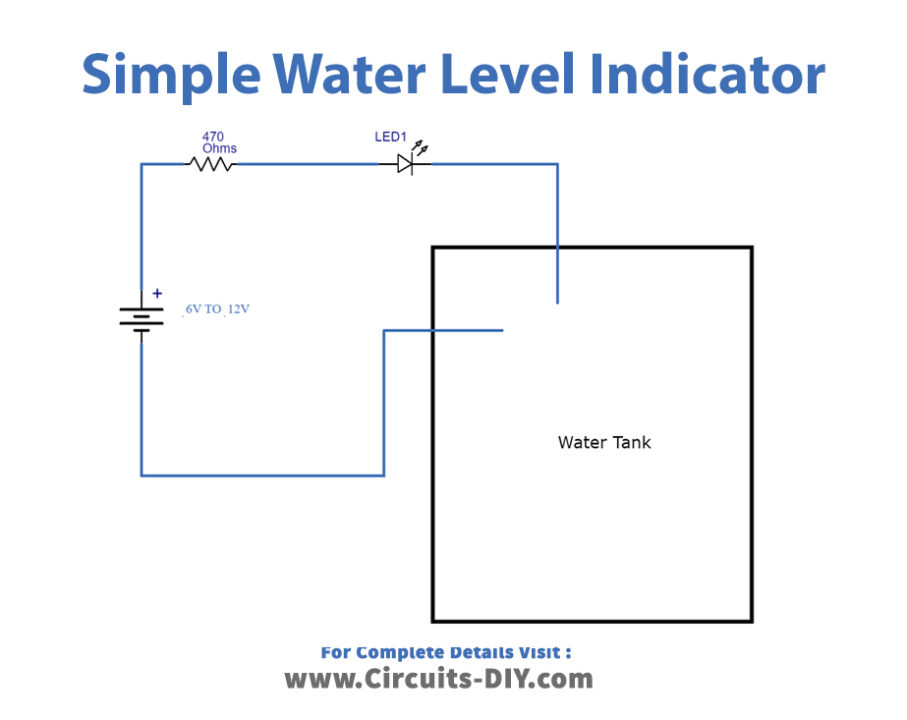
Water Level Indicator Circuit
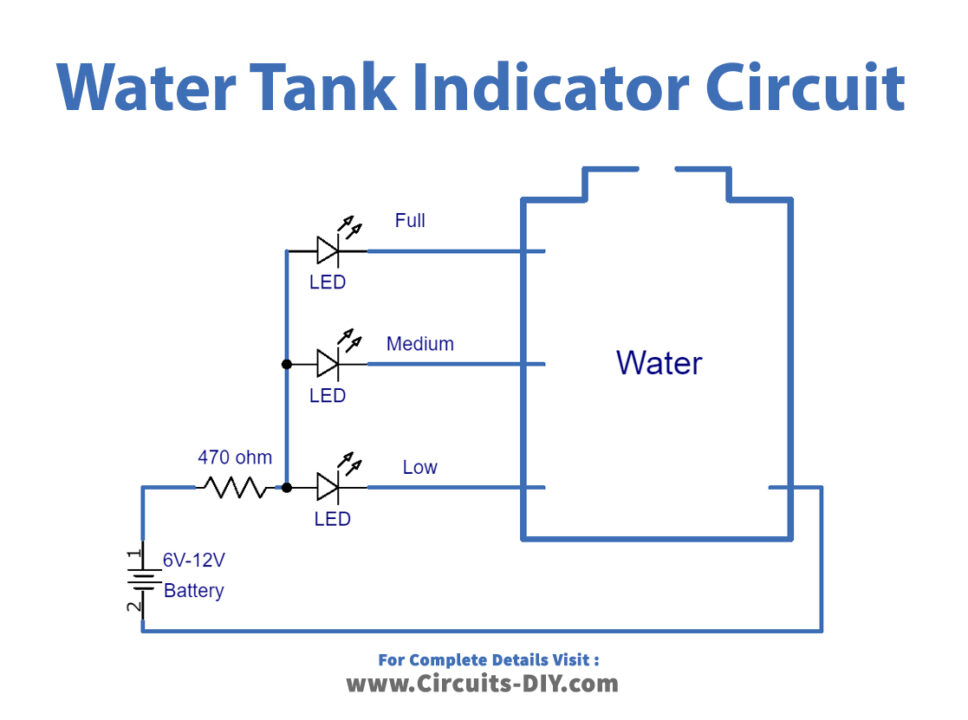
Working Explanation
You can operate this circuit on any battery having voltage from 5 to 12 volts. The working of this circuit is quite simple. When the water reaches the desired level the probes will be attached there and the water will touch them. Since water is a great conductor of electricity the probes will start conducting are gives power to the circuit. The LED will light up giving a visual indication. A current limiting resistor is always used with the LED so that it doesn’t damage.
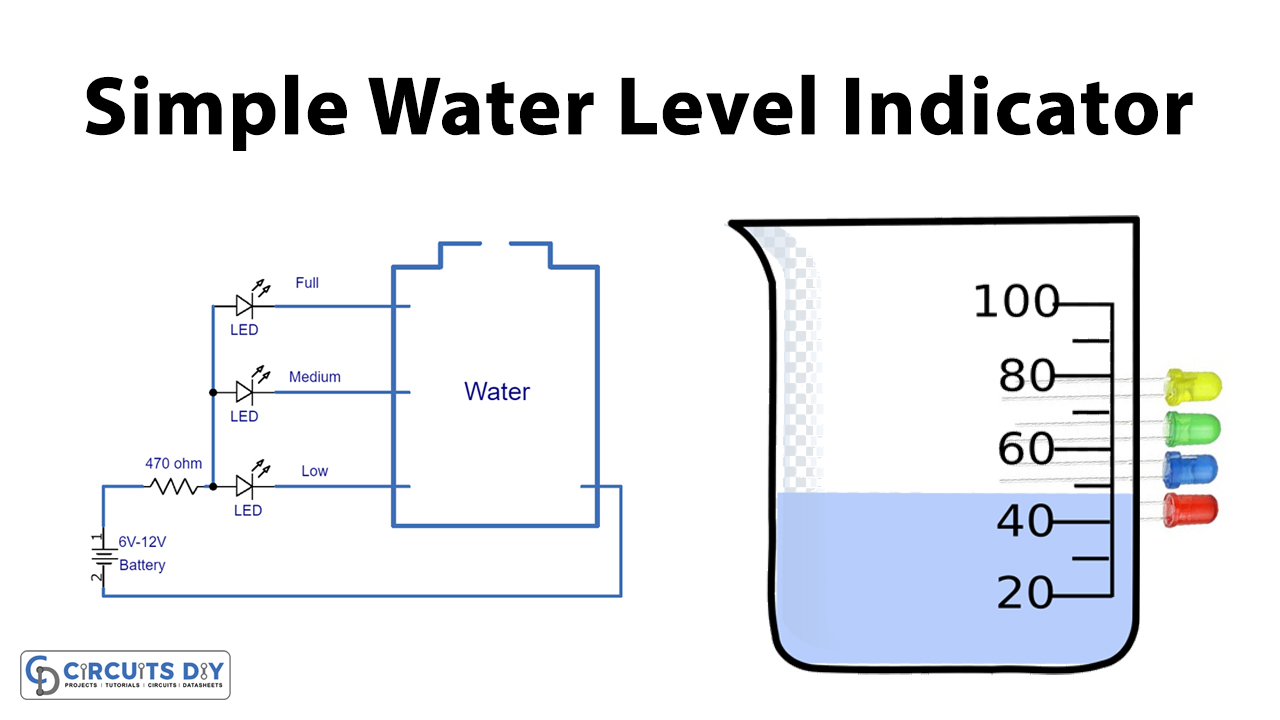
You can modify this circuit as shown in figure 2 by connecting three or more LEDs with this circuit along with a resistor and connecting them to different levels of the water tank. In this way, you can indicate the low, medium, and full levels of the tank. Place the probes on the desired three-level and connect the battery. Each LED will light up when water reaches that level.
Applications and Uses
- Water tanks
- Aquariums
- Swimming pools
- Washing machines