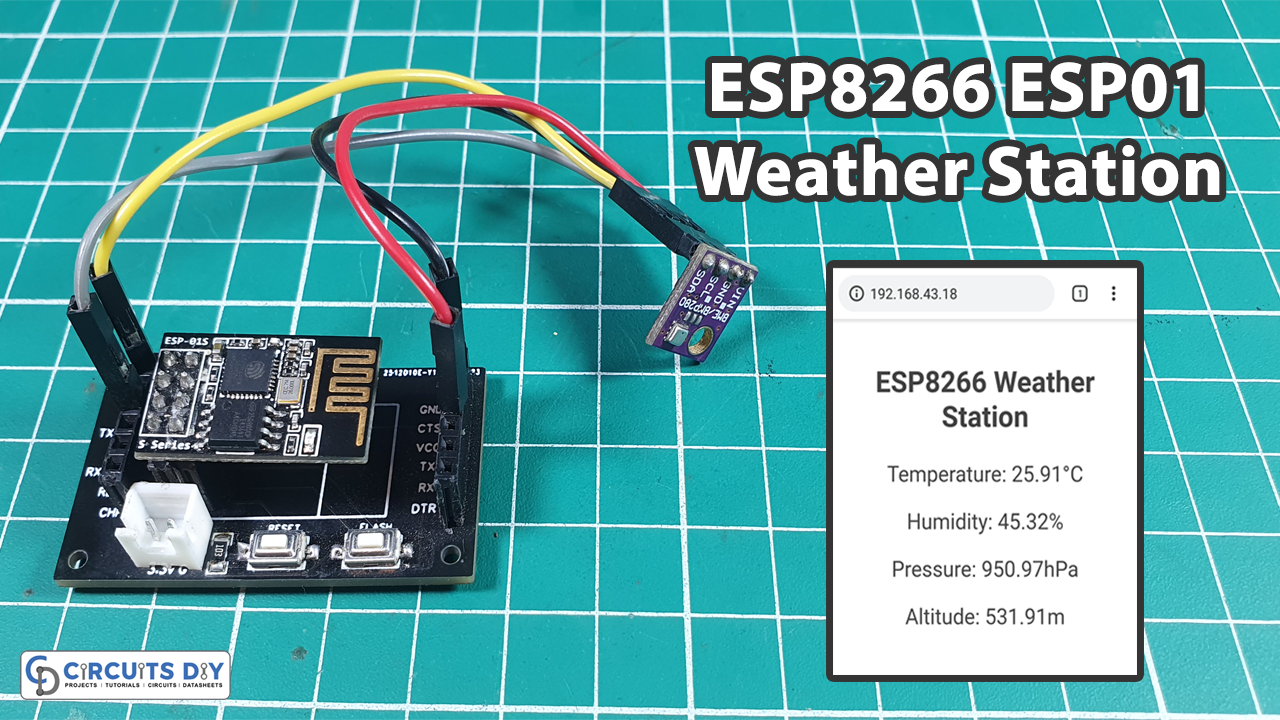
Today in this tutorial we are going to make a simple “ESP8266 Weather Station with BME280”.
This electronic project uses ESP8266 ESP01 as the control device that easily connects to the existing WiFi network & creates a Web Server. When any connected device accesses this web server, ESP8266 reads in temperature, humidity, barometric pressure & altitude from BME280 & sends it to the web browser of that device with a nice interface. Excited? Let’s get started!
The BME280 sensor uses I2C or SPI communication protocol to exchange data from Microcontroller. BME280 is simple & easy to use, pre-calibrated and doesn’t require any extra components to run. You can simply start measuring relative humidity, temperature, barometric pressure & approximated altitude in no time
PCBWay celebrates its 10th anniversary, marking a decade of excellence in PCB manufacturing. Renowned for quality and innovation, PCBWay has earned the trust of engineers and designers worldwide with its top-notch prototyping and production services. Visit PCBWay’s anniversary page to explore special promotions and order your PCBs today!
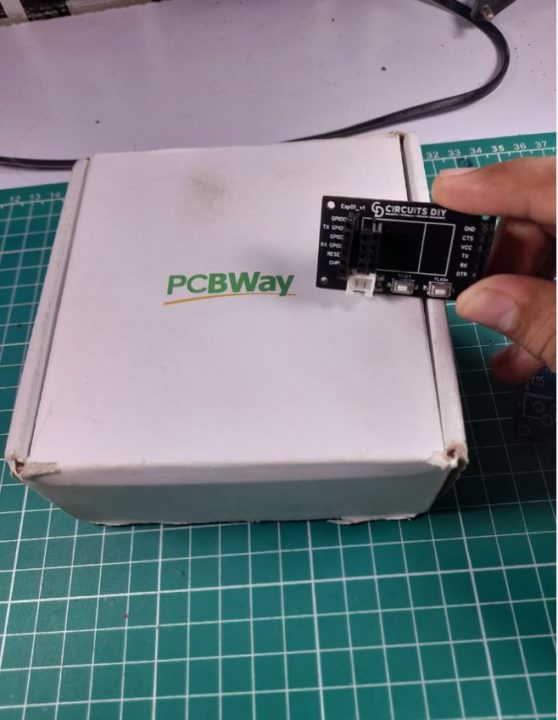
PCBWay commits to meeting the needs of its customers from different industries in terms of quality, delivery, cost-effectiveness, and any other demanding requests. As one of the most experienced PCB manufacturers in China. They pride themselves to be your best business partners as well as good friends in every aspect of your PCB needs.
Hardware Components
| S.no | Component | Value | Qty |
|---|---|---|---|
| 1. | ESP01 | – | |
| 2. | Sensor | BME280 | |
| 3. | SMD Resistor | 10K | 1 |
| 4. | SMD Button | – | 1 |
Circuit Diagram
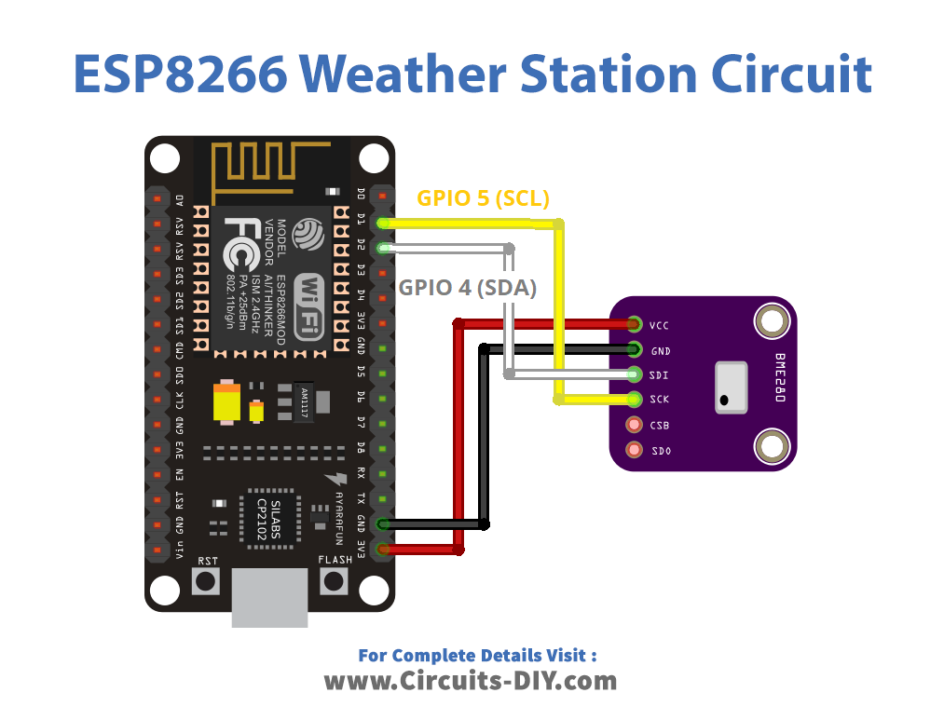
Here we use I2C communication with the BME280 sensor module. For that, wire the sensor to the ESP8266 SDA and SCL pins, as shown in the following schematic diagram. SDA to D1 and SCL to D2.
ESP8266 Weather Station Code
#include <ESP8266WebServer.h>
#include <Wire.h>
#include <Adafruit_Sensor.h>
#include <Adafruit_BME280.h>
#define SEALEVELPRESSURE_HPA (1013.25)
Adafruit_BME280 bme;
float temperature, humidity, pressure, altitude;
/*Put your SSID & Password*/
const char* ssid = "Circuits DIY"; // Enter SSID here
const char* password = "03433212601"; //Enter Password here
ESP8266WebServer server(80);
void setup() {
Serial.begin(115200);
delay(100);
bme.begin(0x76);
Serial.println("Connecting to ");
Serial.println(ssid);
//connect to your local wi-fi network
WiFi.begin(ssid, password);
//check wi-fi is connected to wi-fi network
while (WiFi.status() != WL_CONNECTED) {
delay(1000);
Serial.print(".");
}
Serial.println("");
Serial.println("WiFi connected..!");
Serial.print("Got IP: "); Serial.println(WiFi.localIP());
server.on("/", handle_OnConnect);
server.onNotFound(handle_NotFound);
server.begin();
Serial.println("HTTP server started");
}
void loop() {
server.handleClient();
}
void handle_OnConnect() {
temperature = bme.readTemperature();
humidity = bme.readHumidity();
pressure = bme.readPressure() / 100.0F;
altitude = bme.readAltitude(SEALEVELPRESSURE_HPA);
server.send(200, "text/html", SendHTML(temperature,humidity,pressure,altitude));
}
void handle_NotFound(){
server.send(404, "text/plain", "Not found");
}
String SendHTML(float temperature,float humidity,float pressure,float altitude){
String ptr = "<!DOCTYPE html> <html>\n";
ptr +="<head><meta name=\"viewport\" content=\"width=device-width, initial-scale=1.0, user-scalable=no\">\n";
ptr +="<title>ESP8266 Weather Station</title>\n";
ptr +="<style>html { font-family: Helvetica; display: inline-block; margin: 0px auto; text-align: center;}\n";
ptr +="body{margin-top: 50px;} h1 {color: #444444;margin: 50px auto 30px;}\n";
ptr +="p {font-size: 24px;color: #444444;margin-bottom: 10px;}\n";
ptr +="</style>\n";
ptr +="</head>\n";
ptr +="<body>\n";
ptr +="<div id=\"webpage\">\n";
ptr +="<h1>ESP8266 Weather Station</h1>\n";
ptr +="<p>Temperature: ";
ptr +=temperature;
ptr +="°C</p>";
ptr +="<p>Humidity: ";
ptr +=humidity;
ptr +="%</p>";
ptr +="<p>Pressure: ";
ptr +=pressure;
ptr +="hPa</p>";
ptr +="<p>Altitude: ";
//ptr +=altitude;
ptr +="m</p>";
ptr +="</div>\n";
ptr +="</body>\n";
ptr +="</html>\n";
return ptr;
}We modified this project from LastMinuteEngineers. You can check the original source for a detailed description.
First, you need to install NodeMcU in Arduino IDE. Then required necessary libraries to compile this code. This code requires Adafruit BME280 Library and Adafruit Unified Sensor. Download both libraries after that in your Arduino IDE, you can go to Sketch > Include Library > Add. ZIP library… and select the library you’ve just downloaded.
After installing the required libraries, copy the following code to your Arduino IDE Update SSID and Password according to your network.
After uploading the code, open the Serial Monitor at a baud rate of 115200. If everything is OK, it will output the dynamic IP address obtained from your router and show the HTTP server started message. Paste IP in the browser you will see the webpage with Temperature, Humidity, Pressure & Altitude Values which can be viewed everywhere from the same network locally.


