Introduction
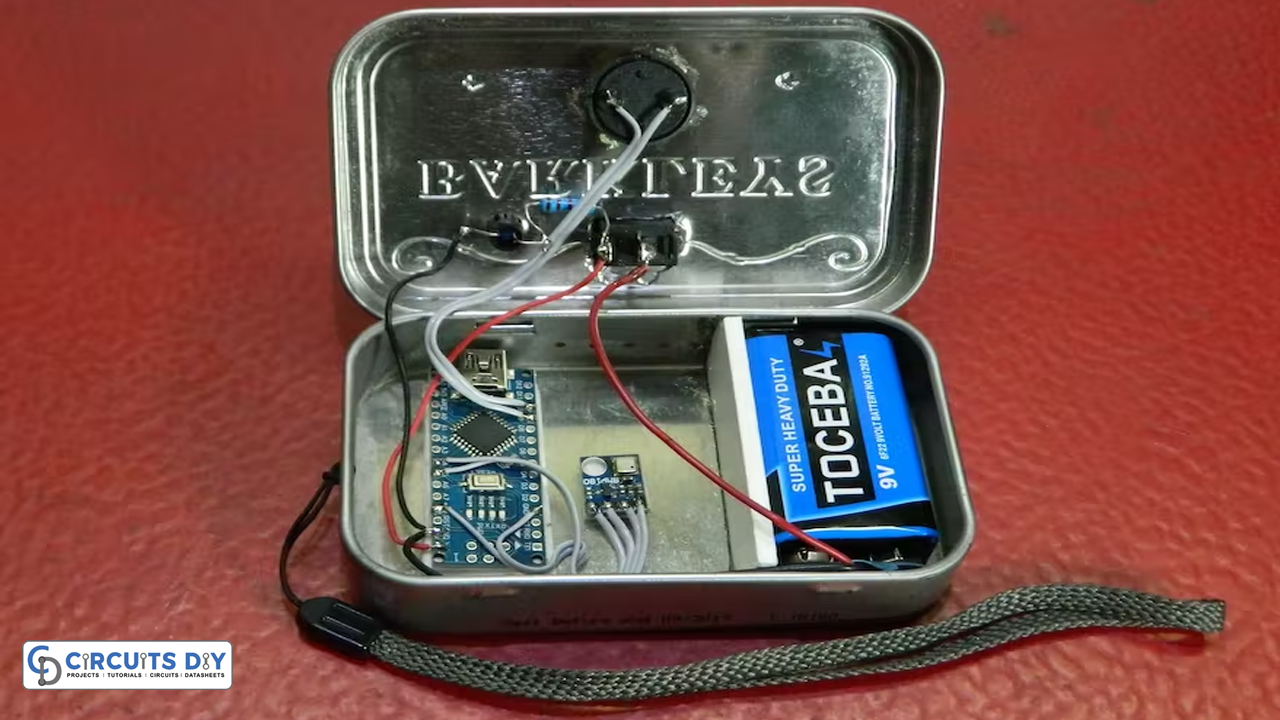
Who doesn’t like a good adventure? Adventures such as paragliding. The desire to fly across the skies like a bird has always inspired humans. This activity is thought to be dangerous, however, the fact is that participants are quite safe, especially when compared to other adventure sports. Of course, you can’t paraglide without having proper safety measures. Several critical elements are carefully considered. For example, the adventure does rely on some devices, like a variometer, for safe flights. So, in this article, we will see How to Make a Simplest Variometer for Paragliding.
Paraglider competitors also utilize a variometer. Along with enthusiasts of paragliding and hang gliding, variometers are utilized by pilots of airplanes and gliders
What is Variometer?
A device that measures the rate of vertical ascent or descent is named a variometer. This device keeps track of information like climb rate, altitude, and speed. It gives pilots access to some crucial information, and therefore, is seen as an essential component of the panel in airplanes. A variometer is beneficial for gliders because it helps pilots navigate safely while also improving the efficiency of tracking thermals.

Hardware Components
You will require the following hardware for Simplest Variometer for Paragliding.
| S.no | Component | Value | Qty |
|---|---|---|---|
| 1. | Arduino UNO | – | 1 |
| 2. | Pressure Sensor | BMP180 | 1 |
| 3. | Buzzer | – | 1 |
| 4. | Button | – | 1 |
| 5. | LED | – | 1 |
| 6. | Resistor | 330Ω | 1 |
| 7. | Breadboard | – | 1 |
| 8. | Jumper Wires | – | 1 |
Steps Making Simplest Variometer
To make this Simplest Variometer, you need a pressure sensor and Arduino along with some very basic electronic components. Once you have them, follow the given steps:
Schematic
Make connections according to the circuit diagram given below.

Wiring / Connections
| Arduino | BMP180 Sensor | Buzzer | LED |
|---|---|---|---|
| 5V | VCC | ||
| GND | GND | -ve | |
| A4 | SDA | +ve with R1 | |
| A5 | SCL | ||
| D9 | -ve | ||
| D10 | +ve |
Installing Arduino IDE
First, you need to install Arduino IDE Software from its official website Arduino. Here is a simple step-by-step guide on “How to install Arduino IDE“.
Installing Libraries
Before you start uploading a code, download and unzip the following libraries at /Progam Files(x86)/Arduino/Libraries (default), to use the sensor with the Arduino board. Here is a simple step-by-step guide on “How to Add Libraries in Arduino IDE“.
Code
Now copy the following code and upload it to Arduino IDE Software.
#include <toneAC.h>
#include <Wire.h>
#include <Adafruit_BMP085.h>
Adafruit_BMP085 mySensor;  // create sensor object called mySensor

/*
Hardware connections:

- (GND) to GND
+ (VDD) to 3.3V
SCL to A5
SDA to A4

D9 and D10 to the Piezo Buzzer ( see toneAC.h )

*/

#define NUM_PRESSURES 64
#define NUM_TOTALS 16
uint32_t pressure[NUM_PRESSURES];
uint32_t old_total[NUM_TOTALS];
int pressure_index = 0;
int total_index = 0;
uint32_t total;
int current_tone = 0;
int beep_time = 0;

void setup() {
// play start sound
  toneAC(388, 4);
  delay(70);
  toneAC(0);
  delay(30);
  toneAC(590, 4);
  delay(70);
  mySensor.begin();
  uint32_t p = mySensor.readPressure();
  total = p*NUM_PRESSURES;
  for(int i = 0; i<NUM_PRESSURES; i++)
  {
    pressure[i] = p;
  }
  for(int i = 0; i<NUM_TOTALS; i++)
  {
    old_total[i] = total;
  }
  toneAC(0);
}

void loop(){
    total -= pressure[pressure_index];
    pressure[pressure_index] = mySensor.readPressure();
    total += pressure[pressure_index];
    int32_t rate = total - old_total[total_index];
    float frate = (float)rate;
    frate = 0.0;
    old_total[total_index] = total;
    pressure_index++;
    total_index++;
    if(pressure_index >= NUM_PRESSURES)pressure_index = 0;
    if(total_index >= NUM_TOTALS)total_index = 0;
    if(rate < -200){
      if(beep_time <5)
        toneAC(500 - rate);
      else
        toneAC(0);
    }
    else if(rate > 200)
    {
      float f = 100.0 + 40000.0 * 1.0/((float)rate);
      toneAC((int)f);
    }
    else
    {
      toneAC(0);
    }
    beep_time++;
    if(beep_time >= 10)beep_time = 0;
}
Let’s Test It
It’s time to put the device to the test. The gadget plays its opening sound as soon as you switch it on. The sound then transitions from being deep to being high-pitched and vice versa, depending on the relative shift in pitch.
Working Explanation
A piezo-resistive sensor, an analog-to-digital converter, and a control unit with E2PROM and a serial I2C interface comprise the BMP180. The uncompensated pressure is provided by the BMP180. The microcontroller transmits a start sequence to initiate a pressure measurement. The result value may be read over the I2C interface.
The code includes various libraries that are required. Since, this particular example is a variometer, which provides an auditory indication to show these variations. Therefore one of the libraries we used is the ToneAC library. The buzzer sound is doubled due to this library.
Applications
- For aircraft and aviation
- For paragliding adventure
Conclusion.
We hope you have found this How to Make a Simplest Variometer for Paragliding Circuit very useful. If you feel any difficulty in making it feel free to ask anything in the comment section.


