Introduction
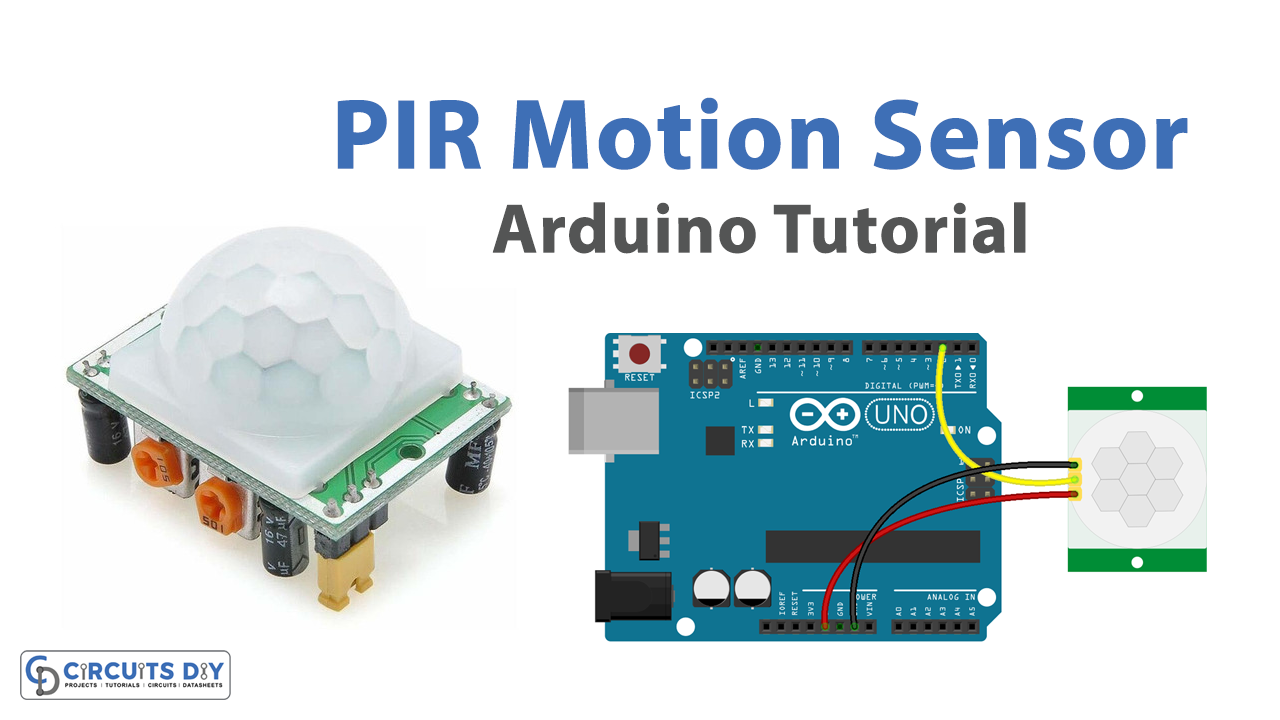
Interfacing an HC-SR501 Pyroelectric PIR infrared motion sensor with an Arduino Uno is a powerful way to add motion detection capabilities to your projects. The HC-SR501 PIR motion sensor is a small, low-cost device that utilizes infrared technology to detect changes in temperature caused by the movement of people or objects in front of the sensor. The sensor can detect motion within a certain range and angle, and sends a signal to the Arduino microcontroller indicating whether motion has been detected or not.
The Arduino then reads this signal and performs the necessary logic to determine if motion has been detected, and this information can be used to trigger an action such as turning on a light or sending a notification. The status of the motion detection can also be posted on the serial monitor for debugging or for displaying the status. This process allows for the creation of interactive projects and systems that can react to movement in the environment, such as home automation, security systems, and robotics.
Hardware Components
You will require the following hardware for Interfacing PIR Motion Sensor with Arduino.
| S.no | Component | Value | Qty |
|---|---|---|---|
| 1. | Arduino UNO | – | 1 |
| 2. | USB Cable Type A to B | – | 1 |
| 3. | Motion Sensor | HC-SR501 | 1 |
| 4. | 9V Power Adapter for Arduino | – | 1 |
| 5. | Jumper Wires | – | 1 |
Motion Sensor with Arduino
- Connect the HC-SR501 PIR motion sensor to the Arduino using the VCC, GND, and OUT pins specified in the sensor’s documentation.
- In the Arduino IDE, include the necessary libraries for the HC-SR501 sensor.
#include <Arduino.h>
- In the setup() function, initialize the serial communication and the pin mode for the sensor:
Serial.begin(9600);
pinMode(sensorPin, INPUT);
- In the loop() function, read the sensor’s output value:
int sensorValue = digitalRead(sensorPin);
- Use an if statement to check if motion is detected by checking if the sensorValue is high and post the status on the serial monitor using the Serial.println() function:
if(sensorValue == HIGH){
    Serial.println("Motion detected");
}else{
    Serial.println("No motion detected");
}
- You can add any other action you want to take when motion is detected.
- Upload the code to the Arduino Uno and open the serial monitor to see the sensor’s output values.
Schematic
Make connections according to the circuit diagram given below.

Wiring / Connections
| Arduino | Sensor |
|---|---|
| 5V | VCC |
| GND | GND |
| D2 | OUT |
Installing Arduino IDE
First, you need to install Arduino IDE Software from its official website Arduino. Here is a simple step-by-step guide on “How to install Arduino IDE“.
Code
Now copy the following code and upload it to Arduino IDE Software.
const int PIN_TO_SENSOR = 2;   // the pin that OUTPUT pin of sensor is connected to
int pinStateCurrent   = LOW; // current state of pin
int pinStatePrevious  = LOW; // previous state of pin

void setup() {
  Serial.begin(9600);            // initialize serial
  pinMode(PIN_TO_SENSOR, INPUT); // set arduino pin to input mode to read value from OUTPUT pin of sensor
}

void loop() {
  pinStatePrevious = pinStateCurrent; // store old state
  pinStateCurrent = digitalRead(PIN_TO_SENSOR);   // read new state

  if (pinStatePrevious == LOW && pinStateCurrent == HIGH) {   // pin state change: LOW -> HIGH
    Serial.println("Motion detected!");
    // TODO: turn on alarm, light or activate a device ... here
  }
  else
  if (pinStatePrevious == HIGH && pinStateCurrent == LOW) {   // pin state change: HIGH -> LOW
    Serial.println("Motion stopped!");
    // TODO: turn off alarm, light or deactivate a device ... here
  }
}
Working Explanation
In the Arduino IDE, the necessary libraries for the HC-SR501 sensor are included. In the setup() function, the serial communication and the pin mode for the sensor is initialized. The baud rate is set to 9600 bps.
In the loop() function, the sensor’s output value is read using the digitalRead() function, which returns either a HIGH or LOW value. The value is then compared to check if motion is detected by using an if statement. If the sensorValue is HIGH, it means motion is detected and the message “Motion detected” is sent to the serial monitor. If the sensorValue is LOW, it means no motion is detected and the message “No motion detected” is sent to the serial monitor.
Applications
- Security Systems
- Robotics
- Industrial Automation
- Automotive
- Medical equipment
- Proximity Detection
- Gaming and interactive projects
Conclusion.
We hope you have found this PIR Motion Sensor Circuit very useful. If you feel any difficulty in making it feel free to ask anything in the comment section.


