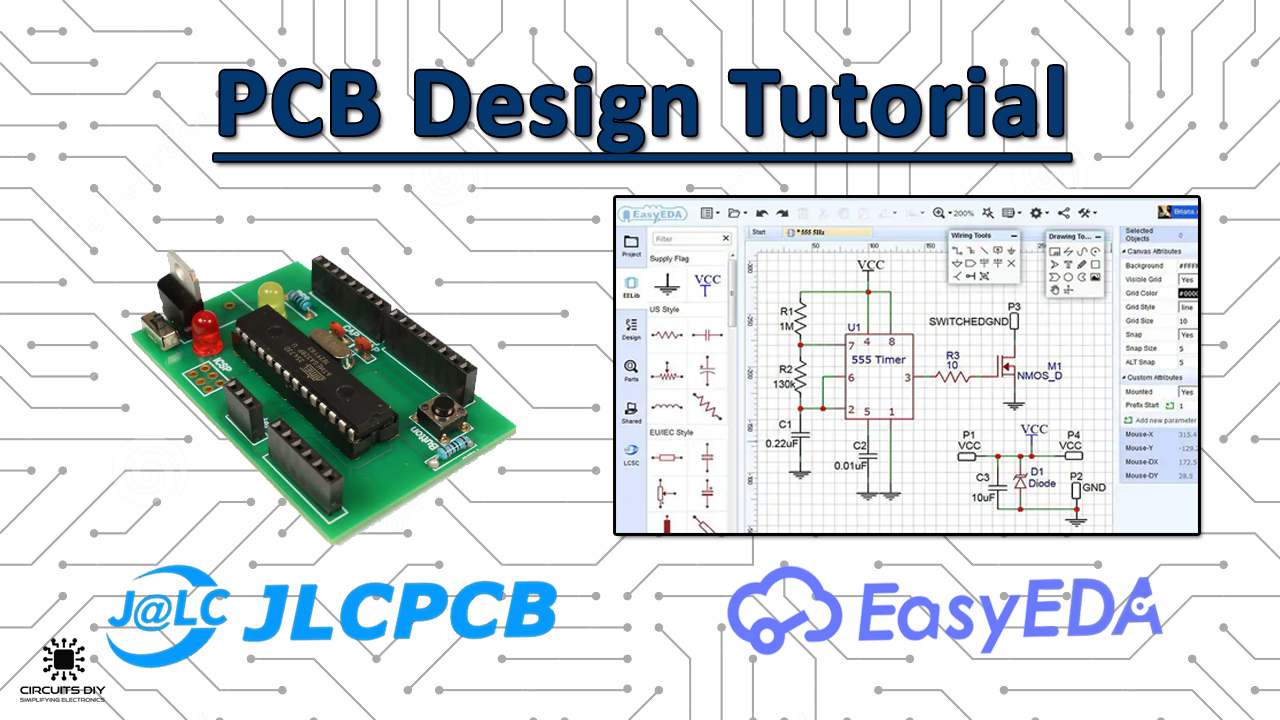
PCB design & fabrication has found its integral importance in today’s world of modern consumer electronics. But, designing & fabricating your PCB using local services tends to be really expensive & messy. Also, a number of other problems come into effect when it comes to ordering & designing PCBs using local services such as No Pre/Post sales support, discrepancies in design parameters, Human errors leading to overbudgeting, etc. So, in this article, I will guide you through a step-by-step PCB design tutorial using the premiere PCB CAD tool EasyEDA & the best PCB manufacturing and prototyping service JLCPCB. By following this tutorial, you’ll be able to design & order your next PCB project without any hassle, so let’s get into it.
Before we get on with our PCB design tutorial, let’s familiarize ourselves with the two primary PCB prototyping services we will be using today:
EasyEDA
EasyEDA is a free, no-install, Web, and cloud-based EDA CAD suite, featuring powerful schematic capture, mixed-mode circuit simulation, and PCB layout in a user-friendly cross-platform browser environment, for engineers, educators, students, and hobbyists. It’s compatible with windows, mac, and Linux, as long as there is one browser on the OS and connecting to the network. You can draw schematics quickly using the available libraries on the browser. It offers Simple, Easier, Friendly, and Powerful general drawing capabilities along with Real-time Team Cooperation & Integrated PCB Fabrication services with the collaboration of JLCPCB.
JLCPCB
JLCPCB is the leading PCB prototype enterprise and a high-tech design manufacturer located in Shenzhen China. Specializing in fast & professional PCB prototypes and small to large-scale PCB design & production. With over 14 years of experience in PCB manufacturing, JLCPCB has more than 800,000 customers. JLCPCB is a professional PCB manufacturer, featuring a large production scale, great manufacturing & production facilities, and superior PCB quality
JLCPCB is the foremost PCB prototype & manufacturing company in china, providing us with the best service we have ever experienced regarding (Quality, Price Service & Time).
Complete PCB Design Tutorial Using EasyEDA & JLCPCB
Follow each step as shown below:
Step 1: Start Making Your PCB Design Using EasyEDA
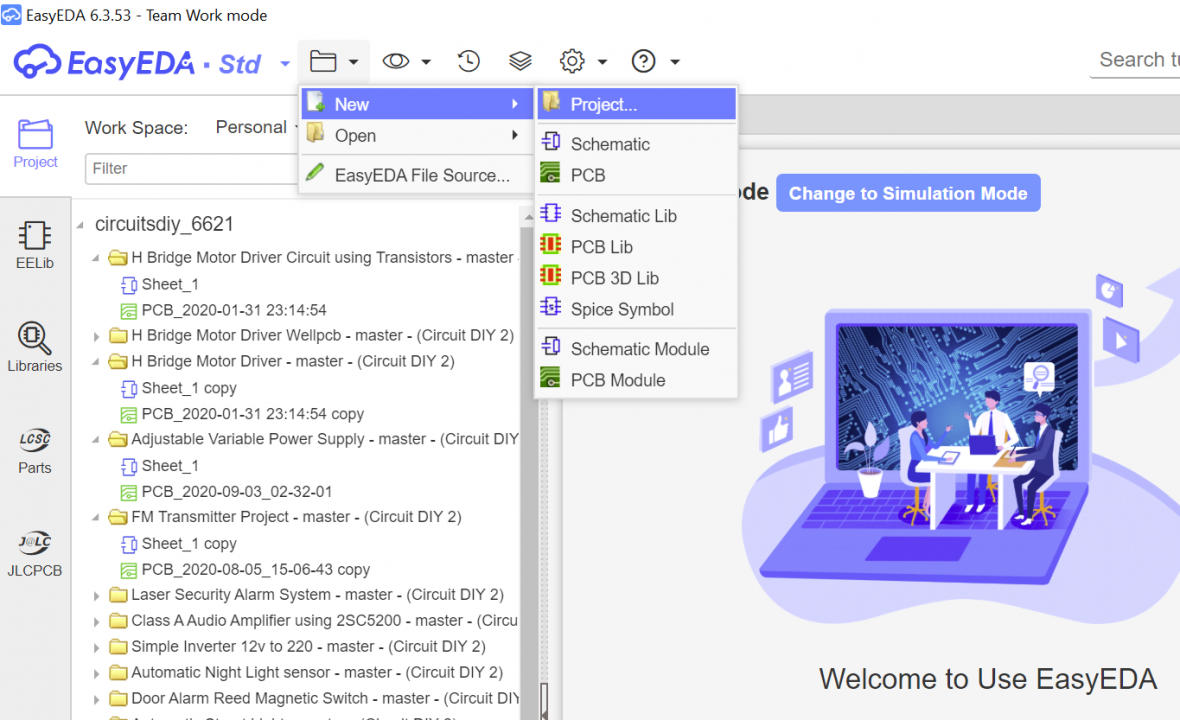
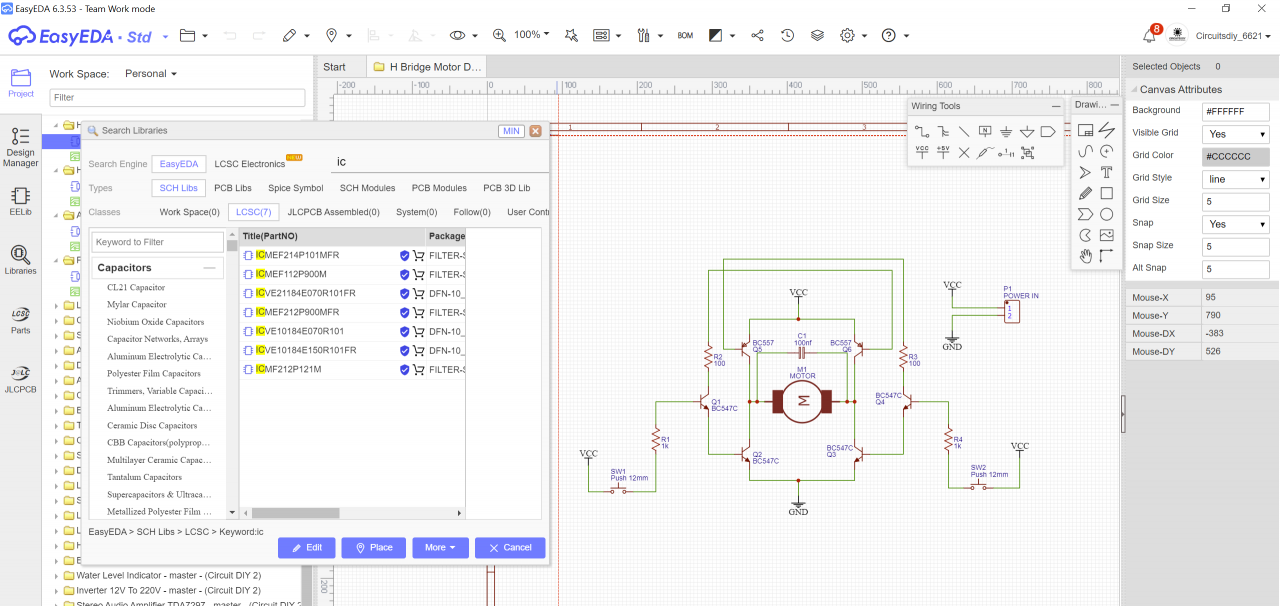
Start by drawing the initial schematic of your PCB using the EasyEDA design tool. For this, Go to the EasyEDA website and create a free account. Registering using a Google Account is also possible Once you are logged in, Go to “Editor” and create a new project. Now start drawing your circuit diagram. Make sure you add the components from JLCPCB/LCSC library while drawing the schematics in EasyEDA.
Step 2: Allocate & Route the Circuit Components
Now, pick the correct parts from the LCSC library & place them on the canvas in EasyEDA using the “wire” tool. After the design is complete, verify & save the circuit.
Step 3: Build the PCB Layout
After that, go to the top tool list, Click on the cover and select “Convert to PCB”. A new window with the layout will open, here you can place the components inside the boundary and rearrange them any way you want. In order to get the best possible look for your PCB, place & route parts with the same functions close to each other.
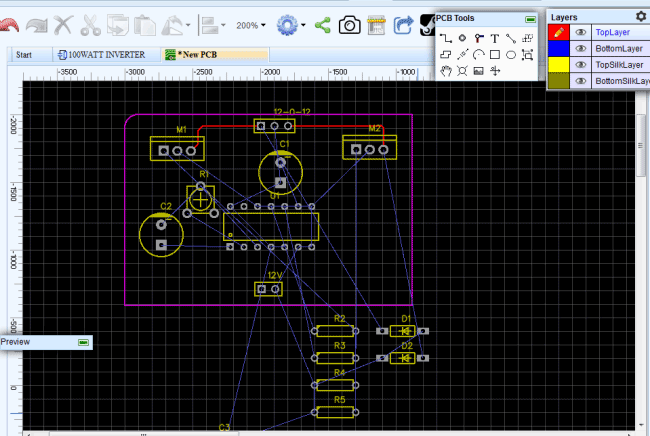
Now, save the PCB layout. After saving, start the routing of your PCB components. You can use the manual routing tool to do this. But, an easier approach is to use the built-in autoroute feature. To use that, Click on the “Route” Tool and Select “Auto Router”. This will open an Auto Router Config Page where you can provide details such as clearance, track width, layer information, etc. After that, click on “Run”.
Step 4: Import Gerber, BoM & CPL/PNP Files
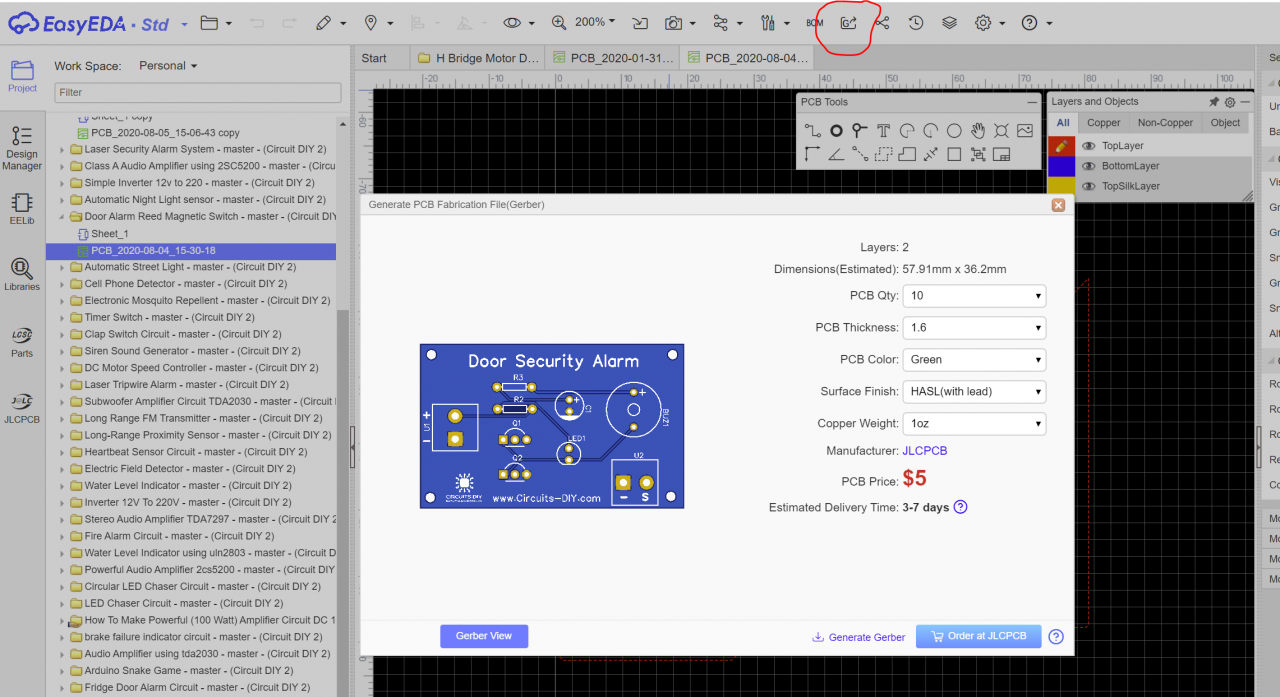
After your layout is completed, import the Gerber, BoM & CPL files, which you can use to manufacture your PCB from JLCPCB.
Gerber Files
The Gerber File has info on your PCB such as PCB layout information, Layer information, spacing information, and trace/track parametric to name a few.
CPL/PNP File
CPL/PNP file (Component Placement List/Pick & Place File). SMT Assembly machines need this file to determine where each part should be placed on the board.
BoM File
The Bill Of Material (BoM) contains the list of all components in the PCB Layout.
Step 5: Setup & Sign-in to your JLCPCB Account
Now, Visit the JLCPCBs website and create a free account, you can also use your google/Facebook account to register for a new account.
Step 6: Export the Gerber File
After signing into your JLCPCB account, Click on “Quote Now” and upload your Gerber File.
Step 7: Add SMT Assembly
After that, the user interface will show a preview of your PCB board. Verify that the PCB layout is as per your desire. Below the PCB preview, there are various custom design options like PCB Quantity, Texture, Thickness, Color, etc. Tick the options as per your design needs. After that, Choose “Assemble your PCB Boards”.
Step 8: Export BoM & CPL/PNP (Pick-Place) File
After that, Upload the BoM & CPL file that you downloaded earlier.
Step 8: Choose Essential Parts
Now, choose all the components you want JLCPCB to assemble in your PCB.
Step 10: Evaluate Assembly Order
Here, you can review & assess your PCB design order. Check & verify the PCB layout & components. If you see any problem, click on “Go Back” to edit your order.
Step 11: Checkout
After that, click on “Save To Cart”. On the next page, you can choose a shipping & payment option and Check Out Securely. You can either use Paypal or Credit/Debit Card to pay for your PCB.
In conclusion, following the above tutorial will enable you to design & order your next PCB project with the best possible result.


