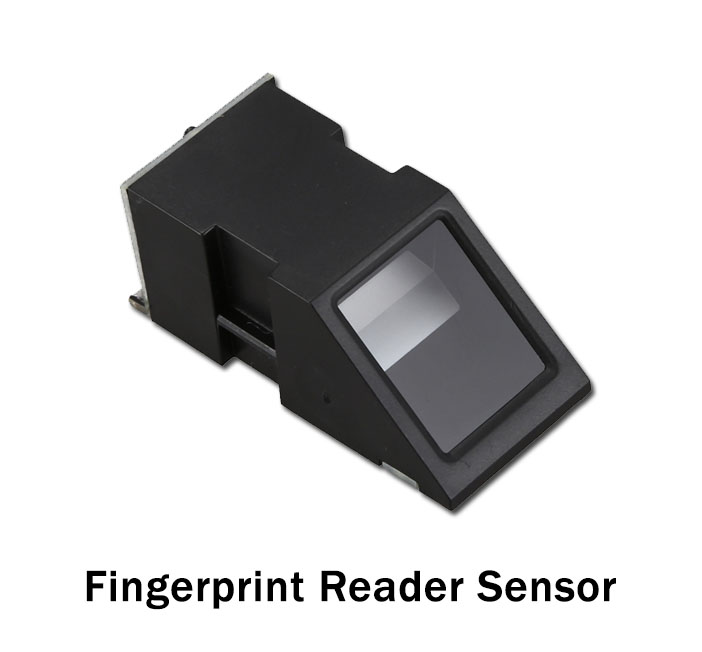
What do you do to unlock your smartphone? How do you get identified when you visit the bank for your work? How do you complete your ID requirements when you visit any government sector? You use your finger to get identified for all of these purposes. But have you ever admired the whole process and thought about the entire circuitry that it keeps? The answer to your curiosity is this fingerprint sensor module. In this article, we’ll show you
- How to Enroll in Fingerprint ID
- How to Find a Fingerprint Match
- And at last, a small project Interfacing Fingerprint Sensor with Arduino UNO displays a greeting message when a match is found, on an OLED display.
But, before starting the tutorial, you must have to understand how the sensor works.
How does the Finger Print Sensor work?
When the finger is laid down on the sensor, the ridges of the finger touch surface of the sensor. A sensor builds the image of the finger by measuring the distance between each part of your finger and the surface. Certainly, the sensor creates the electrostatic field. This build-up field creates a digital image. These modules have FLASH memory to store fingerprint digital images and work with any microcontroller via serial communication.
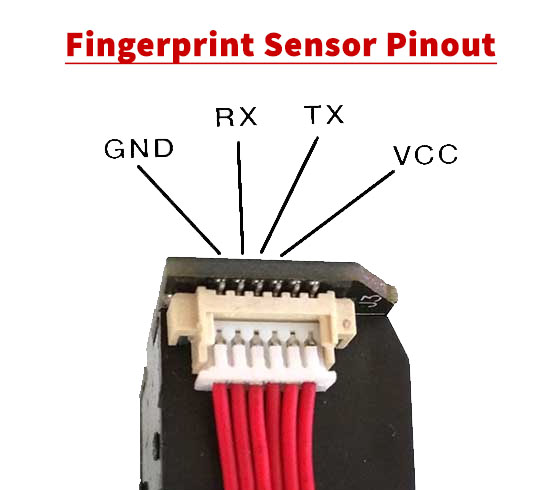
Fingerprint Sensor Pinout
| Arduino | Fingerprint Sensor |
|---|---|
| 5V | VCC |
| D2 | TX |
| D3 | RX |
| GND | GND |
First, make the connection above with the Arduino. Then install the Adafruit Fingerprint Library in Arduino IDE.
Enrolling a Fingerprint ID
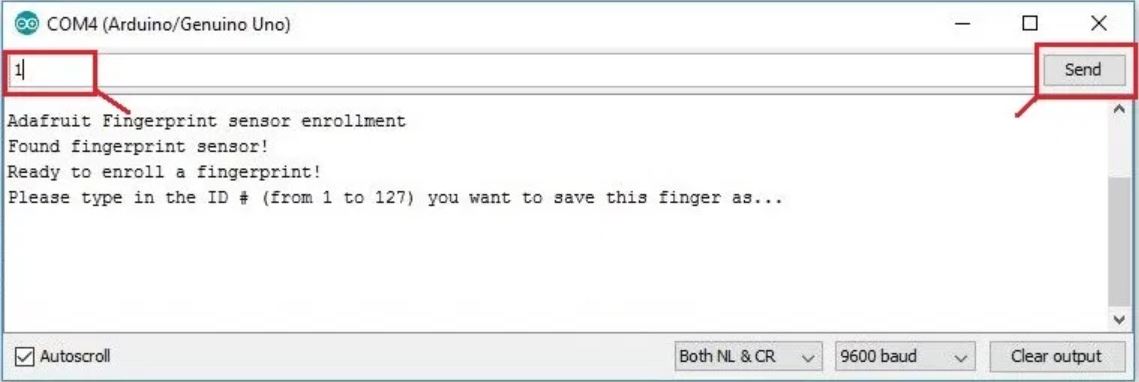
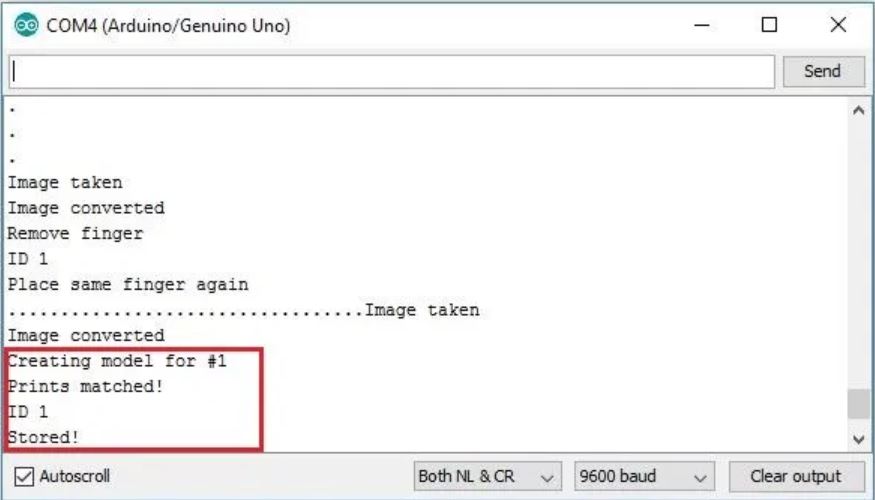
Now, if you want to enroll in the fingerprint, go to the File> Examples>Adafruit Finger Print Sensor Library> Enroll. Open the Serial monitor. Enter your ID for fingerprints. Your ID could be any number or word. After typing the ID, click the send button. Now, place your finger on the module. To confirm your identity, It will ask you to place the finger twice. Further, you will see the message of Prints matched.
Fingerprint Detector
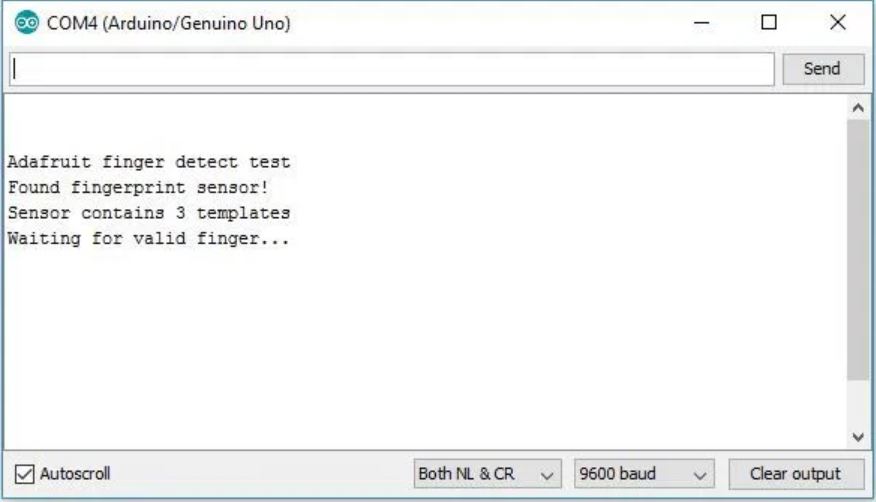
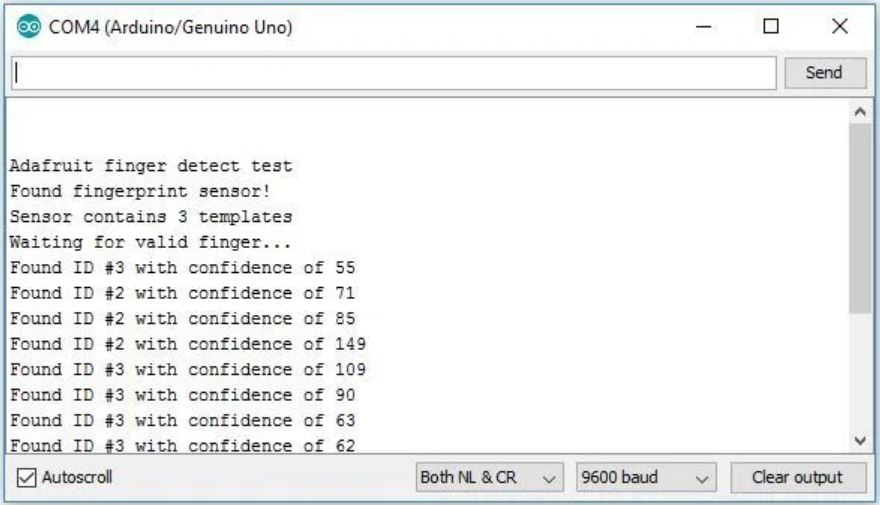
If you want to find the match, go to go to the File> Examples>Adafruit Finger Print Sensor Library> Fingerprint. Open the Serial Monitor and place your finger on the module. ID matches will appear on the Serial monitor.
Fingerprint Sensor with Arduino & OLED
In this project example, we’ll enroll different fingers and then display a message on an OLED Display with a matching ID.
Hardware Required
| S.no | Component | Value | Qty |
|---|---|---|---|
| 1. | Arduino UNO | – | 1 |
| 2. | USB Cable Type A to B | – | 1 |
| 3. | Jumper Wires | – | – |
| 4. | Fingerprint Sensor Module | FPM10A | 1 |
| 5. | OLED Display | – | 1 |
Circuit Diagram

Connection Table
| Arduino | Fingerprint Sensor | OLED |
|---|---|---|
| 5V | VCC | VDD |
| D2 | TX | – |
| D3 | RX | – |
| GND | GND | GND |
| A4 | – | SDA |
| A5 | – | SCK |
Arduino Code
// Circuits DIY // For Complete Details Visit -> https://circuits-diy.com #include#include #include #define OLED_RESET 4 Adafruit_SSD1306 display(OLED_RESET); #include #include SoftwareSerial mySerial(2, 3); Adafruit_Fingerprint finger = Adafruit_Fingerprint(&mySerial); int fingerprintID = 0; String IDname; void setup(){ //Fingerprint sensor module setup Serial.begin(9600); // set the data rate for the sensor serial port finger.begin(57600); if (finger.verifyPassword()) { Serial.println("Found fingerprint sensor!"); } else { Serial.println("Did not find fingerprint sensor :("); while (1) { delay(1); } } //OLED display setup Wire.begin(); display.begin(SSD1306_SWITCHCAPVCC, 0x3C); //displays main screen displayMainScreen(); } void loop(){ displayMainScreen(); fingerprintID = getFingerprintIDez(); delay(50); if(fingerprintID == 1 || fingerprintID == 3 || fingerprintID == 4 || fingerprintID == 5){ IDname = "Sara"; displayUserGreeting(IDname); } else if(fingerprintID == 2){ IDname = "Rui"; displayUserGreeting(IDname); } } // returns -1 if failed, otherwise returns ID # int getFingerprintIDez() { uint8_t p = finger.getImage(); if (p != FINGERPRINT_OK) return -1; p = finger.image2Tz(); if (p != FINGERPRINT_OK) return -1; p = finger.fingerFastSearch(); if (p != FINGERPRINT_OK) return -1; // found a match! Serial.print("Found ID #"); Serial.print(finger.fingerID); Serial.print(" with confidence of "); Serial.println(finger.confidence); return finger.fingerID; } void displayMainScreen(){ display.clearDisplay(); display.setTextSize(1); display.setTextColor(WHITE); display.setCursor(7,5); display.println("Waiting fingerprint"); display.setTextSize(1); display.setTextColor(WHITE); display.setCursor(52,20); display.println("..."); display.display(); delay(2000); } void displayUserGreeting(String Name){ display.clearDisplay(); display.setTextColor(WHITE); display.setTextSize(2); display.setCursor(0,0); display.print("Hello"); display.setCursor(0,15); display.print(Name); display.display(); delay(5000); fingerprintID = 0; }
Code Explanation
Connect the Fingerprint Sensor Module with Arduino UNO according to the above-mentioned diagram. Upload the code in Arduino.
- First, you need to install the libraries adafruit_SSD1306.h and adafruit_GFX.h. You can download the library from:
- After installing the libraries, restart the Arduino IDE. Now, include the downloaded libraries. After that, create the object display for Adafruit_SSD1306. Now import two libraries, Adafruit_fingerprint.h and SoftwareSerial.h for the module sensor. Use mySerial(2, 3) to define that receiver and transmitter are connected with pin 2 and 3 of an Arduino respectively. Then create an object finger for Adafruit_fingerprint. Create the fingerprintID to hold the ID of fingerprints. Also, create the variable IDname.
- In the void setup, initialize the fingerprint sensor and OLED display by using finger.begin and display.begin respectively. Now, address the if, else condition to print the message on the serial monitor.
- In the void loop, to display the main screen on OLED display use displaymainScreen( ). Now the code has checked if the saved fingerprint has found or not. Then, there is an if-else statement to check ID. When it has identified the ID, OLED displays the greetings by using displayUserGreeting( ).
Application and Uses
- It can be used in the government sectors for identification.
- The circuit can be used in the bank, etc.
- Also, in the devices that need security.
- In the office and home automation systems.
- In-attendance devices that are used in schools, colleges, and universities.