Introduction
The measurement of the environment’s parameters like temperature, pressure, humidity is the basic objective of the weather stations. However, every element requires a sensor module to estimate the readings. Consequently, this can cost more. Therefore, the designers made the sensor that can precisely measure all three elements of the atmosphere through one sensor, popularly known as BME280. In short, this effective sensor can effortlessly measure the readings of the surrounding at very reasonable prices. So, this tutorial is going to be about how to interface “BME280 Temperature, Humidity & Pressure Sensor with Arduino UNO”.
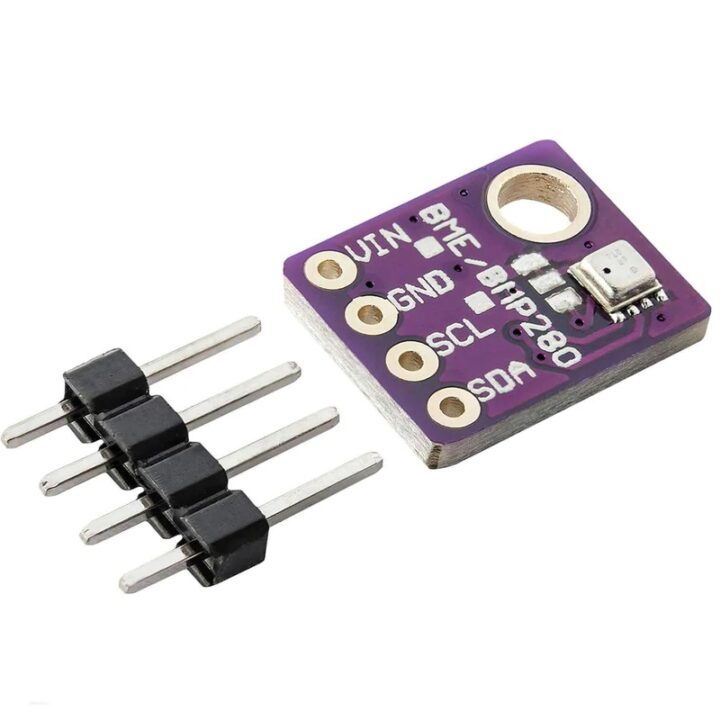
An overview of BME280 Sensor
In the module inside there is a chip manufactured by the Bosch. The chip can measure digital pressure, temperature, and humidity. The module is easy to deal with as it requires no calibration. Moreover, the sensor can easily estimate the pressure of 300pa to 1100pa. Further, the temperature range is from -40 degrees celsius to 80 degrees Celsius. Also, it can measure the humidity from 0 percent to 100 percent with an accuracy rate of 3 percent.
BME280 Sensor Specification
- The module has an average consumption current is 0.1uA in sleep mode.
- At 1 Hz of frequency, the module consumes the current from 1.8uA to 3.6uA.
- For humidity, it has a response time of about 1sec
- For pressure, it has an RMS noise f 0.2Pa.
- The temperature coefficient offset for pressure is 1.5Pa/k
- the module has the 12C and SPI interface.
Hardware Required
| S.no | Component | Value | Qty |
|---|---|---|---|
| 1. | Arduino | UNO | 1 |
| 2. | USB Cable Type A to B | – | 1 |
| 3. | Jumper Wires | – | 1 |
| 4. | Temperature, Humidity & Pressure Sensor | BME280 | 1 |
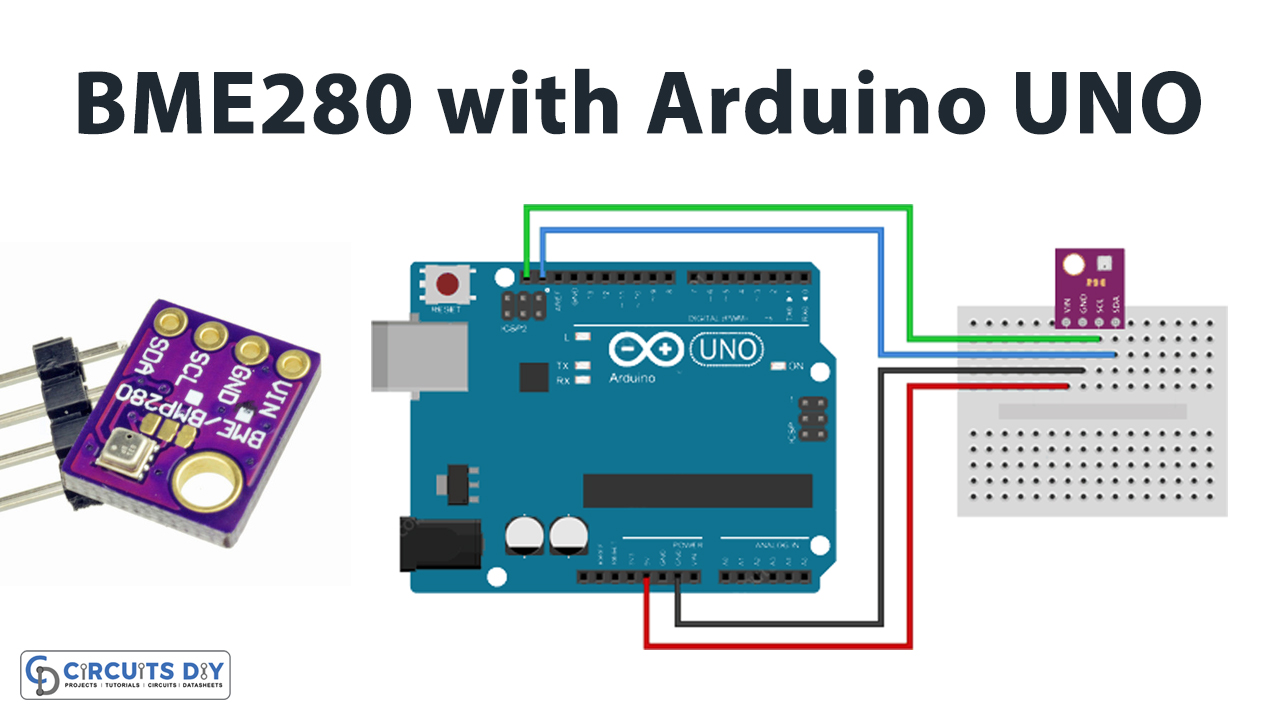
Circuit Diagram
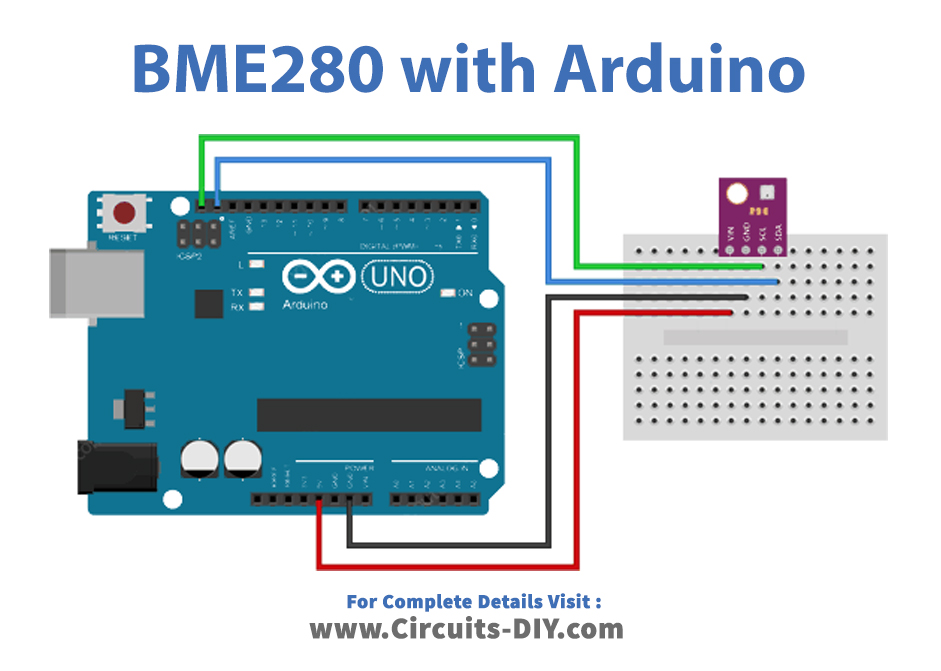
Connection Table
| Arduino | BME280 Temperature, Humidity & Pressure Sensor |
|---|---|
| 5V | VCC |
| GND | GND |
| A5 | SCL |
| A4 | SDA |
Arduino Code
#include <Wire.h>
#include <Adafruit_Sensor.h>
#include <Adafruit_BME280.h>

#define SEALEVELPRESSURE_HPA (1013.25)

Adafruit_BME280 bme;

void setup() {
	Serial.begin(9600);

	if (!bme.begin(0x76)) {
		Serial.println("Could not find a valid BME280 sensor, check wiring!");
		while (1);
	}
}

void loop() {
	Serial.print("Temperature = ");
	Serial.print(bme.readTemperature());
	Serial.println("*C");

	Serial.print("Pressure = ");
	Serial.print(bme.readPressure() / 100.0F);
	Serial.println("hPa");

	Serial.print("Approx. Altitude = ");
	Serial.print(bme.readAltitude(SEALEVELPRESSURE_HPA));
	Serial.println("m");

	Serial.print("Humidity = ");
	Serial.print(bme.readHumidity());
	Serial.println("%");

	Serial.println();
	delay(1000);
}
Working Explanation
To interface the sensor module, connect the BME280 Temperature, Humidity & Pressure Sensor with Arduino UNO according to the diagram given in this tutorial. Then, write the code in your Arduino IDE. And, upload the code in Arduino UNO. After that, open the serial monitor in IDE. Now, analyze the readings of temperature, pressure, and humidity that are coming from the sensor. Meanwhile, if any of the factors get changed in the environment, the readings get changed. Certainly, you will observe different readings on the Serial monitor.
Code Explanation
- To Interface BME280 with Arduino, download and install the Adafruit libraries for the module sensor. You can install the library from:
https://github.com/adafruit/Adafruit_BME280_Library
- Include those libraries in the code. Also, include the wire library to communicate with the sensor. Now, declare the variable SEALEVELPRESSURE_HPA to calculate the altitude of pressure. Create the Adafruit_BME280 object called bme to access some functions.
- Further, in the void setup, initialize serial monitor by serial.begin( ). Initialize the sensor by bme.begin( ). In the brackets write the the12C address. Now, formulate the loop that if the sensor is not found, the serial monitor would print a message that it could not find a sensor.
- After that, in the void loop, use readTepmerature( ), readPressure( ), readAltitude( ), readHumidity( ) functions to read the readings from the sensor. Use print functions to print all the readings. After that, Give some delay time to get the next readings.
Application and Uses
- Most importantly, it can be used in weather stations.
- Further, in mobile applications.
- Moreover, in wearable compact devices.
- Also, in the measuring devices where high accuracy and linearity are required.