Introduction
Water is essential for the growth of plants. But, because irrigation should be neither excessive nor insufficient, it necessitates careful planning. The use of soil moisture sensors greatly aids farmers’ efforts and lowers expenses by determining water levels. Here in this article, we will discuss How to Use a Soil Moisture Sensor.
The sensors have helps farmers understand the regularity and time of irrigation events required to maintain enough moisture in their soils dependent on the crops being cultivated.
What is Soil Moisture Sensor?
An electronic sensor used to measure the amount of moisture is a soil moisture sensor. This sensor is capable of measuring the volumetric amount of water present in the soil. The sensing Probes and the Sensor Module are the two major components of a sensor in most cases. The probes let current flow through the soil before measuring resistance in accordance with soil moisture levels.

Hardware Components
You will require the following hardware to Use a Soil Moisture Sensor with Arduino UNO.
| S.no | Component | Value | Qty |
|---|---|---|---|
| 1. | Arduino | UNO | 1 |
| 2. | Soil Moisture Sensor | – | 1 |
| 3. | Red LED | – | 1 |
| 4. | Breadboard | – | 1 |
| 5. | Jumper Wires | – | 1 |
Steps Making Soil Moisture Sensor
To understand, How to Use a Soil Moisture Sensor, you need the soil sensor and Arduino as the main components. You also need some wires to connect the. Once you get them all; follow the following steps:
Schematic
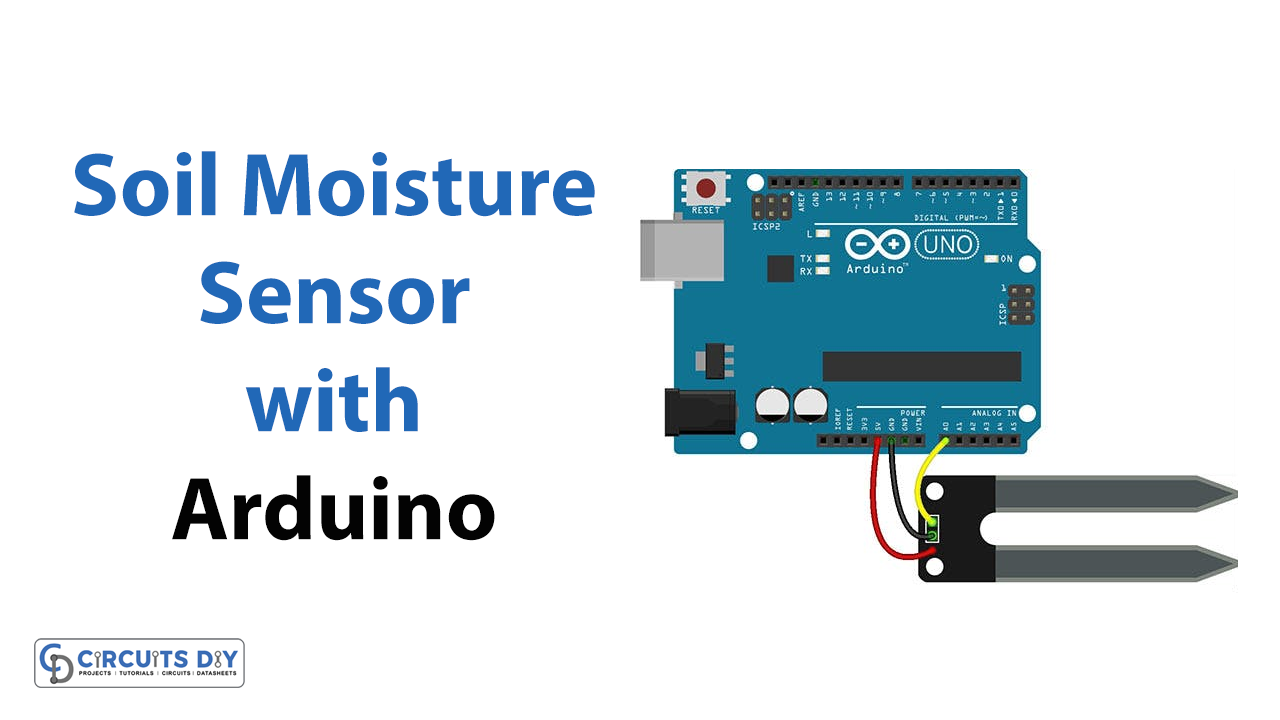
Make connections according to the circuit diagram given below.

Wiring / Connections
| Arduino | Soil Moisture Sensor | |
|---|---|---|
| 5V | VCC | |
| GND | GND | negative |
| A0 | A0 | |
| D13 | Positive |
Installing Arduino IDE
First, you need to install Arduino IDE Software from its official website Arduino. Here is a simple step-by-step guide on “How to install Arduino IDE“.
Code
Now copy the following code and upload it to Arduino IDE Software.
int sensorPin = A0;
int sensorValue;
int limit = 300;

void setup() {
 Serial.begin(9600);
 pinMode(13, OUTPUT);
}

void loop() {

 sensorValue = analogRead(sensorPin);
 Serial.println("Analog Value : ");
 Serial.println(sensorValue);

 if (sensorValue<limit) {
 digitalWrite(13, HIGH);
 }
 else {
 digitalWrite(13, LOW);
 }

 delay(1000);
}
Let’s Test It
It’s now time to test the circuit. After uploading the code to Arduino power up the Arduino. Now, put the soil sensor into the soil, and you will see the readings coming up on the serial monitor. Once the reading exceeds the provided limit LED would turn on
Working Explanation
Let’s dig into the coding to understand the working of the circuit:
- We define three variables:
- The first one describes the Arduino’s analog pin.
- The second describes the analog sensor value that the Arduino reads.
- The third set a limit. A LED will turn on in this case if the sensorValue is more than the limit.
- Following that, we initialize the serial monitor by specifying the baud rate and the LED pin on the Arduino, which is the thirteenth pin.
- We define sensorValue as the value read by the Arduino in the void loop. On the serial monitor, we show the sensorValue. Then, we provide the condition under which an LED glows if the sensorValue is below the limit. Otherwise, the LED is off.
Applications
- irrigation scheduling G
- Greenhouse management
- Fertigation management
- Plant ecology
- Water balance studies
- Microbial ecology,plant disease forecasting
Conclusion.
We hope you have found this How to Use a Soil Moisture Sensor Circuit very useful. If you feel any difficulty making it feel free to ask anything in the comment section.


