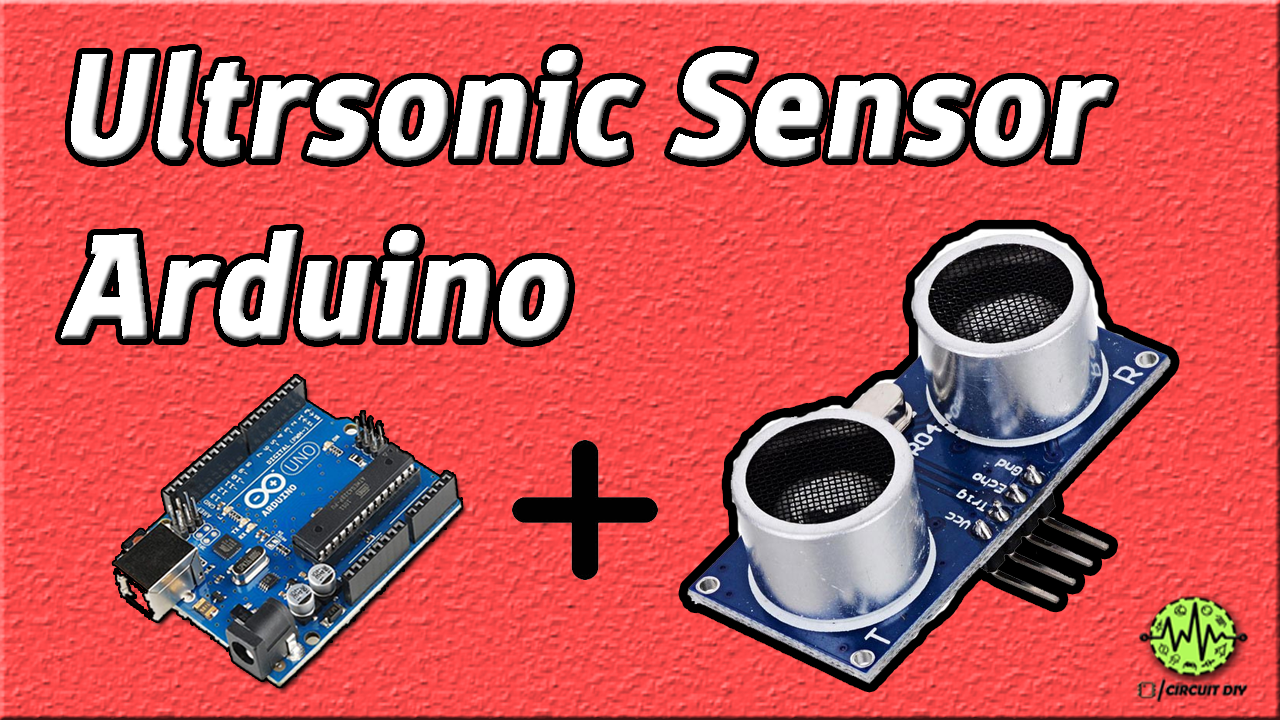
HC–SR04 is very popular Ultrasonic Sensor it emits Ultrasonic Waves (above 20Khz frequency) OR Sound Waves to determine the distance of an object placed in front of the ultrasonic sensor this transmitted wave bounce back when colliding to the object carrying information of the time travel and speed of sound so you can calculate the distance easily with formula
Hardware Required
| S.NO | Component | Value | Qty |
|---|---|---|---|
| 1. | Arduino | Uno R3 | 1 |
| 2. | USB A to B Cable | – | 1 |
| 3. | Breadboard | – | 1 |
| 4 | Jumper Wires | – | 1 |
| 5 | Ultrasonic Sensor | HC-SR04 | 1 |
| 6 | LED | – | 1 |
Useful Steps
Follow All Steps Carefully from the Video Tutorial Above (Recommended)
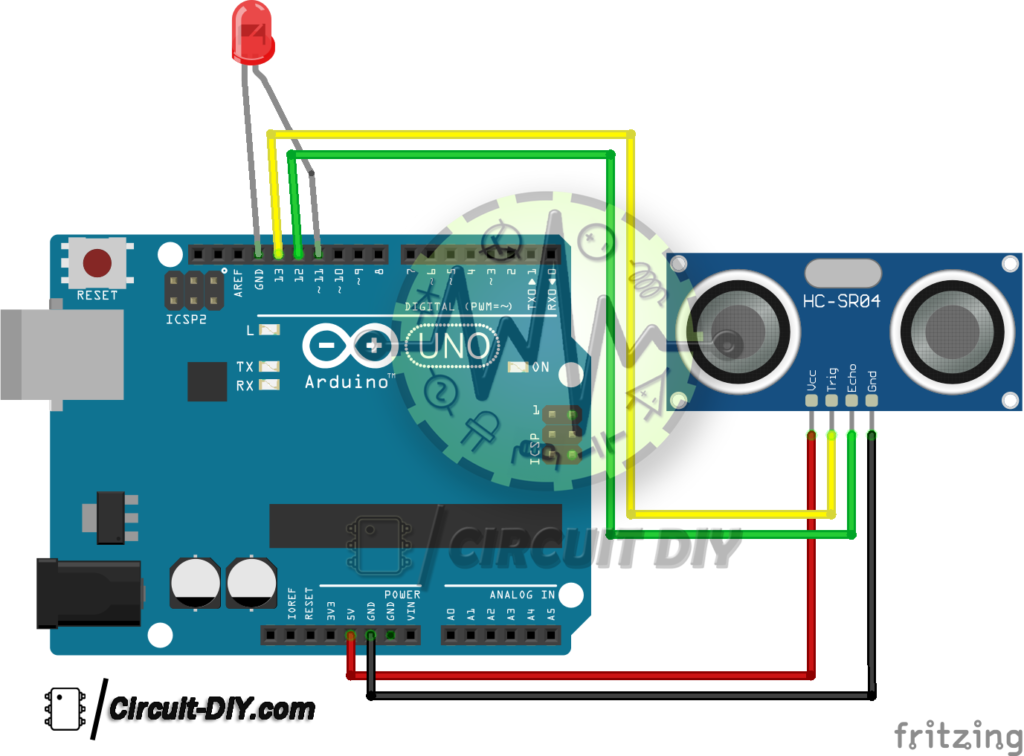
- STEP # 1 ( Make Sensor Connections )
- VCC – To VCC of Arduino.
GND – To GND of Arduino.
TRIG – to D13 of Arduino.
ECHO – To D12 of Arduino. - STEP # 2 ( Make LED Connections )
- Cathode –
to GND of Arduino. D11 of Arduino.
Anode – to - STEP # 3 ( Upload Code )
- Download code and upload it to Arduino Board using Arduino IDE Software
- https://www.arduino.cc/en/Main/Software
Ultrasonic sensor arduino code
#define trigPin 13 #define echoPin 12 #define redLED 11 void setup() { Serial.begin (9600); pinMode(trigPin, OUTPUT); pinMode(echoPin, INPUT); pinMode(redLED, OUTPUT); } void loop() { long duration, distance; digitalWrite(trigPin, LOW); delayMicroseconds(2); digitalWrite(trigPin, HIGH); delayMicroseconds(10); digitalWrite(trigPin, LOW); duration = pulseIn(echoPin, HIGH); distance = (duration/2) / 29.1; if (distance < 10) { // This is where the LED On/Off happens digitalWrite(redLED,HIGH); // When the Red condition is met, the Green LED should turn off digitalWrite(redLED,LOW); } else { digitalWrite(redLED,LOW); } if (distance >= 200 || distance <= 0){ Serial.println(“Out of range”); } else { Serial.print(distance); Serial.println(” cm”); } delay(500); }Circuit Diagram
For any difficulty in making this project Please Comment Below.
Download all important files & useful materials for this post from the link given below.


