Introduction
To detect the sound, a device called a microphone sound sensor is used. Mainly, it converts sounds into electrical energy. It works by observing the differences in air pressure and converting them into electrical signals. The sensor contains three basic components. The first is the sensor unit that measures the physical area. Second, it has an amplifier that magnifies the amplitude of the signal. Finally, there is a comparator that compares the value to the threshold value and drives the load accordingly. Grandly, this sensor has a broad range of applications in electronic devices.
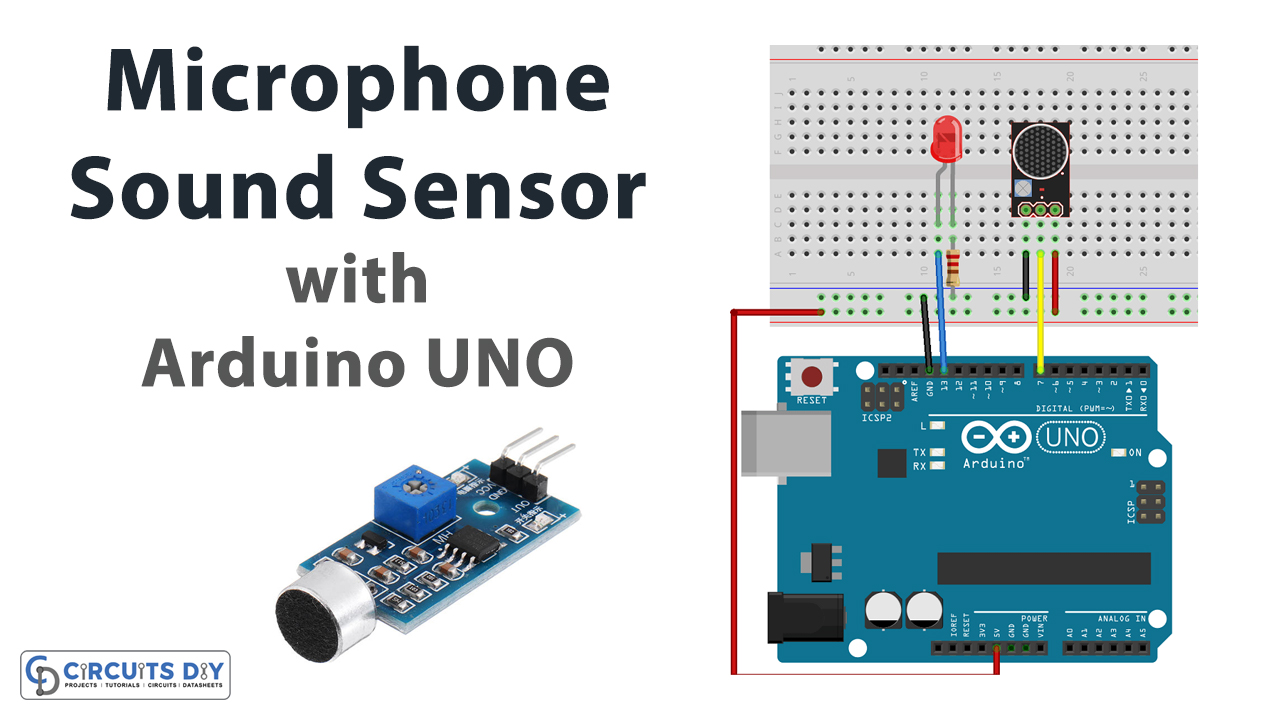
Therefore, in this tutorial, we are going to interface “Microphone Sound Sensor with Arduino UNO”.
Working Principle of Sound Sensor
The sensor work like a human ear. It has a diaphragm made from magnets. And, the magnets are surrounded by metal wire. When the sound waves collide with the diaphragm, it causes the diagram to vibrate. This vibration influences the magnets to vibrate. The magnets evoke the electrical current in them. And, that’s how the vibrations get converted into electrical energy.
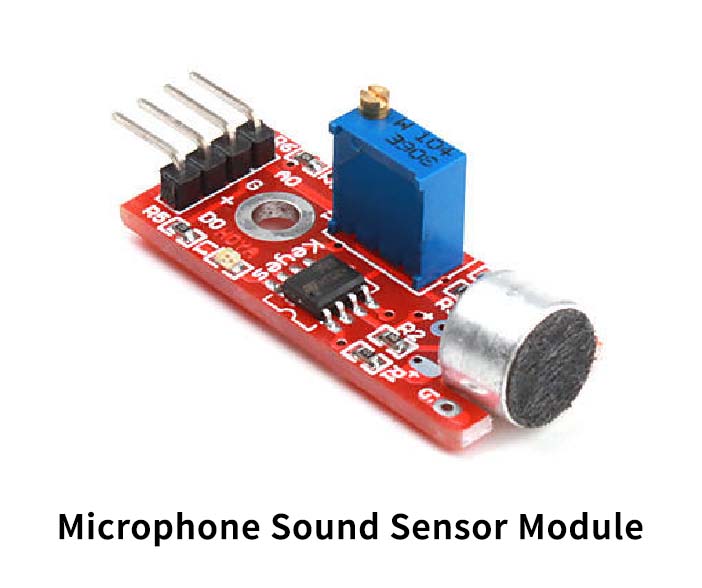
Hardware Required
| S.no | Component | Value | Qty |
|---|---|---|---|
| 1. | Arduino | UNO | 1 |
| 2. | USB Cable Type A to B | – | 1 |
| 3. | Jumper Wires | – | – |
| 4. | Microphone Sound Sensor | – | – |
Circuit Diagram
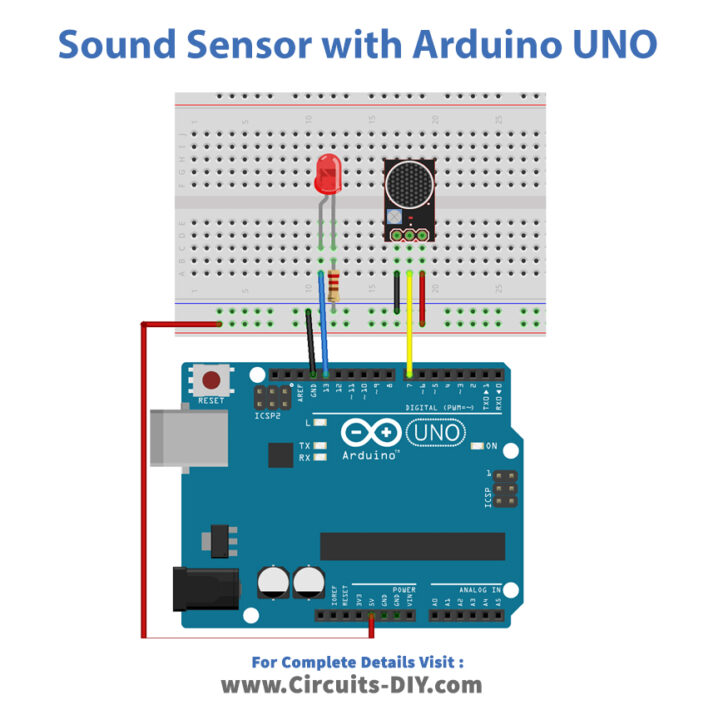
Connection Table
| Arduino | Microphone Sound Sensor |
|---|---|
| Analog Pins | A0 |
| Digital Pins | D0 |
| GND | GND |
| 5V | VCC |
Arduino Code
// Circuits DIY
 // For Complete Details Visit -> https://circuits-diy.com
int ledPin=13;
int sensorPin=7;
boolean val =0;

void setup(){
  pinMode(ledPin, OUTPUT);
  pinMode(sensorPin, INPUT);
  Serial.begin (9600);
}

void loop (){
  val =digitalRead(sensorPin);
  Serial.println (val);
  // when the sensor detects a signal above the threshold value, LED flashes
  if (val==HIGH) {
    digitalWrite(ledPin, HIGH);
  }
  else {
    digitalWrite(ledPin, LOW);
  }
}
Working Explanation
Connect the Microphone Sound Sensor with your Arduino UNO. Then, upload the code in the Arduino. Set the threshold value using the potentiometer screw in the module. Now make any sound in front of the sensor. This activates the module and when the value reaches the threshold value, the LED will turn ON. You can also adjust the sensitivity of the module.
Code Explanation
- First, the code has defined the digital pins that are connected with the LED and sensor.
- In the void setup, it has declared the input and output pins. Also, it has initialized the serial monitor.
- In the void loop, the variable Val has been declared. And, then the condition is given that if the sensor detects the Val greater than the threshold, the LED will be ON. Otherwise, it will be low
Application and Uses
It can be used in various electronic projects like
- In a circuit to detect the sound pollution
- Baby monitoring system
- Pet tracking systems
- In-home automation devices


