Introduction
When do you want to buy something from the malls or any store that you do? You grab that thing and go to the cashier. The cashier then takes that thing and brings it in front of the machine. That machine reads something from the thing that you have bought, which appears on the computer. The cashier asks for payment and gives that thing with a receipt of it and the receipt has a price on it. So, that machine reads the price from the tag of the thing you buy. And, the machine is commonly known as the RFID Reader machine.
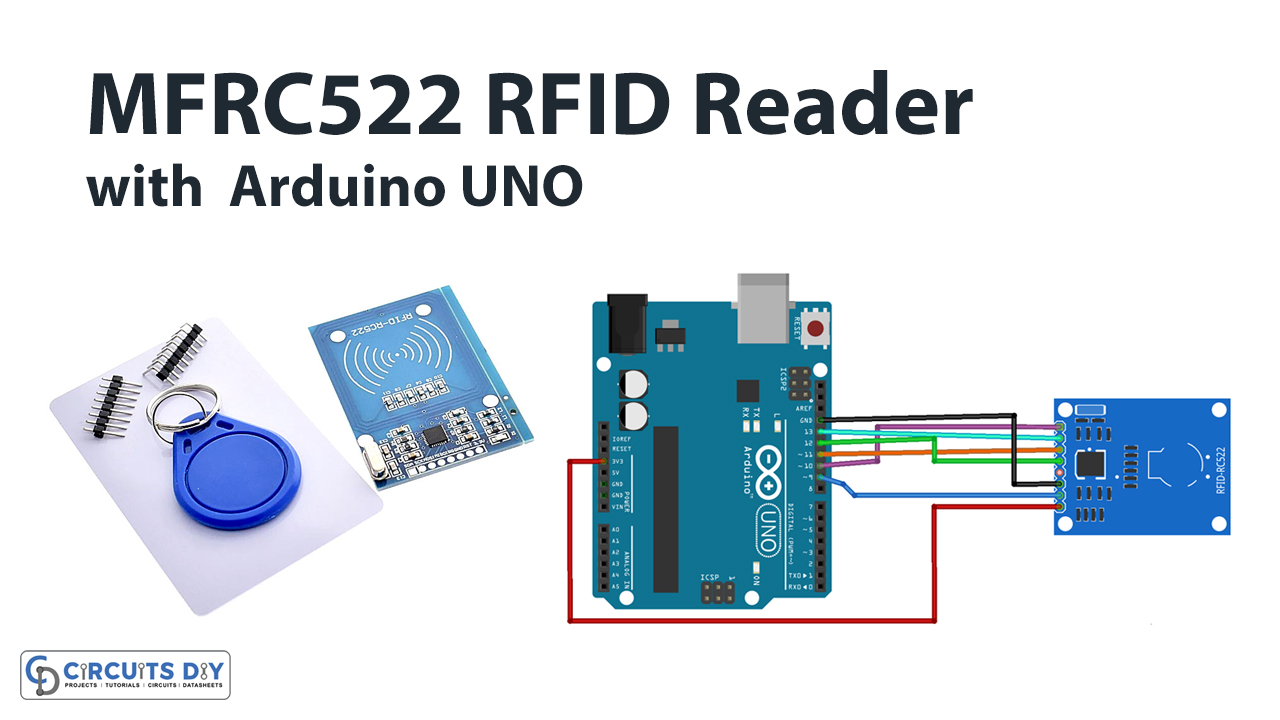
So, in this tutorial, we are getting on to interface “MFRC522 RFID Reader with Arduino UNO”.
How does RFID Reader Works?
Radio Frequency Identification that is abbreviated as RFID, utilizes electromagnetic fields to automatically recognize the tags affixed to the things in the stores, malls, etc. The RFID tag stores an extended range of information in it. The RFID tags powered the RFID reader to read. Hence, it doesn’t require any battery, etc. RFID emits the radio waves to emit the signal back from the tag.
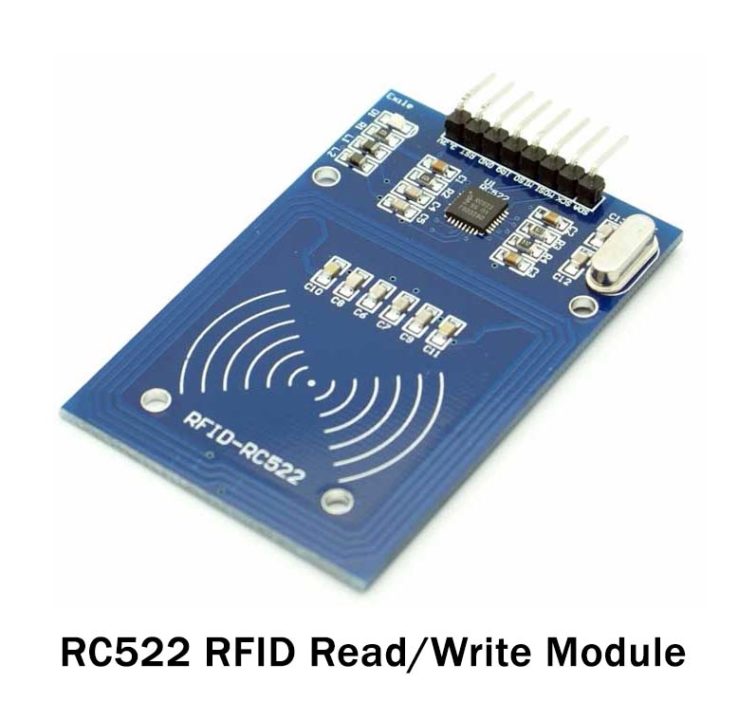
Hardware Required
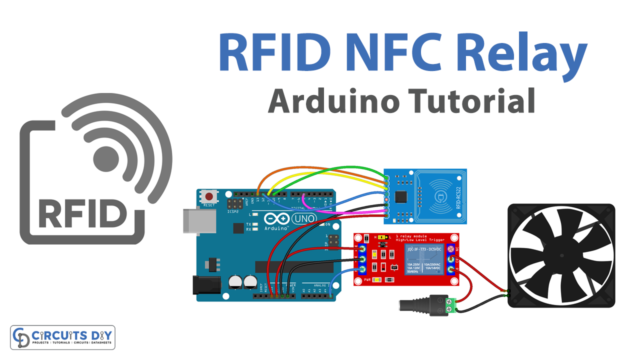
Circuit Diagram
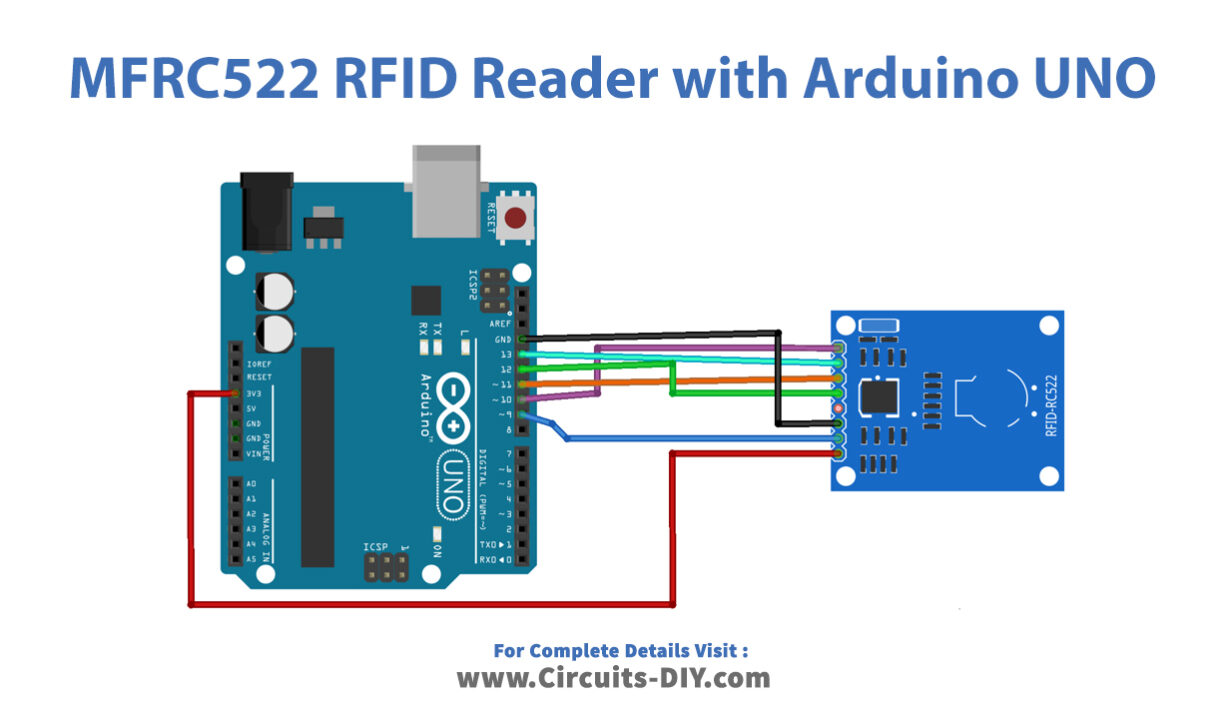
Connections Table
| Arduino | RFID Reader |
|---|---|
| D10 Pin | SDA Pin |
| D13 Pin | SCK Pin |
| D11 Pin | MOSI Pin |
| D12 Pin | MISO Pin |
| Unconnected Pin | IRQ Pin |
| GND Pin | GND Pin |
| D9 Pin | RST Pin |
| 3.3V Pin | 3.3V Pin |
Arduino Code
// Circuits DIY
 // For Complete Details Visit -> https://circuits-diy.com

#include <SPI.h>
#include <MFRC522.h>

#define SS_PIN 10
#define RST_PIN 9
MFRC522 mfrc522(SS_PIN, RST_PIN);   // Create MFRC522 instance.

void setup()
{
  Serial.begin(9600);   // Initiate a serial communication
  SPI.begin();      // Initiate  SPI bus
  mfrc522.PCD_Init();   // Initiate MFRC522
  Serial.println("Approximate your card to the reader...");
  Serial.println();

}
void loop()
{
  // Look for new cards
  if ( ! mfrc522.PICC_IsNewCardPresent())
  {
    return;
  }
  // Select one of the cards
  if ( ! mfrc522.PICC_ReadCardSerial())
  {
    return;
  }
  //Show UID on serial monitor
  Serial.print("UID tag :");
  String content= "";
  byte letter;
  for (byte i = 0; i < mfrc522.uid.size; i++)
  {
     Serial.print(mfrc522.uid.uidByte[i] < 0x10 ? " 0" : " ");
     Serial.print(mfrc522.uid.uidByte[i], HEX);
     content.concat(String(mfrc522.uid.uidByte[i] < 0x10 ? " 0" : " "));
     content.concat(String(mfrc522.uid.uidByte[i], HEX));
  }
  Serial.println();
  Serial.print("Message : ");
  content.toUpperCase();
  if (content.substring(1) == "BD 31 15 2B") //change here the UID of the card/cards that you want to give access
  {
    Serial.println("Authorized access");
    Serial.println();
    delay(3000);
  }

 else   {
    Serial.println(" Access denied");
    delay(3000);
  }
}
Working Explanation
Connect the MFRC522 RFID Reader with Arduino UNO in a way that is described above. First, you need to go to the file> Examples> MFRC522>Dumpinfo. After installing the RFID library, upload the code that is available in the Arduino UNO. Go to the serial monitor of an Arduino IDE. Correspond the RFID tag to the RFID reader. You will see the information will be displayed on the Serial Monitor. The card UID will be stored in the memory. Write or memorize that UID card, because you’ll need this later.
Now, upload the above mentioned code in the Arduino. Remember that in the code, you must have to change the line if (content.substring(1== “Write your UID”). Here in write your UID, write down the UID, you have stored earlier in Arduino IDE. Bring the thing having a tag in front of the RFID reader. If the tag has the same stored UID, you’ll see the message: Authorized access. If not, then you’ll see the message: Access denied on the serial Monitor.
Code Explanation
The code has Included the SPI library to communicate with the tags over a short distance. Also, it has included the RFID library MFRC522. Then, the code has defined the Reset pin of the module is connected with pin 9 of an Arduino. And, the serial input pin, that is for SPI communication is connected with the pin 10 of an Arduino
Then, in the void setup, the code has to initialize the SPI bus and the RFID module. In the void loop function, the code first has scanned to look at a new card. Now, the code has defined the conditions, if the card has a UID tag stored in the IDE or not, it will work and give the message accordingly.
Application and Uses
- For door lock systems. Hence, may be used in home automation circuit
- In the security and alert systems
- For attendance systems
- In stores to read the price tags of items, etc