Introduction
Humidity and temperature measurement are critical, not just to make humans aware of different weather conditions. But, also it’s important for various industries. For example, these temperature and humidity measurements help the agricultural to grow healthy plants. However, the measurements are done by some sensors. And, DHT11/DHT22 is one of the most commonly used sensors for this purpose. So, in this article, we will give a short tutorial an explanation of how to interface “DHT11/DHT22 with Arduino UNO”.
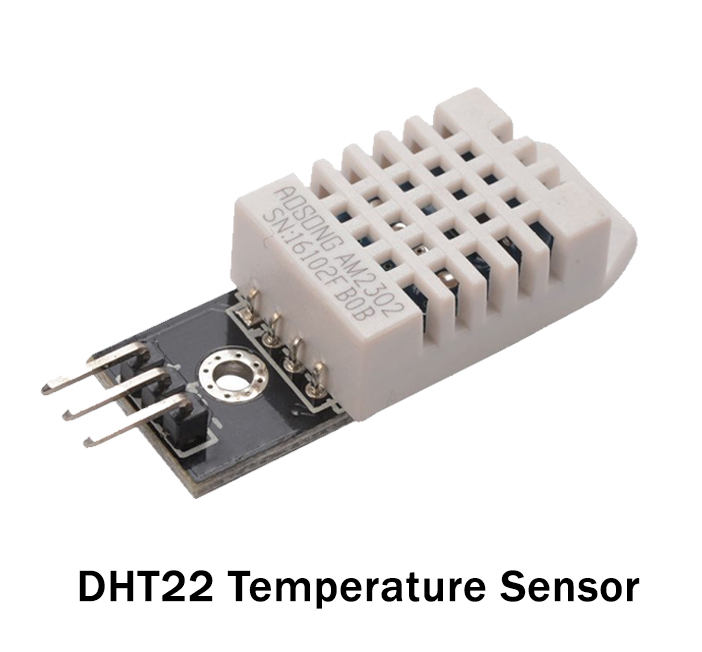
An Overview about DHT11/DHT22
DHT11/DHT22 is an inexpensive yet reliable temperature and humidity sensor. It enables the estimation of the environmental conditions of humidity and temperature. Further, its temperature range is from 0 to 50 degrees Celsius. And, the humidity range is from 20 percent to 80 percent. Moreover, the sensor operates on a very low voltage range from three to five volts. Also, it draws a current of 2.5mA. To sum up, the internal structure of the sensor contains the thermistor and a humidity sensing element. The thermistor usually changes its resistance with the change of temperature. Hence, the resistance decreases with the increase in temperature. On the other side, the humidity component has two electrodes that have a substrate between them. As the resistance gets changed, the conductivity of this substrate also gets changed. And, that’s how the sensor works.
Hardware Required
Circuit Diagram
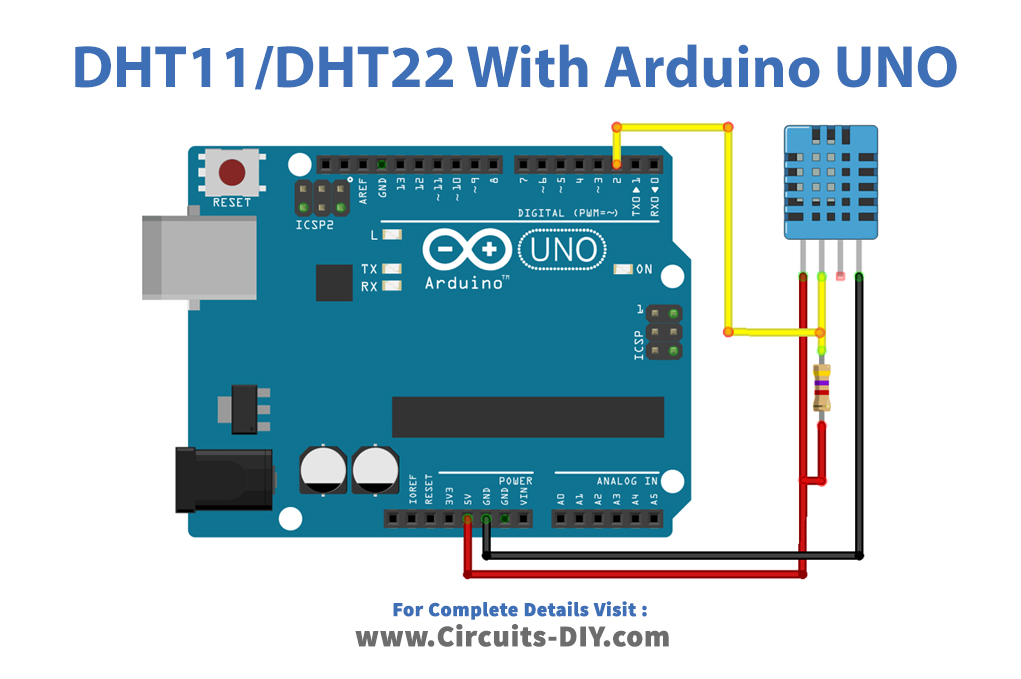
Connection Table
| Arduino | DHT 11/22 |
|---|---|
| 5V | Pin 1 |
| D2 | Pin 2 |
| Not Connected | Pin 3 |
| GND | Pin 4 |
Arduino Code
// Circuits DIY
// For Complete Details Visit -> https://circuits-diy.com
#include "DHT.h"

#define DHTPIN 2     // what pin we're connected to

// Uncomment whatever type you're using!
#define DHTTYPE DHT11   // DHT 11
//#define DHTTYPE DHT22   // DHT 22  (AM2302)
//#define DHTTYPE DHT21   // DHT 21 (AM2301)

// Initialize DHT sensor for normal 16mhz Arduino
DHT dht(DHTPIN, DHTTYPE);

void setup() {
  Serial.begin(9600);
  Serial.println("DHTxx test!");

  dht.begin();
}

void loop() {
  // Wait a few seconds between measurements.
  delay(2000);

  // Reading temperature or humidity takes about 250 milliseconds!
  // Sensor readings may also be up to 2 seconds 'old' (its a very slow sensor)
  float h = dht.readHumidity();
  // Read temperature as Celsius
  float t = dht.readTemperature();
  // Read temperature as Fahrenheit
  float f = dht.readTemperature(true);

  // Check if any reads failed and exit early (to try again).
  if (isnan(h) || isnan(t) || isnan(f)) {
    Serial.println("Failed to read from DHT sensor!");
    return;
  }

  // Compute heat index
  // Must send in temp in Fahrenheit!
  float hi = dht.computeHeatIndex(f, h);

  Serial.print("Humidity: ");
  Serial.print(h);
  Serial.print(" %\t");
  Serial.print("Temperature: ");
  Serial.print(t);
  Serial.print(" *C ");
  Serial.print(f);
  Serial.print(" *F\t");
  Serial.print("Heat index: ");
  Serial.print(hi);
  Serial.println(" *F");
}
Working Explanation
Firstly, connect DHT11/DHT22 with the Arduino circuit according to the circuit diagram. Secondly, upload the code in an Arduini UNO. After that, open the serial monitor and analyze the readings of temperature and humidity. The sensor gives the readings after every two seconds. Moreover, if you want to examine the considerable changes in the readings, then pour a drop of water on a sensor or bring the sense at a different temperature from room temperature. As a result, You’ll see the readings will change drastically.
Code Explanation
- The code has started by including the important DHT library for the sensor. You can download the library from:
https://github.com/adafruit/DHT-sensor-library
- Then, it has defined that the sensor is connected to pin 2 of an Arduino UNO. After that, it jas describes the type of DHT sensor. Further, it jas initialized the sensor.
- In the void setup, it has initialized the Serial monitor and the DHT sensor. In the void loop, the code has given a delay of 2 seconds. This delay is given to take the readings from the environment. Further, there is a command of readHumidity( ) for humidity measurement. In the same vein, there is a command of readTemperature ( )for temperature measurement. Finally, the reading gets printed on Serial Monitor.
Application and Uses
- In weather stations
- For agricultural purpose