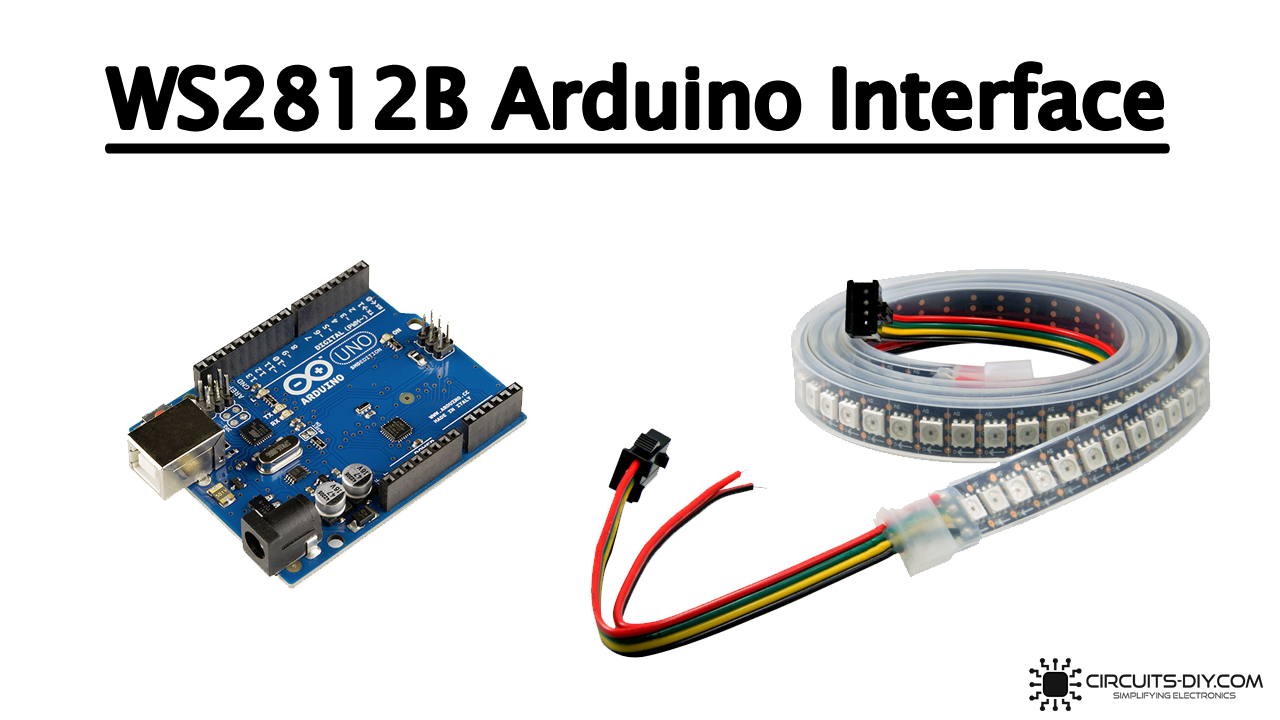
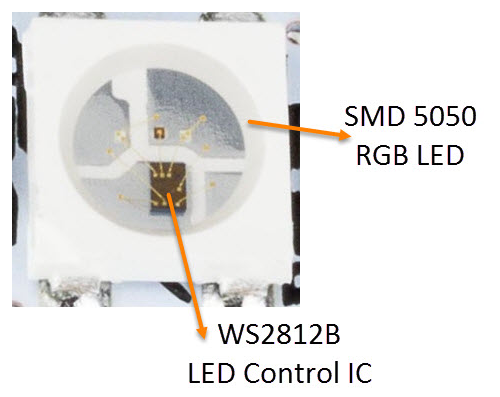
The WS2812B Addressable LED Strip is an intelligent light source that contains an IC and an RGB LED in a single package, usually in SMD 5050 form factor. The LEDs are enclosed in a weatherproof silicone so, they can be left outside in the rain and dust without any problem. You can adjust its size by cutting the strip with scissors in the right place (proper places to cut the strip are marked). These strips come with connectors at each end.

Why use addressable LEDs?
In a normal LED strip you cannot control the brightness or color of a particular led simply you can say that you lose the privilege to control them individually.
If we want to control any specific led in strip then for that we should use addressable LED we can control any specific LED by Arduino or other micro controller.
Pin Description:
WS2812B LED Block has four pins namely VDD, VSS (GND), DIN and DOUT & power supply for the WS2812B IC is also supplied through the VDD Pin
| PIN | DESCRIPTION |
|---|---|
| VDD | Power Supply for LED |
| VSS | Ground |
| DIN | Control Data Signal Input |
| DOUT | Control Data Signal Output |
How to Control WS2812B LED using Arduino?
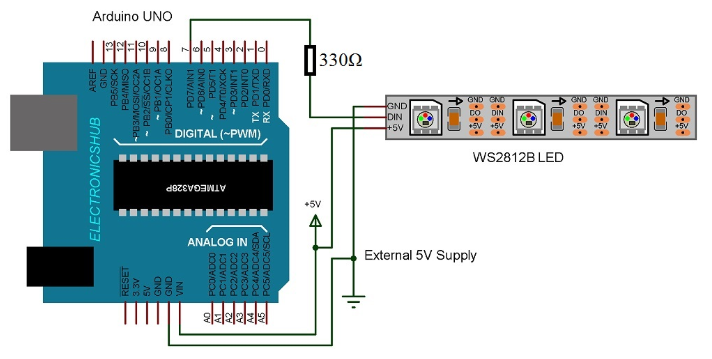
The WS2812B LED strip will be powered using the 5V Arduino pin. We are controlling 10 LEDs. If you want to control many LEDs, you’ll need to use an external power source.
Tips:
- Connect a capacitor with a capacitance between 100uF and 1000uF from power to ground to smooth out the power supply.
- Add a 220 to 470 Ohm resistor between the Arduino digital output pin and the strip data input pin to reduce noise on that line.
- Make your wires between the Arduino, power supply, and the strip as short as possible to minimize voltage loss.
- If your strip gets damaged and doesn’t work, check if the first LED is broken. If so, cut it, resolder the header pins.
REMEMBER: To control the WS2812B LED strip, you’ll need to download the FastLED library.
Arduino Code
Here it is code for Arduino you can simply upload the code on Arduino to use the LEDs , you can increase the number of LEDS by changing the value of NUMOFLEDS in the code below.
#include <FastLED.h>
 #define LEDPIN     7
 #define NUMOFLEDS    10
 CRGB leds[NUMOFLEDS];
 void setup() {
  FastLED.addLeds<WS2812, LEDPIN, GRB>(leds, NUMOFLEDS);
}
 void loop() {
 for (int i = 0; i <= 9; i++) {
    leds[i] = CRGB ( 0, 0, 255);
    FastLED.show();
    delay(40);
  }
  for (int i = 9; i >= 0; i--) {
    leds[i] = CRGB ( 255, 0, 0);
    FastLED.show();
    delay(40);
  }
}
Applications:
- Decoration purpose indoor/outdoor
- Used in automobiles decoration
- Parties , school functions etc