Introduction
If you are willing to build a fire detection device, or an air monitoring system, then unquestionably this tutorial is for you. Because in this tutorial we are going to interface MQ2 Gas Smoke Sensor with Arduino UNO. MQ2 gas sensors are employed to effectively detect smoke, alcohol, LPG, carbon monoxide, etc in the environment. Hence this inexpensive device can be used in office and industrial automation to inform about smoke if ever happened.
How MQ2 sensor Works?
The sensor is enclosed in two layers of steel. The output is taken as the voltage which depends on the concentration of the gases. In other words, voltage is proportional to the gas concentration. The higher the concentration, the higher would be the voltage. Similarly, when the concentration is lower, the voltage would be lower.
An Overview about MQ2 Sensor
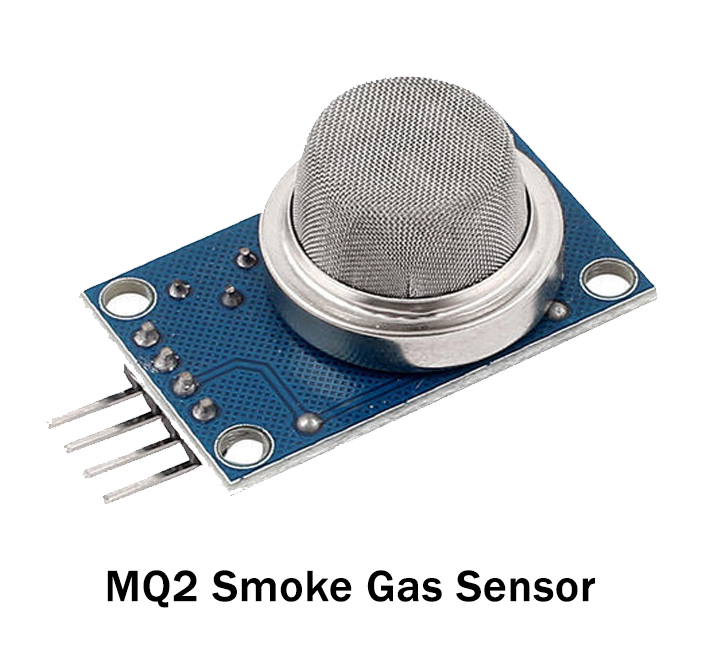
The MQ2 sensor can quickly detect Alcohol, propane, LPG, hydrogen, and methane. The operating voltage of the sensor is about 5V. Since it requires a warm-up, therefore, it has a preheat duration of 20 seconds. Moreover, it can be used both as a digital and analog sensor. Also, the sensitivity of the digital pin can be changed by the given potentiometer.
Hardware Required
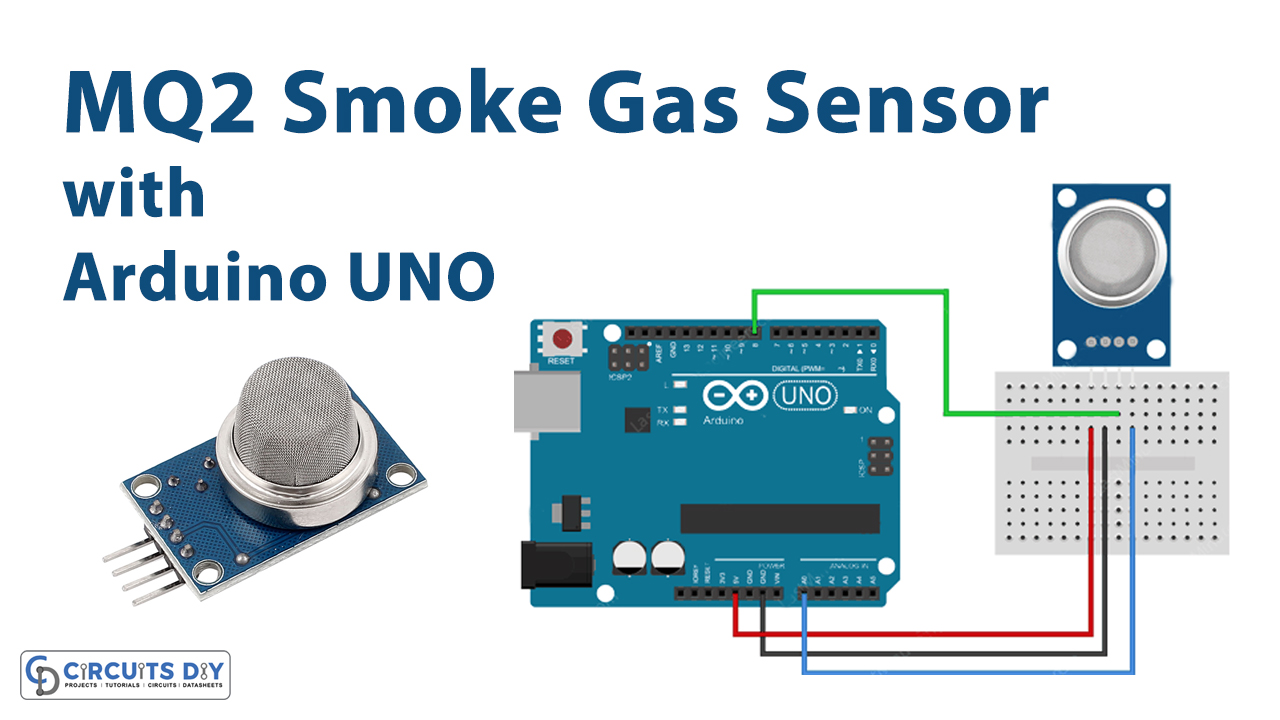
Circuit Diagram
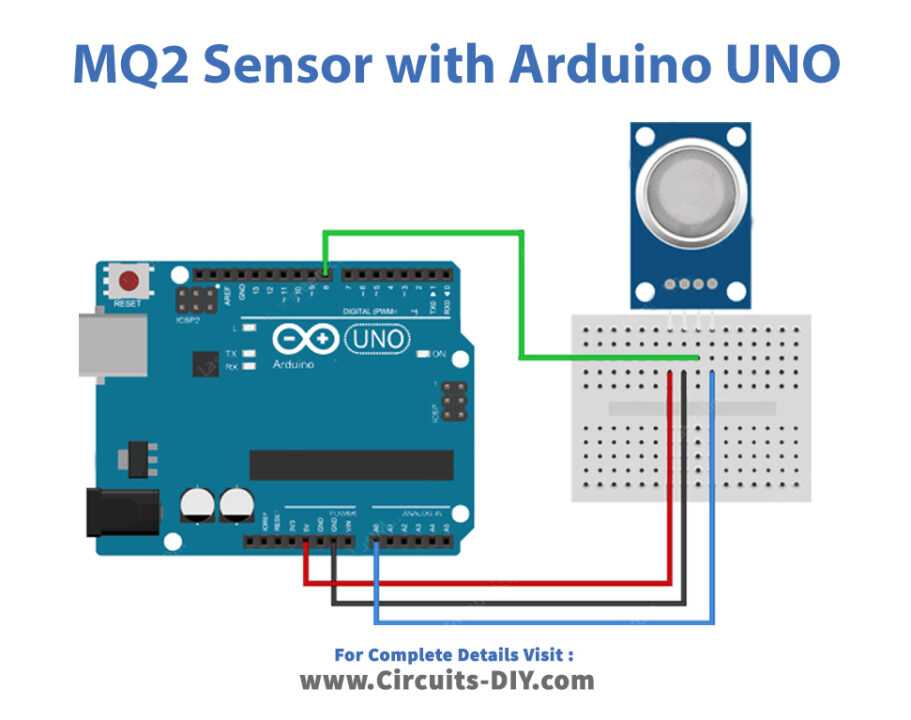
Connection Table
| Arduino | MQ2 Gas Smoke Sensor |
|---|---|
| 5V | VCC |
| GND | GND |
| D8 | D0 |
| A0 | A0 |
Arduino Code
#define MQ2pin (0)

float sensorValue;  //variable to store sensor value

void setup()
{
  Serial.begin(9600); // sets the serial port to 9600
  Serial.println("Gas sensor warming up!");
  delay(20000); // allow the MQ-6 to warm up
}

void loop()
{
  sensorValue = analogRead(MQ2pin); // read analog input pin 0

  Serial.print("Sensor Value: ");
  Serial.print(sensorValue);

  if(sensorValue > 300)
  {
    Serial.print(" | Smoke detected!");
  }

  Serial.println("");
  delay(2000); // wait 2s for next reading
}
Working Explanation
Connect and interface MQ2 Gas Smoke Sensor with Arduino UNO using the schematic given above. Copy the above-mentioned code and paste it into your Arduino IDE. After that, upload the code in Arduino UNO. observe the readings on the Serial monitor. To examine the drastic changes in the readings, take the device to some smoky place. As a result, you can see the changes happening on the serial monitor.
Code Explanation
- To make the code, first, define the sensor pin. Define the variable sensorValue that stores the value of the sensor.
- In the void setup, initialize the serial monitor by using Serial.begin( ). Print the message ” Gas sensor warming up” by using Serial. Print( ). Give some delay to allow the sensor to warm up.
- In the void loop, read the analog input of Arduino using analogRead( ). Print sensor value using Serial.print( ). Formulate the if condition that if the sensor value is greater tha 30, it will print Smoke detected. after that give some delay to get the next readings.
Application and Uses
- For air quality monitoring.
- In the gas leak alarm.
- In fire detecting devices.
- Also, in the safety maintenance devices.


