Introduction
Heart disease is one of the leading causes of death worldwide, and early detection is crucial for effective treatment. A heartbeat monitoring system using an Arduino Uno, a heart pulse sensor, and a 16×2 LCD module is a simple yet effective way to monitor heart rate in real time. With this system, individuals can track their heart rate at home or in a clinical setting, allowing for early detection of irregularities that may indicate the onset of cardiovascular disease. This low-cost and easy-to-build system can help promote heart health and improve overall well-being.
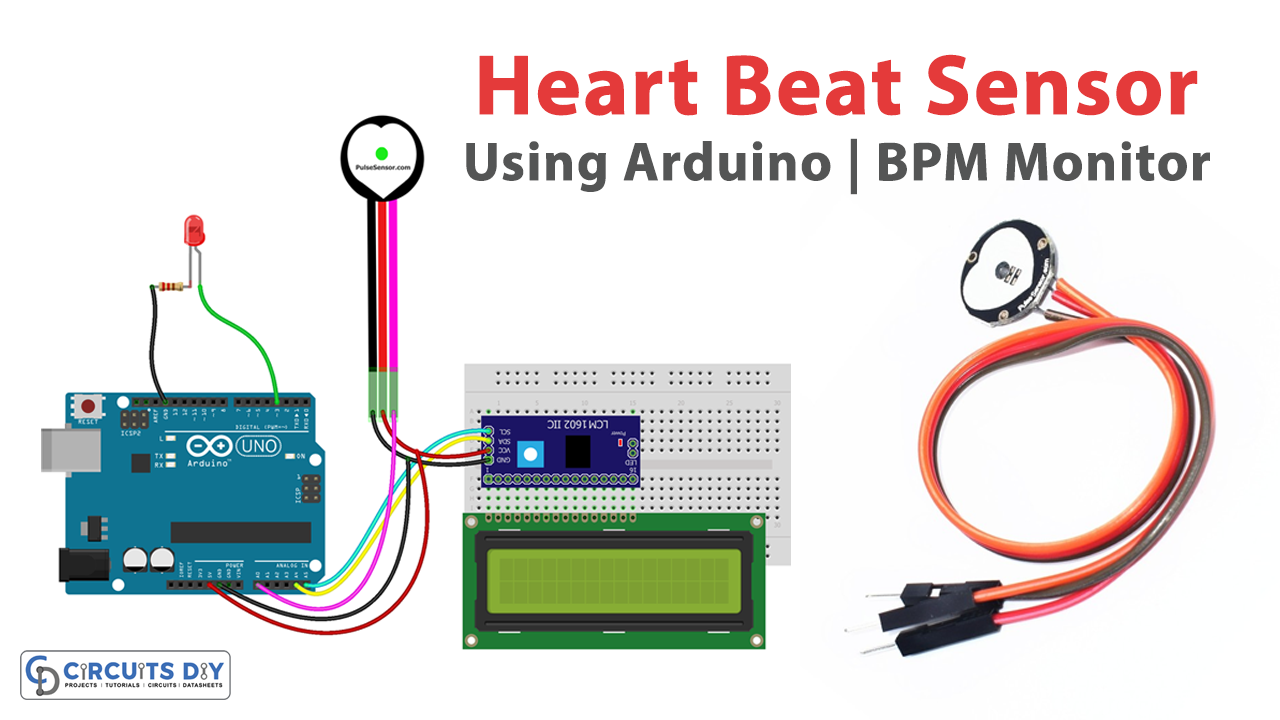
A heart pulse sensor, also known as a heart rate sensor, is an electronic device that measures a person’s heart rate in real time. It works by detecting and measuring the electrical or mechanical signals produced by the heart with each beat. These signals can be detected through the skin using a non-invasive sensor, which typically consists of a light source and a photodetector. When the heart beats, blood flow through the finger or wrist changes, causing changes in the amount of light absorbed by the photodetector. The sensor then converts these changes into an electrical signal, which can be processed by an electronic device, such as an Arduino, to determine the heart rate. Heart pulse sensors are commonly used in wearable fitness trackers, medical devices, and heart rate monitors.
Hardware Components
You will require the following hardware for the Heart Beat Sensor.
| Components | Value | Qty |
|---|---|---|
| Arduino UNO | – | 1 |
| Pulse Sensor | – | 1 |
| I2C Module | LCM1602 IIC | 1 |
| LCD | 16×2 | 1 |
| LED | – | 1 |
| Resistor | 220Ω | 1 |
| Breadboard | – | 1 |
| Jumper Wires | – | 1 |
Arduino Code
- Include necessary libraries and define constants/variables:
#include <PulseSensorPlayground.h>
#include <LiquidCrystal_I2C.h>

#define USE_ARDUINO_INTERRUPTS true
const int PulseWire = 0;
int LED_3 = 3;
int Threshold = 550;
byte heart1[8] = {B11111, B11111, B11111, B11111, B01111, B00111, B00011, B00001};
byte heart2[8] = {B00011, B00001, B00000, B00000, B00000, B00000, B00000, B00000};
...
This step includes necessary libraries, defines constants such as PulseWire, LED_3, Threshold, and also defines byte arrays to create custom characters for the LCD.
- Create an instance of the LiquidCrystal_I2C class:
LiquidCrystal_I2C lcd(0x27,16,2);
This line creates an instance of the LiquidCrystal_I2C class with the given I2C address and screen dimensions.
- Initialize the serial communication and LCD:
Serial.begin(9600);
lcd.begin();
This step initializes the serial communication and the LCD display.
- Create custom characters for the LCD:
lcd.createChar(1, heart1);
lcd.createChar(2, heart2);
...
This step creates custom characters on the LCD display using the byte arrays defined earlier.
- Display initial messages on the LCD:
lcd.setCursor(0,0);
lcd.print(" HeartBeat Rate ");
lcd.setCursor(0,1);
lcd.print("   Monitoring   ");
This step displays the initial messages on the LCD.
- Configure the PulseSensor object and check if it was created successfully:
pulseSensor.analogInput(PulseWire);
pulseSensor.blinkOnPulse(LED_3);
pulseSensor.setThreshold(Threshold);

if (pulseSensor.begin()) {
    Serial.println("We created a pulseSensor Object !");
}
This step configures the PulseSensor object with the given variables and checks if the object was created successfully.
- Continuously check for heartbeats and display messages on the LCD:
int myBPM = pulseSensor.getBeatsPerMinute();

if (pulseSensor.sawStartOfBeat()) {
    // Display heartbeat message and BPM value on the serial monitor
    Serial.println("♥  A HeartBeat Happened ! ");
    Serial.print("BPM: ");
    Serial.println(myBPM);

    // Display a heart shape on the LCD
    lcd.setCursor(1,1);
    lcd.write(byte(1));
    lcd.setCursor(0,1);
    lcd.write(byte(2));
    ...
} else {
    // Display message to put a finger on the sensor
    if (Instructions_view > 499) {
        lcd.setCursor(0,0);
        lcd.print("Put your finger ");
        lcd.setCursor(0,1);
        lcd.print("on the sensor   ");
        ...
    }
}
This step continuously checks for heartbeats using the getBeatsPerMinute() and sawStartOfBeat() functions of the PulseSensor object. If a heartbeat is detected, it displays a message and a heart shape on the LCD. Otherwise, it displays a message to put a finger on the sensor.
Schematic
Make connections according to the circuit diagram given below.
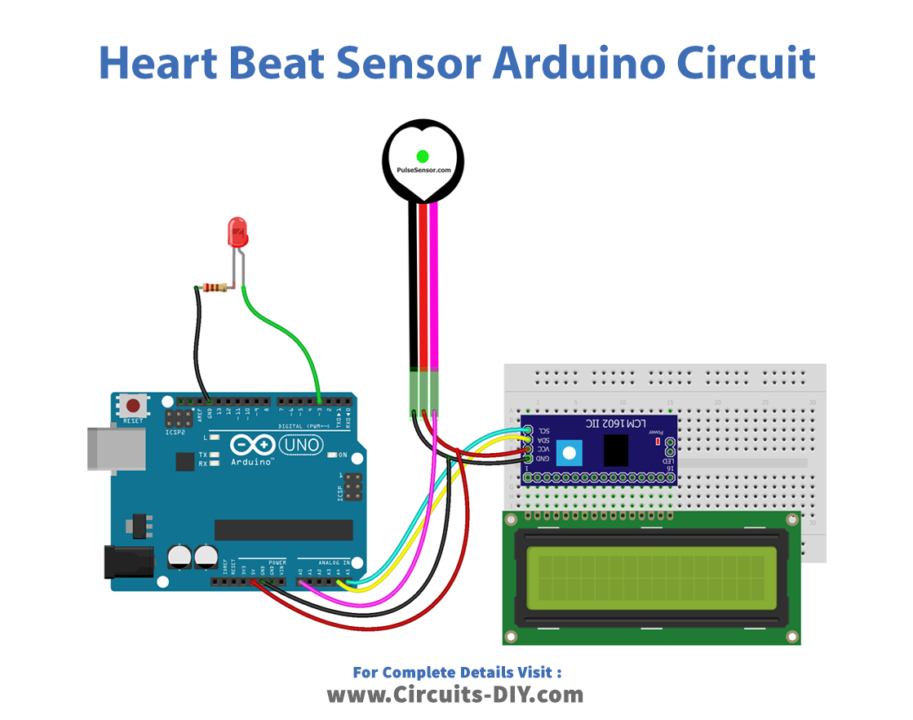
Wiring / Connections
| Arduino | I2C Module | Pulse Sensor | LED |
|---|---|---|---|
| 5V | VCC | VCC | |
| GND | GND | GND | Negative – |
| A4 | SDA | ||
| A5 | SCL | ||
| A0 | SIGNAL | ||
| D3 | Positive + |
Installing Arduino IDE
First, you need to install Arduino IDE Software from its official website Arduino. Here is a simple step-by-step guide on “How to install Arduino IDE“.
Code
Now copy the following code and upload it to Arduino IDE Software.
#define USE_ARDUINO_INTERRUPTS true //--> Set-up low-level interrupts for most acurate BPM math.
#include <PulseSensorPlayground.h> //--> Includes the PulseSensorPlayground Library.
#include <LiquidCrystal_I2C.h> //--> Includes the LiquidCrystal Library.
LiquidCrystal_I2C lcd(0x27,16,2);

const int PulseWire = 0; //--> PulseSensor PURPLE WIRE connected to ANALOG PIN 0
int LED_3 = 3; //--> LED to detect when the heart is beating. The LED is connected to PIN 3 on the Arduino UNO.
int Threshold = 550; //--> Determine which Signal to "count as a beat" and which to ignore.
                     //--> Use the "Gettting Started Project" to fine-tune Threshold Value beyond default setting.
                     //--> Otherwise leave the default "550" value.

byte heart1[8] = {B11111, B11111, B11111, B11111, B01111, B00111, B00011, B00001};
byte heart2[8] = {B00011, B00001, B00000, B00000, B00000, B00000, B00000, B00000};
byte heart3[8] = {B00011, B00111, B01111, B11111, B11111, B11111, B11111, B01111};
byte heart4[8] = {B11000, B11100, B11110, B11111, B11111, B11111, B11111, B11111};
byte heart5[8] = {B00011, B00111, B01111, B11111, B11111, B11111, B11111, B11111};
byte heart6[8] = {B11000, B11100, B11110, B11111, B11111, B11111, B11111, B11110};
byte heart7[8] = {B11000, B10000, B00000, B00000, B00000, B00000, B00000, B00000};
byte heart8[8] = {B11111, B11111, B11111, B11111, B11110, B11100, B11000, B10000};
//----------------------------------------

int Instructions_view = 500; //--> Variable for waiting time to display instructions on LCD.

PulseSensorPlayground pulseSensor; //--> Creates an instance of the PulseSensorPlayground object called "pulseSensor"

//--------------------------------------------------------------------------------void setup
void setup() {
  Serial.begin(9600);//--> Set's up Serial Communication at certain speed.
  lcd.begin(); //--> Initializes the interface to the LCD screen, and specifies the dimensions (width and height) of the display

  //----------------------------------------Create a custom character (glyph) for use on the LCD
  lcd.createChar(1, heart1);
  lcd.createChar(2, heart2);
  lcd.createChar(3, heart3);
  lcd.createChar(4, heart4);
  lcd.createChar(5, heart5);
  lcd.createChar(6, heart6);
  lcd.createChar(7, heart7);
  lcd.createChar(8, heart8);
  //----------------------------------------

  lcd.setCursor(0,0);
  lcd.print(" HeartBeat Rate ");
  lcd.setCursor(0,1);
  lcd.print("   Monitoring   ");

  //----------------------------------------Configure the PulseSensor object, by assigning our variables to it.
  pulseSensor.analogInput(PulseWire);
  pulseSensor.blinkOnPulse(LED_3); //--> auto-magically blink Arduino's LED with heartbeat.
  pulseSensor.setThreshold(Threshold);
  //----------------------------------------

  //----------------------------------------Double-check the "pulseSensor" object was created and "began" seeing a signal.
  if (pulseSensor.begin()) {
    Serial.println("We created a pulseSensor Object !"); //--> This prints one time at Arduino power-up,  or on Arduino reset.
  }
  //----------------------------------------

  delay(2000);
  lcd.clear();
}
//--------------------------------------------------------------------------------

//--------------------------------------------------------------------------------void loop
void loop() {
  int myBPM = pulseSensor.getBeatsPerMinute(); //--> Calls function on our pulseSensor object that returns BPM as an "int". "myBPM" hold this BPM value now.

  //----------------------------------------Condition if the Sensor does not detect the heart rate / the sensor is not touched.
  if (Instructions_view < 500) {
    Instructions_view++;
  }

  if (Instructions_view > 499) {
    lcd.setCursor(0,0);
    lcd.print("Put your finger ");
    lcd.setCursor(0,1);
    lcd.print("on the sensor   ");
    delay(1000);
    lcd.clear();
    delay(500);
  }
  //----------------------------------------

  //----------------------------------------Constantly test to see if "a beat happened".
  if (pulseSensor.sawStartOfBeat()) { //--> If test is "true", then the following conditions will be executed.
    Serial.println("♥  A HeartBeat Happened ! "); //--> Print a message "a heartbeat happened".
    Serial.print("BPM: "); //--> Print phrase "BPM: "
    Serial.println(myBPM); //--> Print the value inside of myBPM.

    //----------------------------------------Displays a "Heart" shape on the LCD.
    lcd.setCursor(1,1);
    lcd.write(byte(1));
    lcd.setCursor(0,1);
    lcd.write(byte(2));
    lcd.setCursor(0,0);
    lcd.write(byte(3));
    lcd.setCursor(1,0);
    lcd.write(byte(4));
    lcd.setCursor(2,0);
    lcd.write(byte(5));
    lcd.setCursor(3,0);
    lcd.write(byte(6));
    lcd.setCursor(3,1);
    lcd.write(byte(7));
    lcd.setCursor(2,1);
    lcd.write(byte(8));
    //----------------------------------------
    //----------------------------------------Displays the BPM value on the LCD.
    lcd.setCursor(5,0);
    lcd.print("Heart Rate");
    lcd.setCursor(5,1);
    lcd.print(": ");
    lcd.print(myBPM);
    lcd.print(" ");
    lcd.print("BPM     ");
    //----------------------------------------
    Instructions_view = 0;
  }
  //----------------------------------------
  delay(20);
}
Working Explanation
The program starts by setting up the Pulse Sensor, the LCD screen, and some custom heart-shaped characters to display on the LCD. It then enters the main loop where it constantly checks the Pulse Sensor for heartbeats. If a heartbeat is detected, the program prints a message to the Serial Monitor and updates the heart rate displayed on the LCD screen.
If no heartbeat is detected for a certain amount of time, the program displays instructions on the LCD screen asking the user to place their finger on the sensor. This feature helps to conserve power by turning off the display and the LED when the sensor is not in use. The program uses interrupts to improve the accuracy of the heart rate measurement. This allows the program to detect the precise timing of each heartbeat, even if the Arduino is busy with other tasks.
Applications
- Personal health monitoring
- Fitness tracking
- Medical research
- Hospital monitoring
- Biofeedback therapy