Introduction
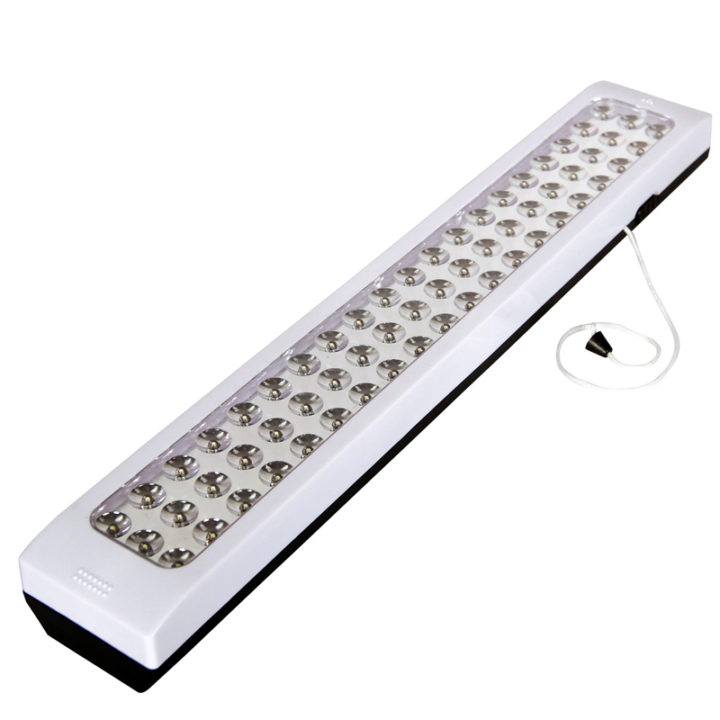
Let’s suppose you had an exam the other day and your neighborhood was having a power outage. You’ll need a light to study now since it’s late at night. What would you do if you found yourself in this situation? As a result, in these instances, the emergency light is the only alternative. When the power goes off, emergency lights are activated, and the light turns on right away. To avoid power outages, they are utilized as emergency lighting in homes, offices, and study rooms.
So, in this tutorial, we’ll make an “Emergency LED Lamp.” Automatic emergency lighting is a simple circuit to put up and can be finished in a short amount of time. The components for the Emergency Light circuit are easily accessible and inexpensive.
Hardware Components
The following components are required to make Emergency LED Lamp Circuit
| S.no | Component | Value | Qty |
|---|---|---|---|
| 1. | Center Tapped Transformer | 9v-0-9v | 1 |
| 2. | Diode | 1N4007 | 3 |
| 3. | LED | – | 11 |
| 4. | Battery | 4.5AH | 1 |
| 5. | Resistor | 470Ω | 1 |
| 6. | 2-Pin Connector | – | 1 |
| 7. | SPST Switch | – | 1 |
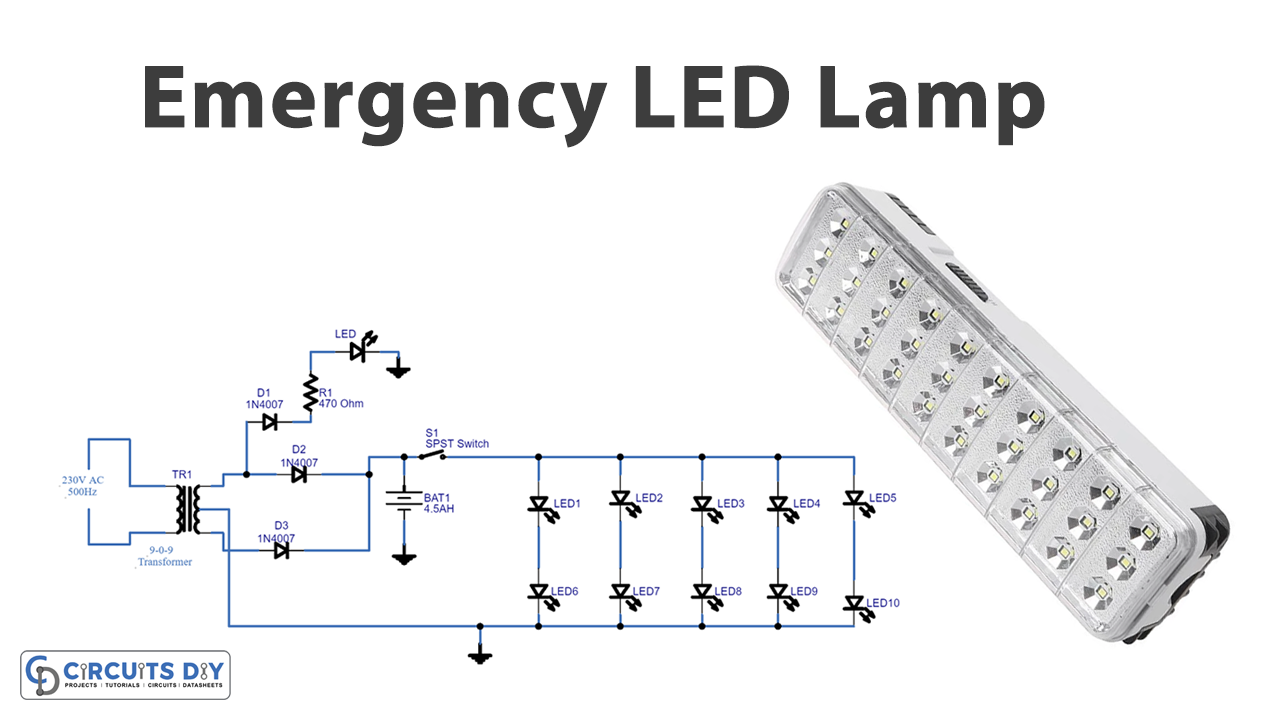
Emergency LED Lamp Circuit
Working Explanation
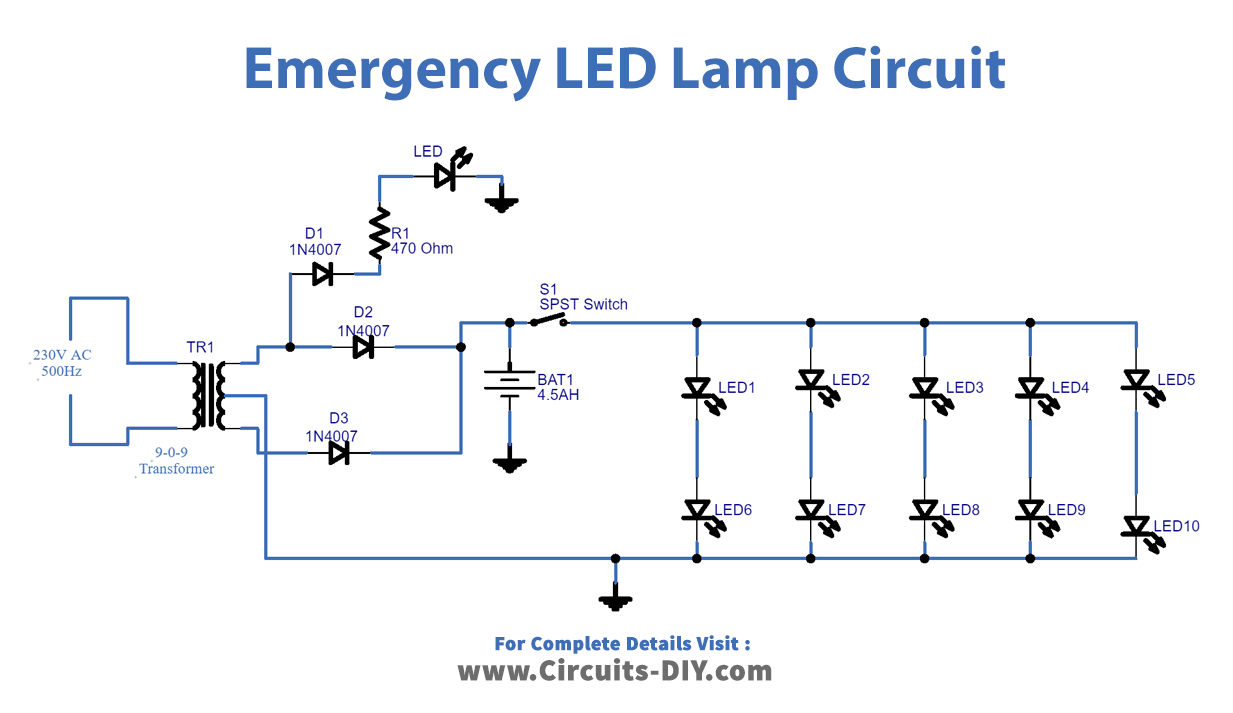
To build this circuit, we have used a 9-0-9v center-tapped transformer and two 1N4007 diodes to connect the rectifier circuit. An LED that is there to indicate the power output coming from the transformer is wired to a half-wave rectifier with the help of a 470 resistor. Then there is a rectifier made from diodes. The DC supply from the rectifier is applied directly to the rechargeable battery, and a switch is utilized to turn on and off the output LEDs, which are super flux white LEDs that create increased light intensity.
Application and Uses
- One can use it in night lamps, street lights, etc.
- The circuit is useful where there are load-shedding issues.
- Also, can be employed to avoid sudden power failures in workplaces


