Introduction
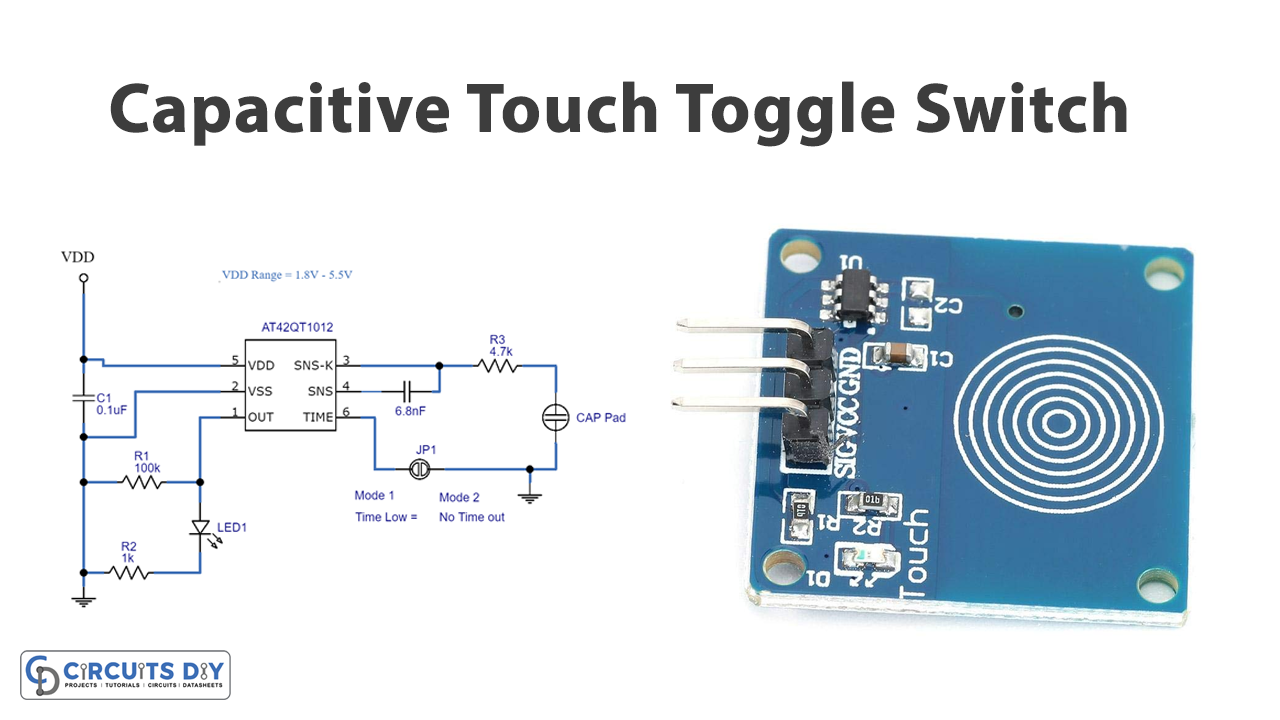
Switches are our daily life, from our home appliances to other electrical machines, turning ON the switches is the only way to turn ON the machines. Thus, switches are of different types, usually, mechanical switches are used regularly. Capacitive switches are not very regularly used but have an advantage over mechanical switches. In this tutorial, we are going to “Capacitive Touch Toggle Switch circuit”
With a mechanical switch, you need to press the button hard enough so the upper conductive follow comes into contact with the base conductive follow. With a capacitive switch, then again, you just need to contact the button with an exposed finger.
Hardware Components
The following components are required to make Capacitive Touch Toggle Switch Circuit
| S.no | Component | Value | Qty |
|---|---|---|---|
| 1. | Capacitive Touch Sensor | AT42QT1012 | 1 |
| 2. | LED | – | 1 |
| 3. | Capacitive TouchPad | – | 1 |
| 4. | Jumper SW | – | 1 |
| 5. | Ceramic Capacitor | 0.1μF, 6.8nF | 1,1 |
| 6. | Resistor | 1KΩ, 100KΩ, 4.7KΩ | 1,1,1 |
| 7. | Battery | – | 1 |
| 8. | 2-Pin Connector | – | 1 |
AT42QT1012 Pinout

For a detailed description of pinout, dimension features, and specifications download the datasheet of AT42QT1012
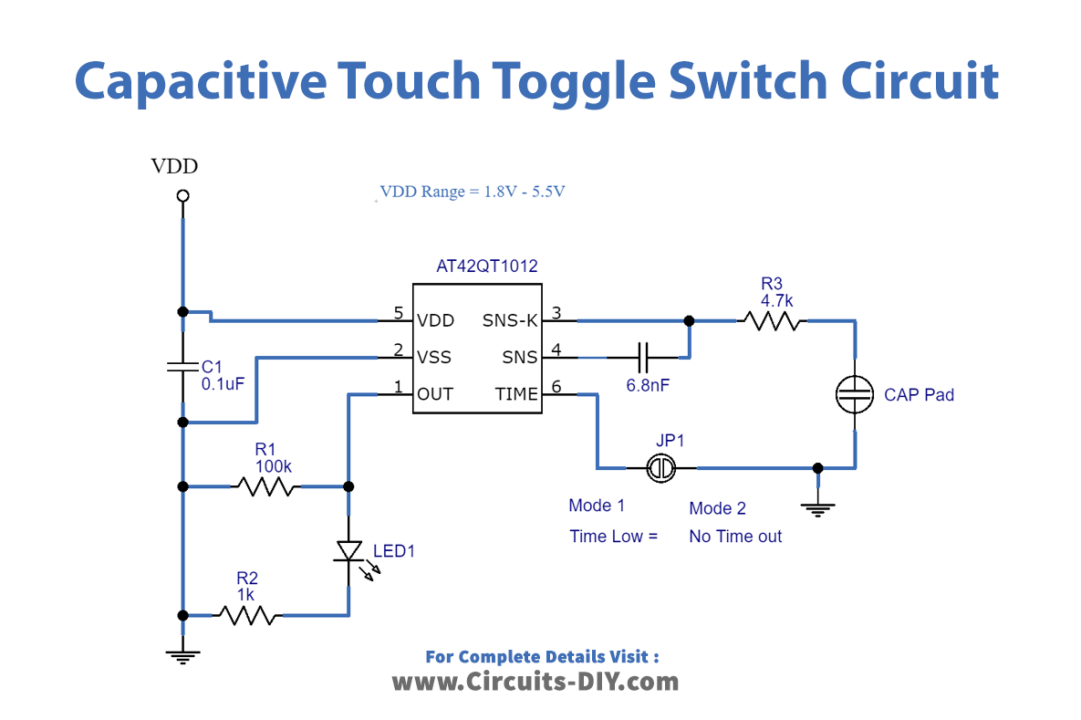
Capacitive Touch Toggle Switch Circuit
Working Explanation
In this Capacitive Touch Toggle Switch circuit, we have made the capacitor touchpad by utilizing a copper tape plate, If you Implement this circuit in PCB you can likewise utilize the track as a touch sensor, because of its nearness, it can recognize the touch. You can utilize a single or double plate.
The value of the capacitor concludes the level of sensitivity, a higher value of the capacitor (C2) can increase the sensitivity, however, it requires more power and more slow response time, thus you can pick between 2 – 50nF of capacitance. Here the LED is utilized to demonstrate the result, you can interface any other output load according to your need.
Application and Uses
- Home appliances control.
- Remote controls.
- Control panels.


