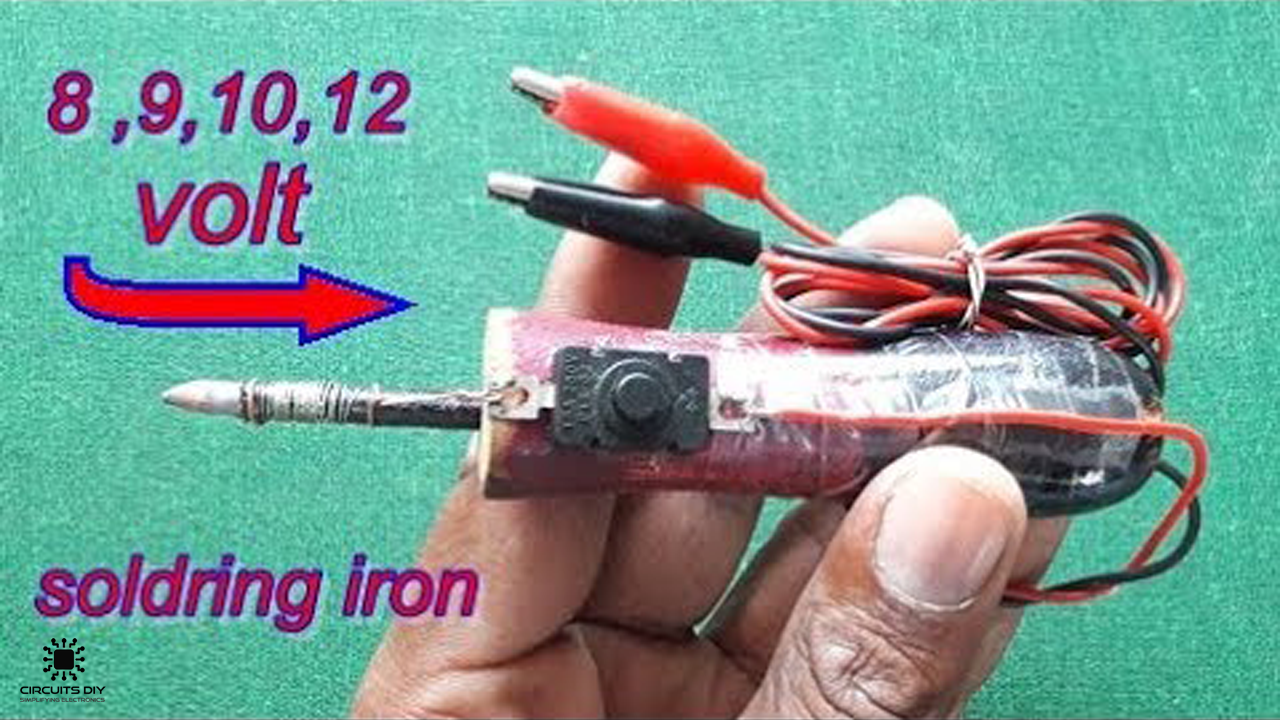
Soldering iron is an electrical tool that is used to solder electrical & electronic components directly or on a Veroboard or a PCB. It is a common tool that is essential for electronic enthusiasts and hobbyists. It is compact, easy to control & is pretty cheap to build by yourself. So, in this project, we are going to look into a step-by-step procedure on How To Make A 12V Soldering Iron using a small number of components.
A soldering iron is basically composed of a heated metal tip and an insulated handle. The tip of a soldering iron gets extremely hot, usually around 430°C. It supplies heat to melt the solder so that it can flow into the joint between two workpieces. Heating is achieved electrically, by passing an electric current through a resistive heating element.
PCBWay commits to meeting the needs of its customers from different industries in terms of quality, delivery, cost-effectiveness, and any other demanding requests. As one of the most experienced PCB manufacturers in China. They pride themselves to be your best business partners as well as good friends in every aspect of your PCB needs.
Hardware Components
The following components are required to make 12V Soldering Iron
| S. No | Component | Value | Qty |
|---|---|---|---|
| 1. | Solid Copper enameled copper rod | 8mm | 1 |
| 2. | wire sleeves | Heat resistant | 1 |
| 3. | Nichrome wires | 32 AWG | 1 |
| 4. | Copper wiring | 1mm | 1 |
| 5. | Lead Acid DC Battery | 12V/ 7Ah | 1 |
| 6. | Wooden handle | – | 1 |
| 7. | Cut File | – | 1 |
| 8. | Power Drill w/ drill bits | 4mm drill bit | 1 |
| 9. | Super Glue | – | 1 |
| 10. | Push Button Switch | – | 1 |
| 11. | Alligator clips w/ leads | – | 2 |
Useful Steps
Following are the steps on ‘How To Make A 12V Soldering Iron.’
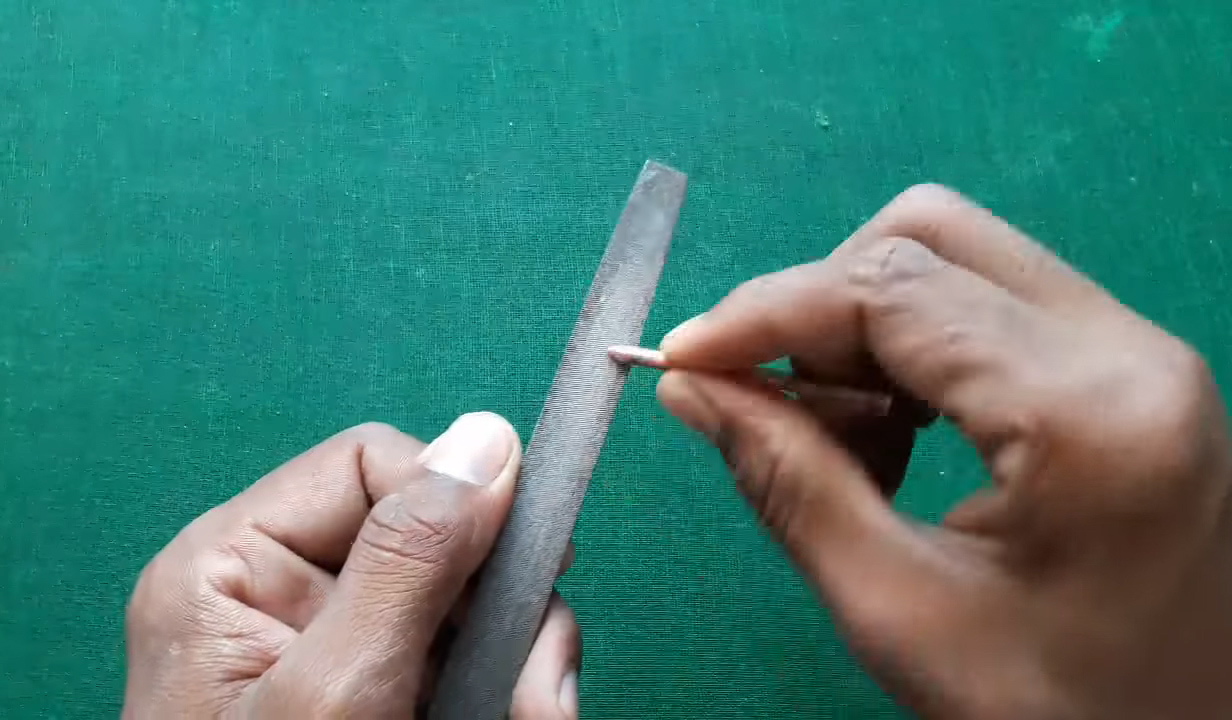
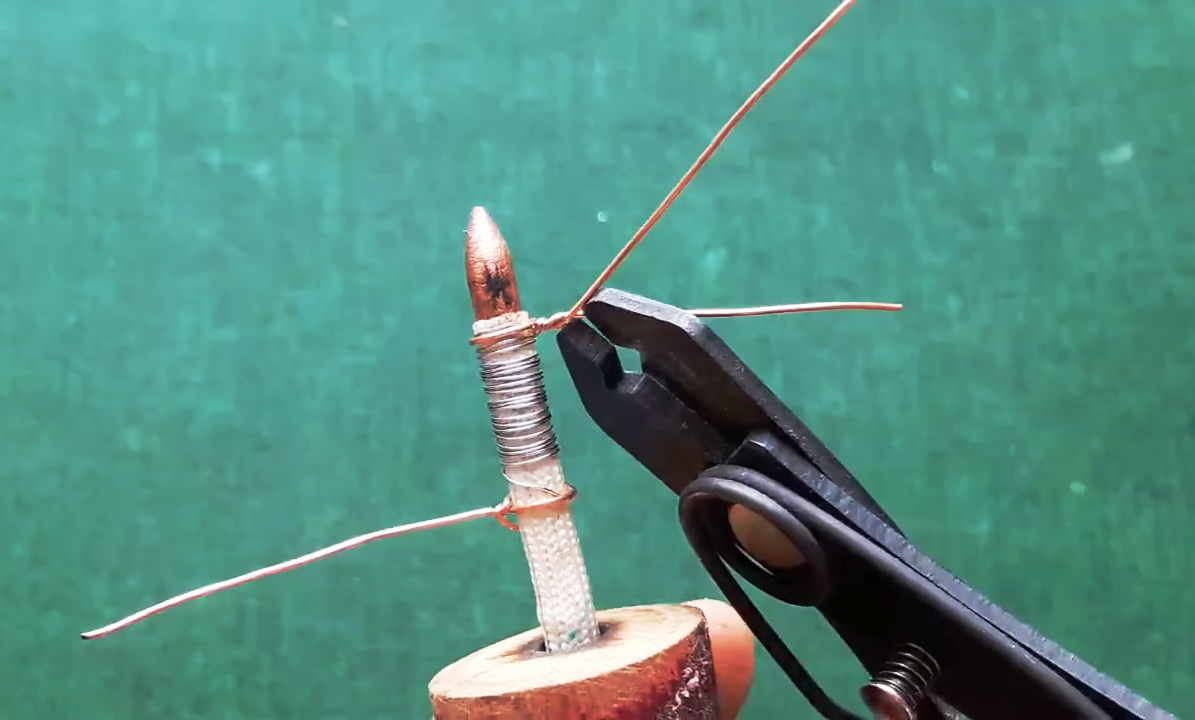
1) File one end of the 8mm copper rod into a dulled conical shape. After that take some heat-resistant sleeves & cover 1/3rd of the copper wire, exposing the dulled end.

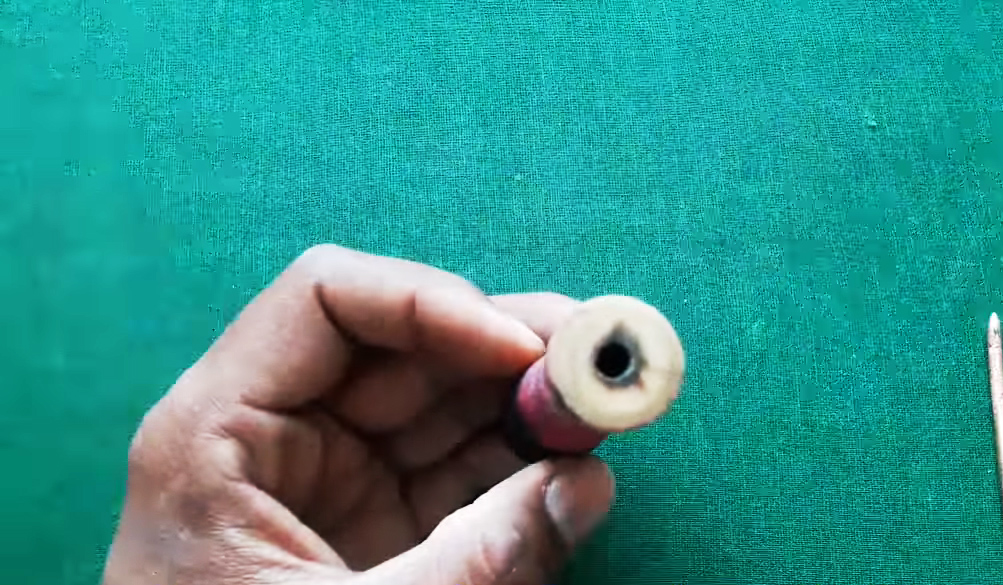
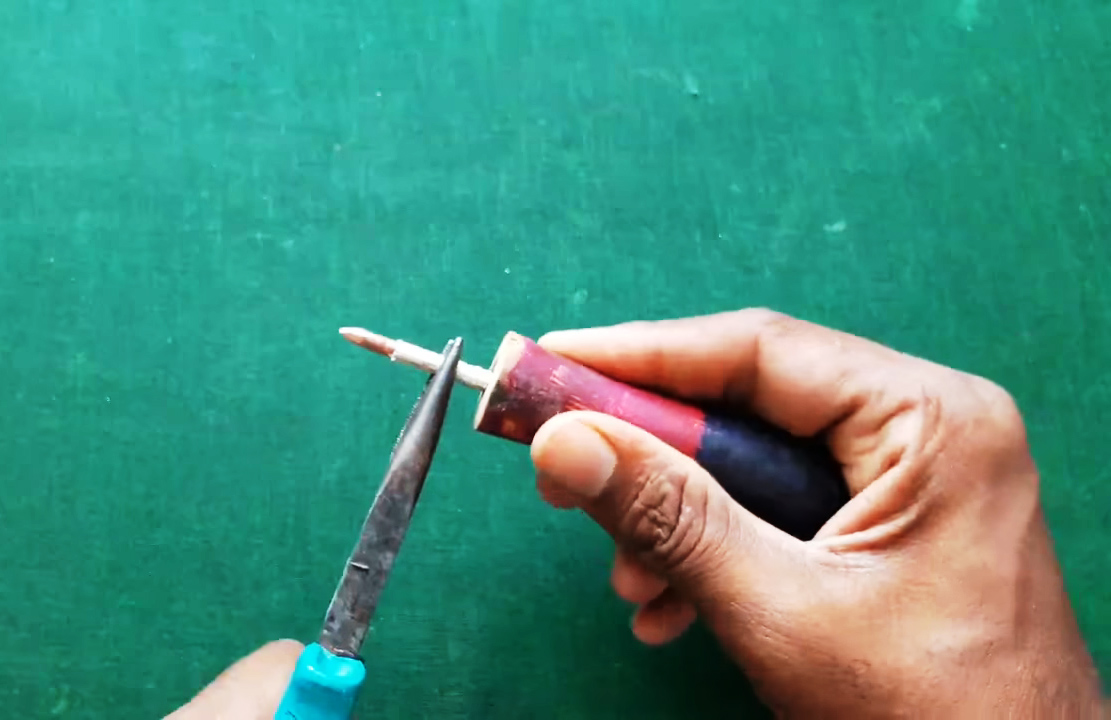
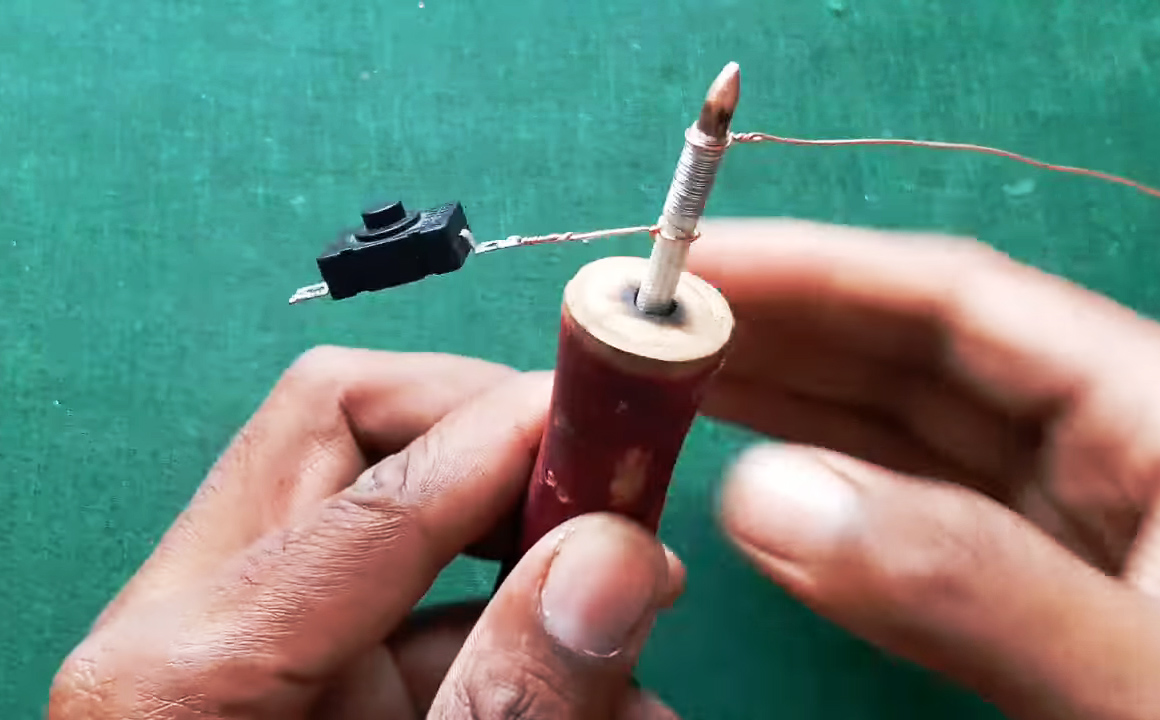
2) Take a cylindrical wood piece & drill an 8mm hole, 2cm deep in the wood using a power drill. After this, firmly stick the Solid copper rod into the hole using a nose plier.
3) coil approx 35cm of nichrome wire along the heat-resistant sleeve, tying them off on both ends using simple 1mm thick solid core copper wires.

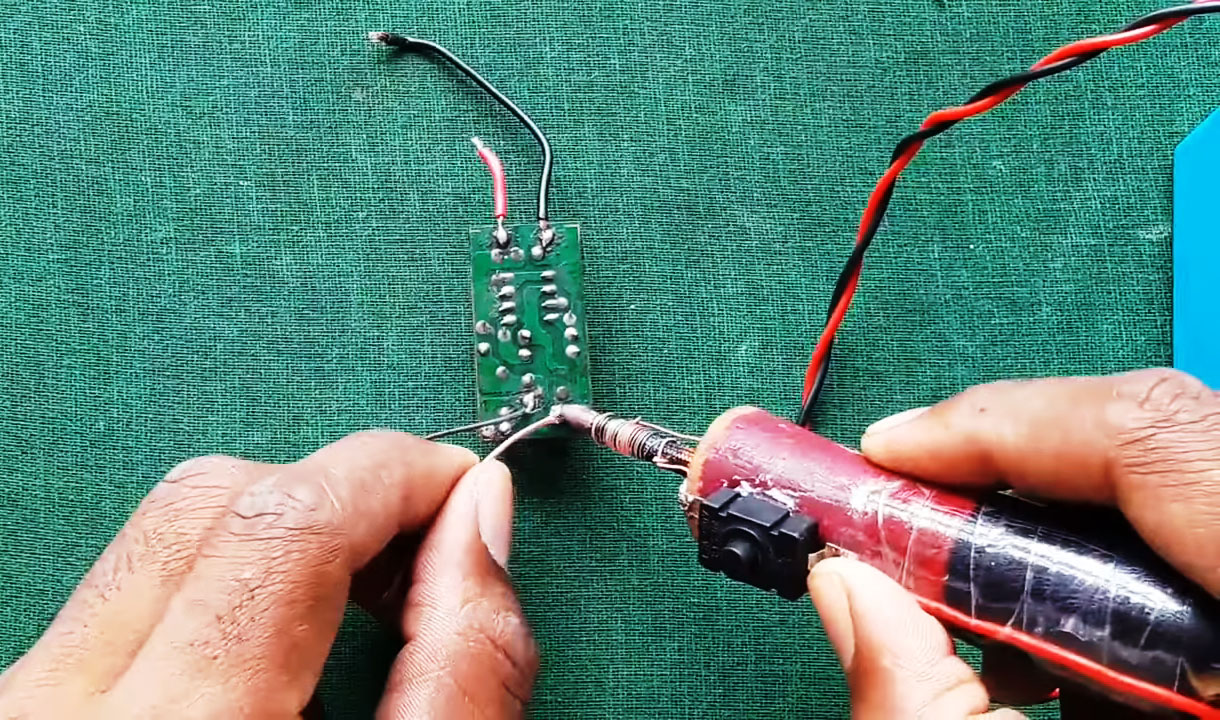
4) Tie off one terminal of the on-off switch to the +ve lead of the battery clip and the other terminal to solid copper wire. Secure the on-off button on the wooden handle using super glue

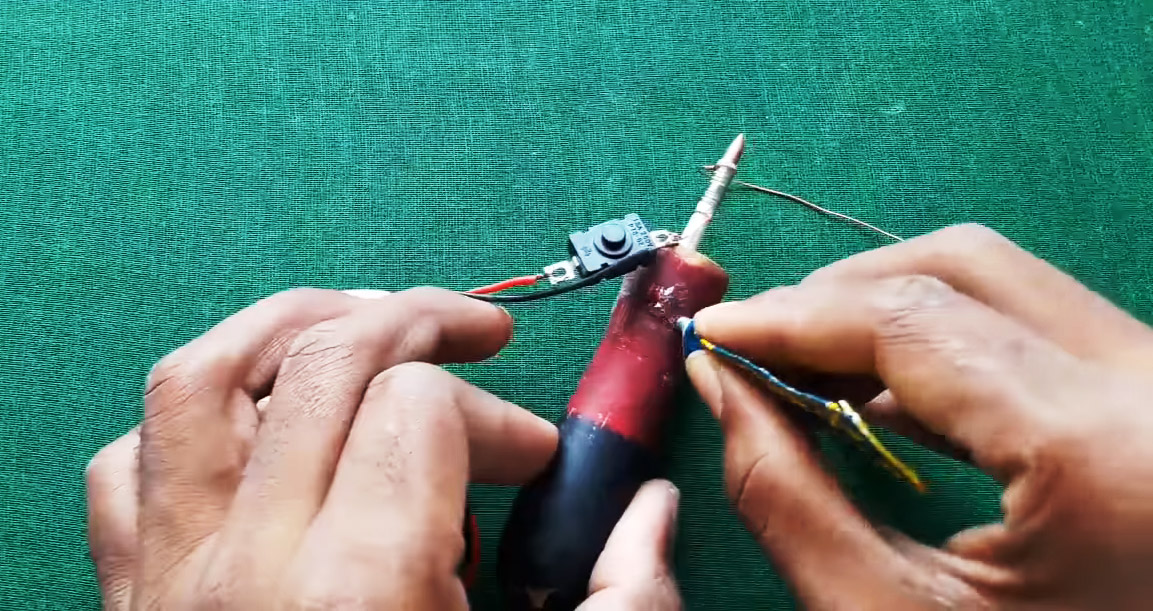
5) Tie off the -ve lead of the battery clip with the other end of the solid copper wire.


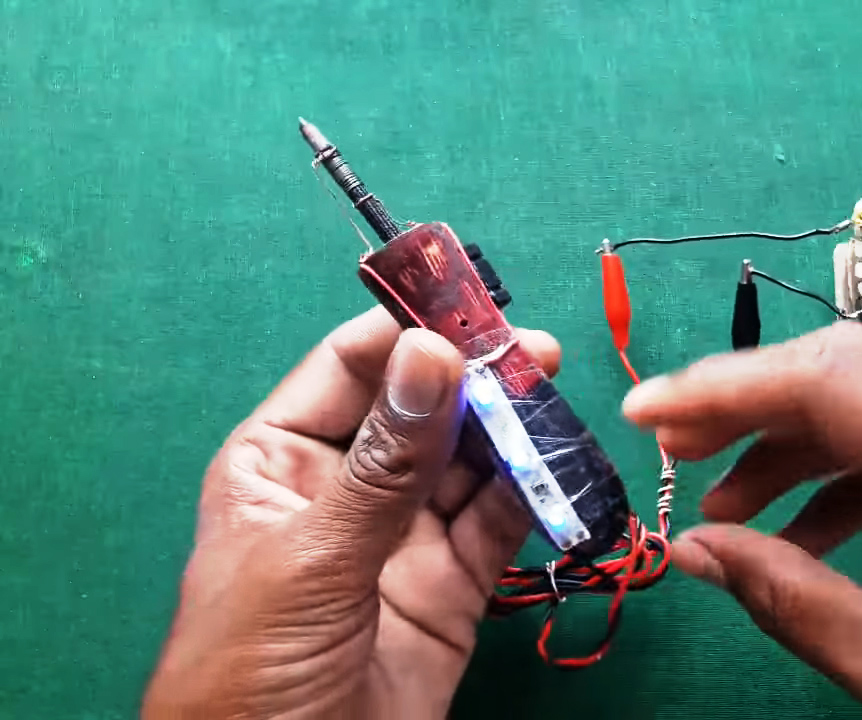
6) Connect the battery clips to a 12V/7Ah Lead Acid Battery & switch on the circuit. The tip of the soldering iron will smoke during the first few uses due to the burning of copper enamel. After a minute cover the tip of the soldering iron with some solder wire.

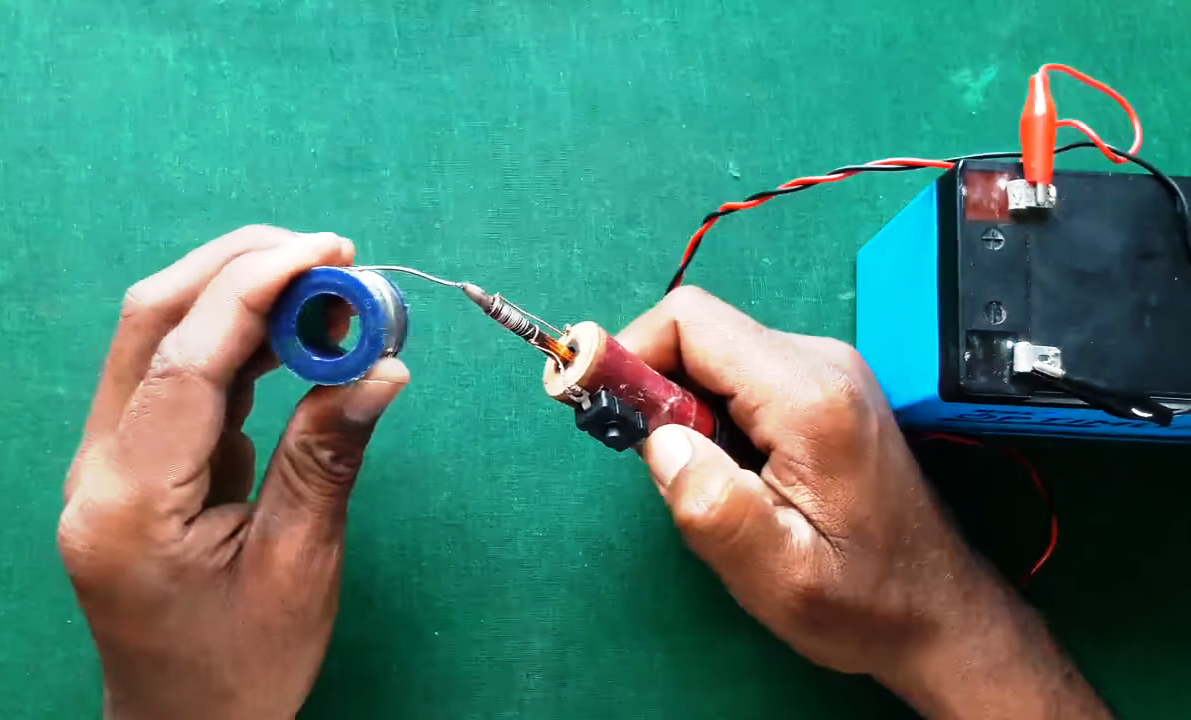
6) Test the soldering iron. You can also attach led strips to the on-off switch to serve as a power indicator.
Working Explanation
The working of this circuit is very simple. On powering on the circuit the Nichrome coil begins to heat up. Nichrome wire has the benefit of heating to red hot levels without compromising its structural integrity, due to the formation of Cr2O3 (chromium oxide).
The immense heat from the Nichrome coil (approx 430°C) gets thermally conducted by the 8mm solid copper wire. Pushing the tip to the required soldering temperature.
Applications
- Soldering Iron is used for everyday soldering purposes such as small-scale projects & complex circuits