Introduction
Soil moisture is the term for the water that exists in the soil. The soil pores are where the water is kept. When it comes to planting growth, soil water is the most crucial component. Plants can quickly absorb soil water if the soil’s moisture level is optimal for their growth. The status of soil moisture is vital for plant development. Numerous elements of plant development can be impacted by too much or too little water. Therefore, it’s essential to keep an eye on the soil’s moisture. And so we need a sensor for that purpose. And that sensor needs a microcontroller to interface. So this tutorial would be about learning the interfacing Soil Moisture Sensor with Arduino
According to numerous farmers Manually checking soil moisture raises labor and operating expenses. Manual inspection findings are sometimes erroneous and obtaining real-time data becomes challenging. Crops often receive too much or too little water in the absence of real-time data. This damages crops in addition to wasting water. And here is where soil sensors may help!
What is Soil Moisture Sensor?
A soil moisture sensor is a device that monitors the existing moisture content of the soil. Sensors incorporated into the irrigation system make it much easier to schedule water supply and distribution. Such devices aid in reducing or increasing irrigation for optimal plant development.
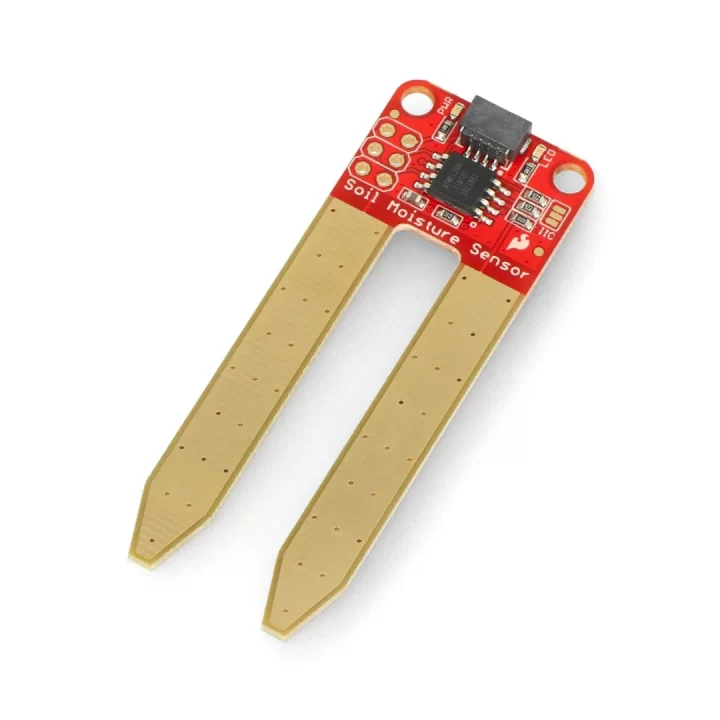
Hardware Components
You will require the following hardware for Complete Guide to Use Soil Moisture Sensor w/ Examples.
| S.no | Component | Value | Qty |
|---|---|---|---|
| 1. | Arduino | UNO | 1 |
| 2. | Soil Moisture Sensor | – | 1 |
| 3. | Breadboard | – | 1 |
| 4. | Jumper Wires | – | 1 |
Steps Interfacing Soil Moisture Sensor with Arduino
To interface the Soil Moisture Sensor with Arduino, you need Arduino and the soil sensor as the major components with some wires. Once you got that, follow the following steps:
Schematic
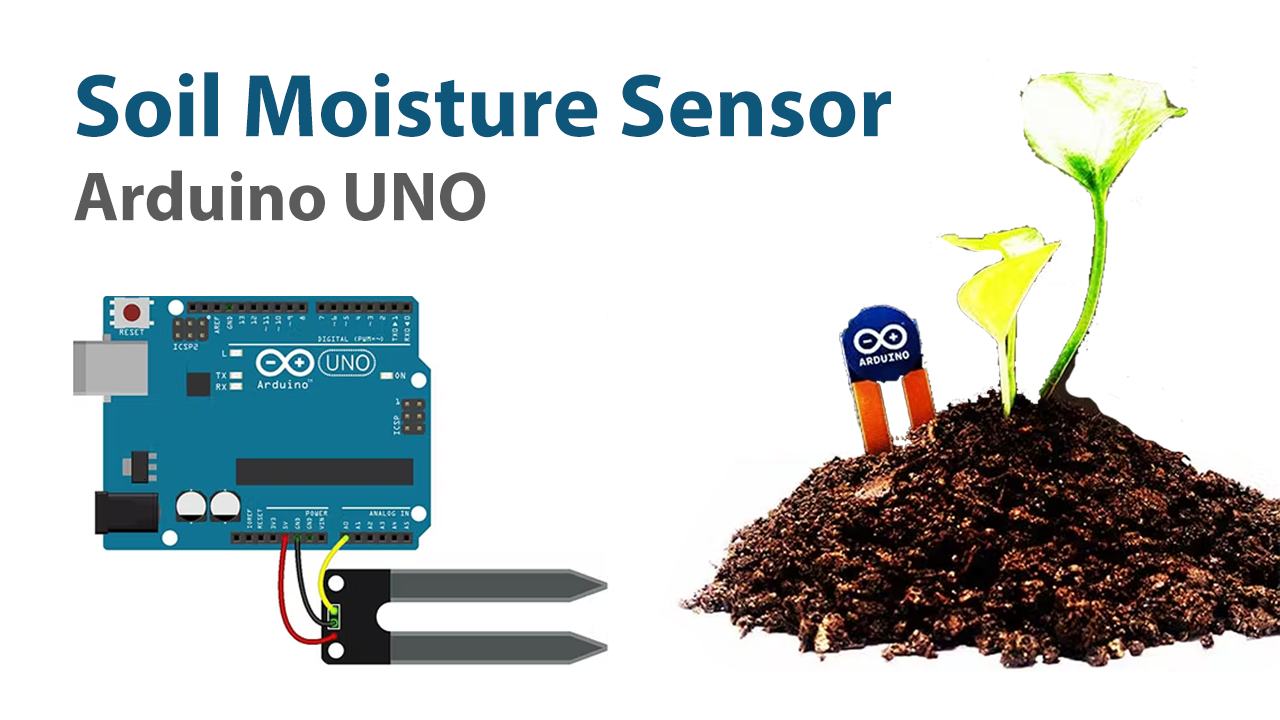
Make connections according to the circuit diagram given below.
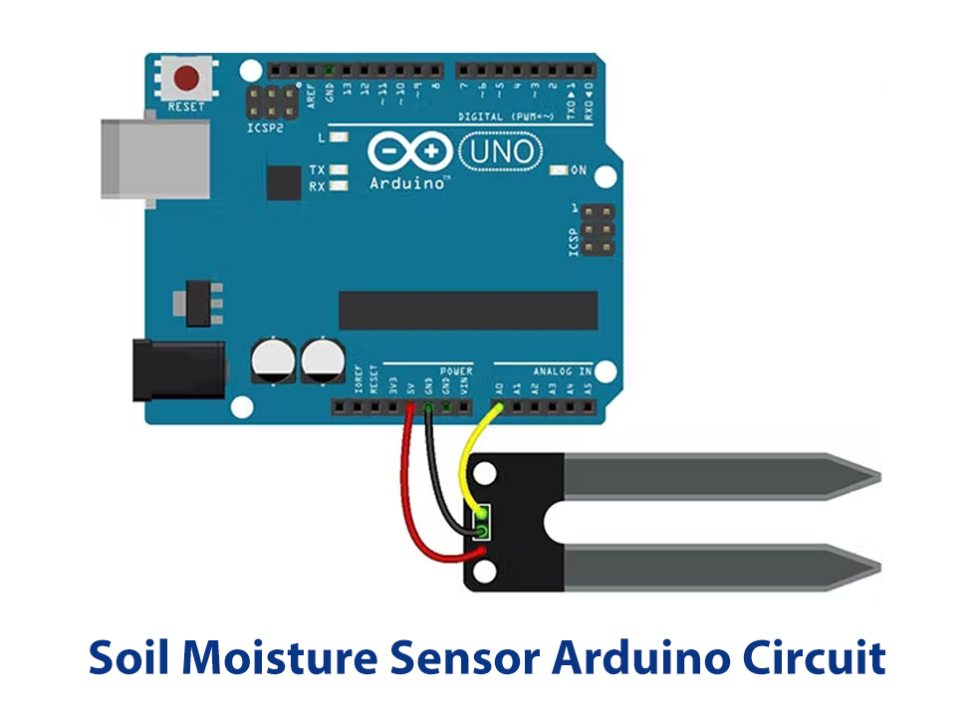
Wiring / Connections
| Arduino | Soil Moisture Sensor |
|---|---|
| 5V | VCC |
| GND | GND |
| A0 | A0 |
Installing Arduino IDE
First, you need to install Arduino IDE Software from its official website Arduino. Here is a simple step-by-step guide on “How to install Arduino IDE“.
Code
Now copy the following code and upload it to Arduino IDE Software.
#define SensorPin A0
float sensorValue = 0;
void setup() {
 Serial.begin(9600);
}
void loop() {
 for (int i = 0; i <= 100; i++)
 {
   sensorValue = sensorValue + analogRead(SensorPin);
   delay(1);
 }
 sensorValue = sensorValue/100.0;
 Serial.println(sensorValue);
 delay(30);
}
Let’s Test It
It’s now time to test the circuit! Power up the Arduino. The code should be uploaded to Arduino. Now, Put the soil moisture sensor in the soil. The reading will appear on the serial monitor.
Working Explanation
Let’s dig into the coding to understand the working:
- First, we specified the Arduino pin that is connected to the sensor. hen, using serial, initialize. We then define a variable sensorValue to store the values coming from the sensor. Initially, we store 0 in it
- In the void loop, we initialize the serial monitor by giving the function Serial.begin
- In the void loop, there’s a code to get the sensor value. Every coming value that sensor read is added with the sensorValue to get the new sensorValue. After that, to increase the stability and accuracy of the data, we averaged 100 sensor readings for each measurement of soil moisture. And, print those values on the Serial monitor.
The sensor operates in such a manner that the bigger the amount of water in the soil, the greater the conductivity and the lower the resistance. The lower the soil’s water content, the lower the conductivity and the higher the resistance. Based on the resistance, the sensor creates an output voltage, which may be used to determine the moisture level by monitoring it.
Applications
- Farming, agricultural, and irrigation systems.
Conclusion.
We hope you have found this interfacing tutorial on “Soil Moisture Sensor” very useful. If you feel any difficulty in making it feel free to ask anything in the comment section.

