Introduction
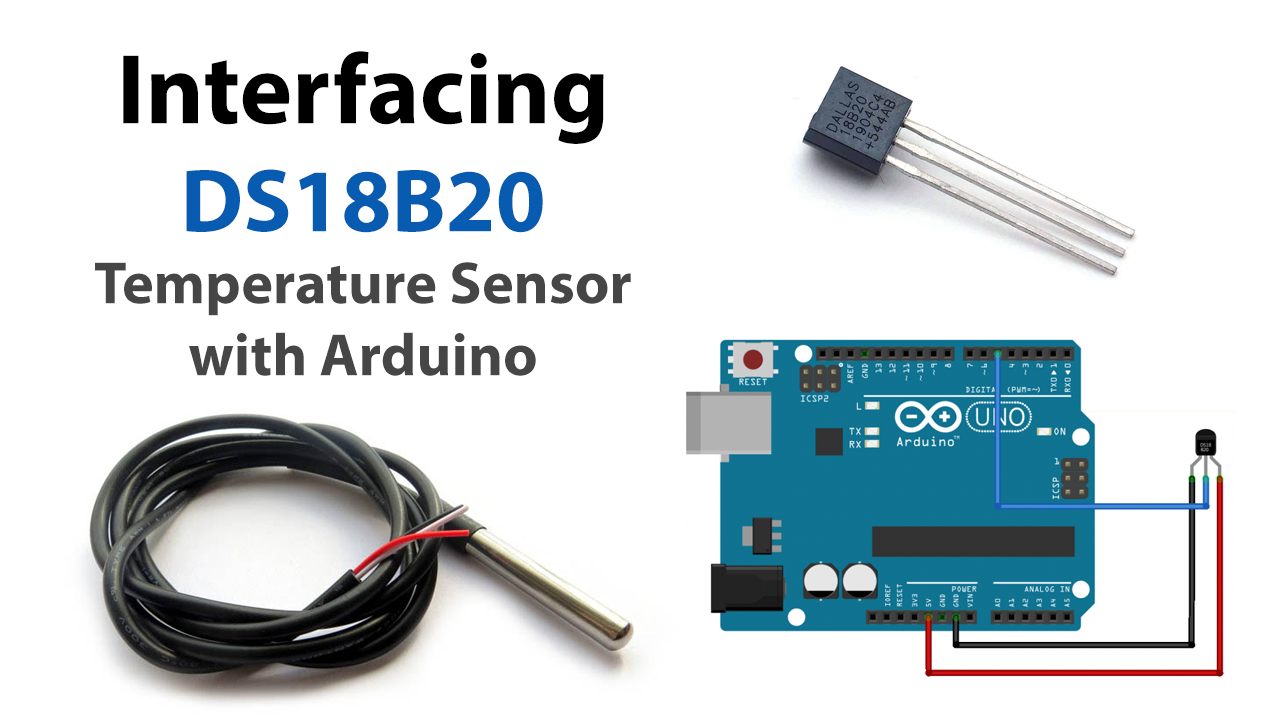
A temperature sensor, as we are all aware, is a piece of electronic equipment that measures the temperature of its surroundings and converts the incoming data into electronic output data to regulate, record, or communicate temperature fluctuations. Temperature sensors come in a wide range of varieties. Here, we’d like to introduce to you the DS18B20 temperature sensor. From this article, you will learn “How To Use DS18B20 Waterproof Temperature Sensor using Arduino”
This sensor is a convenient method to get a fair idea of the temperature. Specifically, it requires no additional external components and is simple to use. The sensor is very simple to interface with.
What is the DS18B20 Temperature Sensor?
The DS18B20 is a 1-wire programmable temperature sensor that is commonly utilized in harsh environments such as chemical solutions, mines, etc This sensor can connect using a one-wire bus protocol, which employs a single data line to interface with an internal microprocessor.
Hardware Components
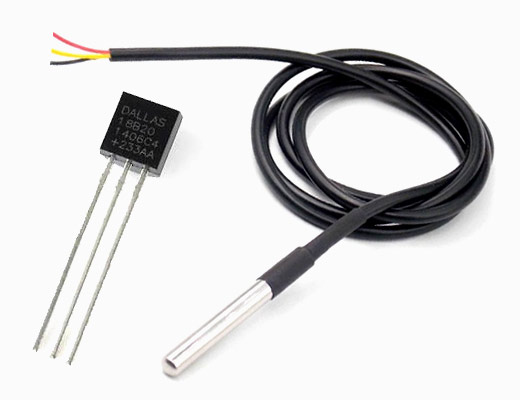
You will require the following hardware interface DS18B20 Temperature Sensor with Arduino.
Steps Interfacing DS18B20 Temperature Sensor with Arduino
Once you get the sensor, Arduino, and the other simple required electronic components; you need to follow the following steps:
Schematic
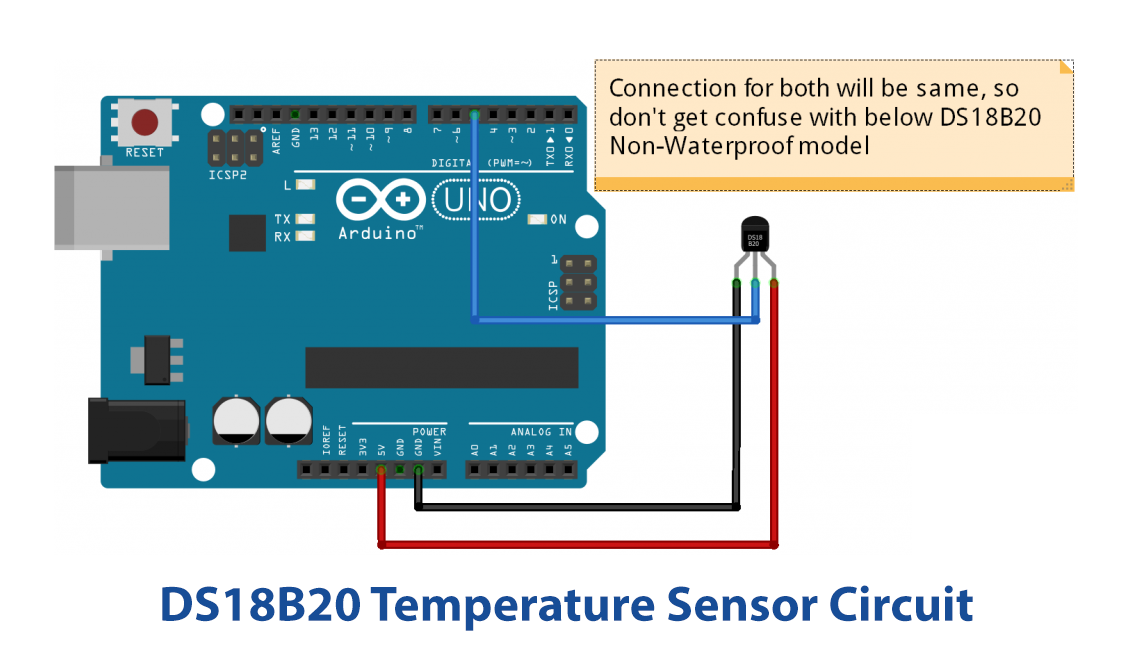
Make connections according to the circuit diagram given below.
Wiring / Connections
| Arduino | DS18B20 Sensor |
|---|---|
| 5V | VCC |
| GND | GND |
| D5 | DATA |
Installing Arduino IDE
First, you need to install Arduino IDE Software from its official website Arduino. Here is a simple step-by-step guide on “How to install Arduino IDE“.
Installing Libraries
Before you start uploading a code, download and unzip the following libraries at /Progam Files(x86)/Arduino/Libraries (default), in order to use the sensor with the Arduino board. Here is a simple step-by-step guide on “How to Add Libraries in Arduino IDE“.
Code
Now copy the following code and upload it to Arduino IDE Software.
#include <OneWire.h>
#include <DallasTemperature.h>

#define ONE_WIRE_BUS 5

OneWire oneWire(ONE_WIRE_BUS);

DallasTemperature sensors(&oneWire);

 float Celcius=0;
 float Fahrenheit=0;
void setup(void)
{
  Serial.begin(9600);
  sensors.begin();
}
void loop(void)
{
  sensors.requestTemperatures();
  Celcius=sensors.getTempCByIndex(0);
  Fahrenheit=sensors.toFahrenheit(Celcius);
  Serial.print(" C  ");
  Serial.print(Celcius);
  Serial.print(" F  ");
  Serial.println(Fahrenheit);
  delay(1000);
}
Let’s Test It
It’s now time to test the circuit. Power up the Arduino once you upload the code. Now observe the readings on the serial monitor. To see the drastic changes in the readings, take the circuit at a temperature other than room temperature.
Working Explanation
Understand the following code to understand the working:
- We first the library for the temperature sensor. We add the wire library as well to enable one-wire communication. Then we defined the pin on the Arduino that is connected to the sensor. To communicate with the sensor-equipped one-wire device, five the command oneWire(). To send the one-wire reference to the temperature library, use the sensors() command. Create the float object to hold the Celsius and Fahrenheit values.
- We then Initialize the sensor and the serial monitor next in the void setup.
- We then send the requestTemperature() function to receive the sensor values lastly inside the void loop. Print the temperatures in celsius. We then create some more code to convert the readings to Fahrenheit and print it on the serial monitor.
The operation is easier. It was done to measure the temperature and convert it from celsius to Fahrenheit. The serial monitor is then used to display the temperature information.
Applications
- Hard and rigid environment temperature measurement
- To measure temperature at multiple points
- To measure the temperature of the liquid
- Thermal sensitive devices
- Thermostat control system
Conclusion
We hope you have found this Interfacing DS18B20 tutorial very useful. If you feel any difficulty in making it feel free to ask anything in the comment section.

