Introduction
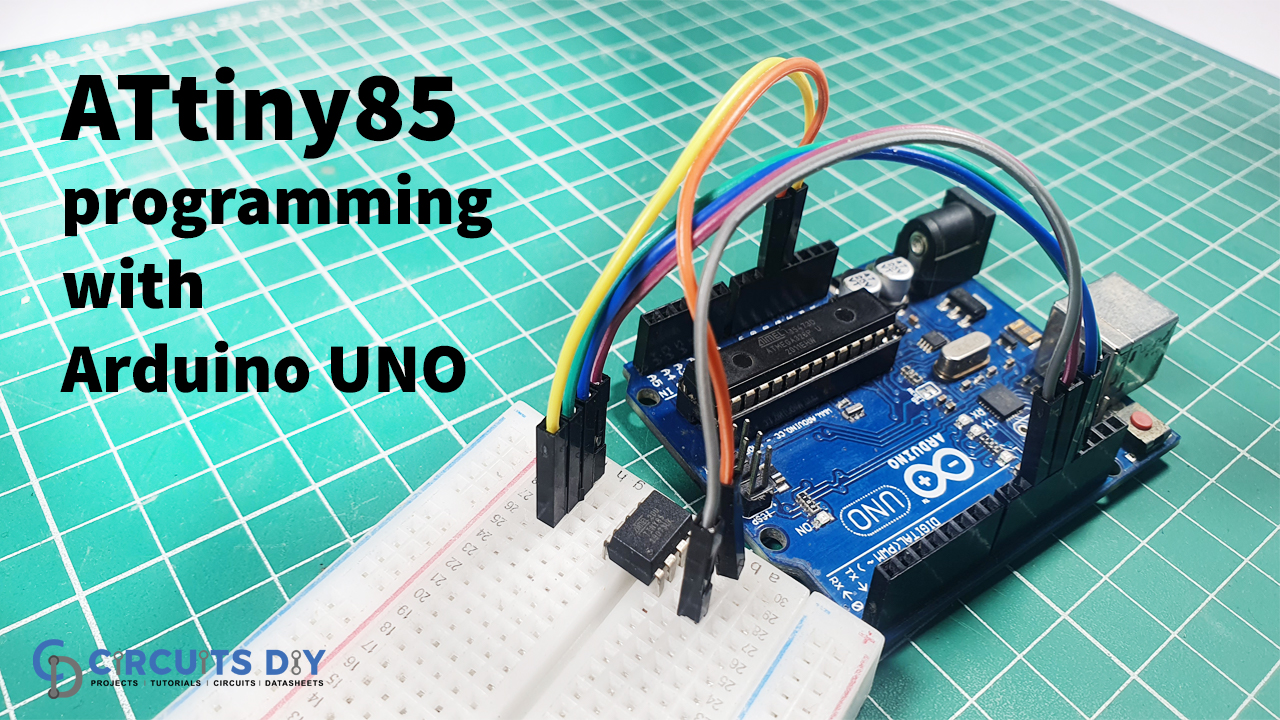
It is always easier to program on Arduino IDE because of its good interface and simpler ways to compose and upload the programs in Arduino as well as in other controllers. However, it requires a little bit of extra knowledge to upload the codes in the different controllers that do not belong to the Arduino board category. Moreover, it requires very few external components like resistors or capacitors for that purpose. To make the process of programming more smooth, here in this article we have come up with Program ATtiny85 with Arduino Uno.
Hardware Required
| S.no | Component | Value | Qty |
|---|---|---|---|
| 1. | Arduino | UNO | 1 |
| 2. | USB Cable Type A to B | – | 1 |
| 3 | Jumper Wires | – | – |
| 4. | Breadboard | – | 1 |
| 5. | ATtiny85 | – | 1 |
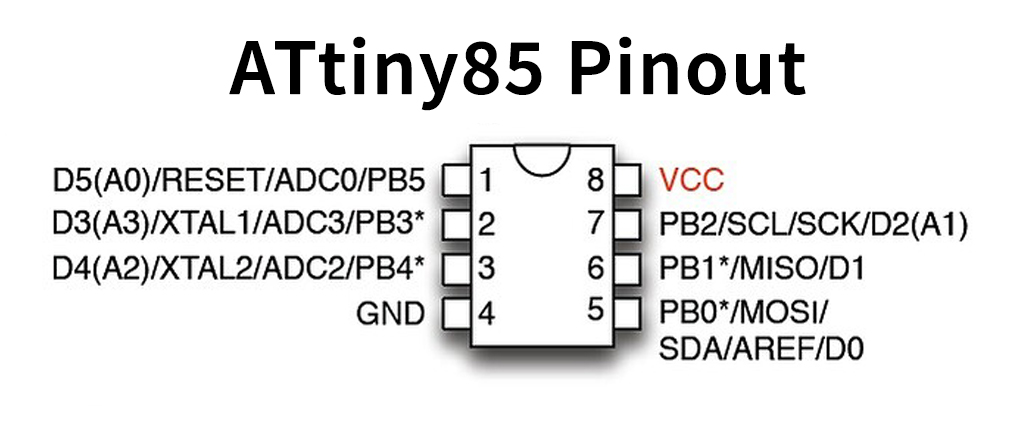
ATtiny85 Pinout
Circuit Diagram
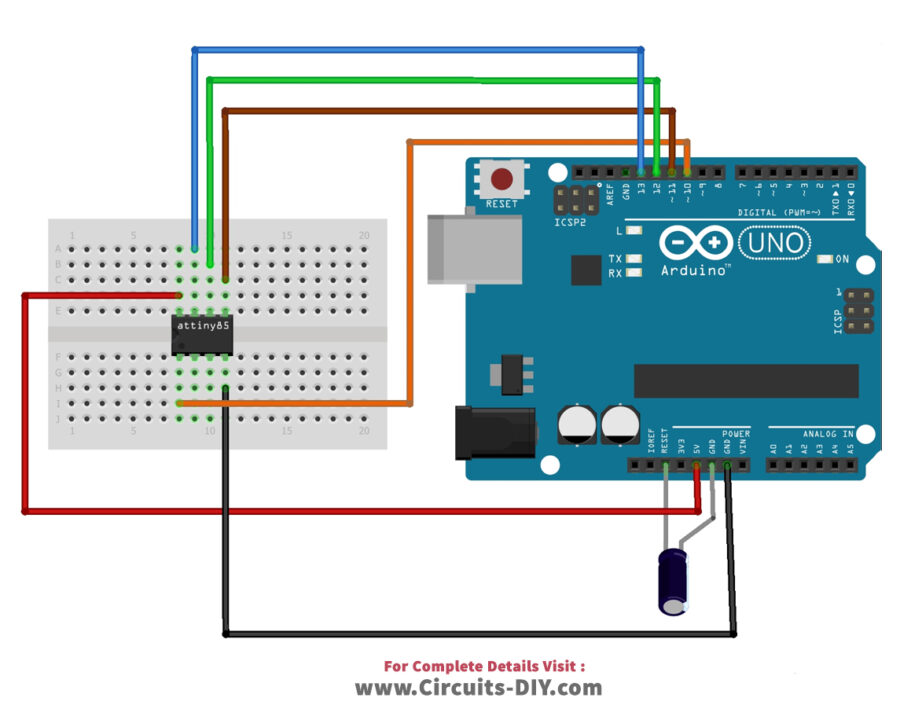
Connections
| Arduino UNO | ATtiny85 |
|---|---|
| 5V | Vcc |
| GND | And |
| Pin 13 | Pin 2/PB2 |
| Pin 12 | Pin 1/PB1 |
| Pin 11 | Pin 0/PB0 |
| Pin 10 | Reset/PB5 |
Steps
- To burn or upload your code you first need to connect attiny85 with arduino microcontroller according to a above given diagram
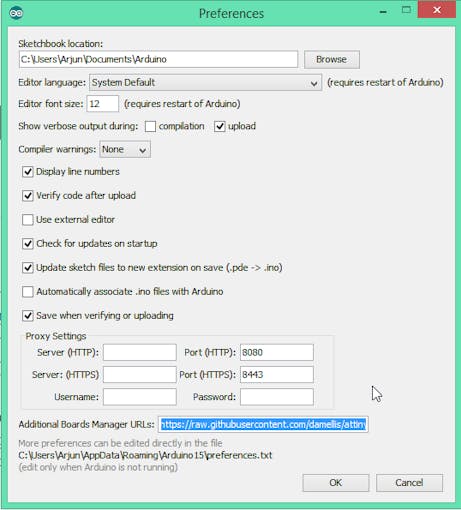
- Know that, There is no ATtiny85 option in arduino, and hence we have to add ATtiny boards to Arduino IDE. For this Open File -> Preferences and in the Additional Boards Manager URLs , paste the given link https://raw.githubusercontent.com/damellis/attiny/ide-1.6.x-boards-manager/package_damellis_attiny_index.json.
- After you do this , open Tools from menu bar, go on board and click the Board Manager
- The board manager window will be open. Now, scroll down until you see “attiny by Davis A. Mellis”. Click on that option and install it.
- When it get installed, now you could see a new entry in the Board menu
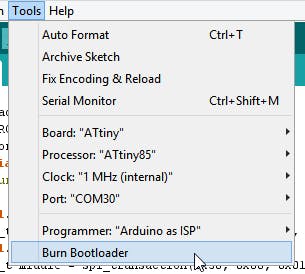
- Now you need to go back to Arduino IDE. Go to the tools, Select Processor: “ATtiny85” option. And select 85 MHz. Below the Processor option, there is a clock option, go there and select 8MHz (internal)
- In the same tool option, there is a Programmer option, select that and then select arduino as ISP
- The tools also contain the Burn Bootloader option. Select that option.
- You then get the message if the burning bootloader was successful.
- Now open your code and burn that.
Conclusion
We have discussed the easier way to program your ATtiny85 using Arduino. And hence it is never difficult to make a project on this tiny controller that can surely do wonders for tiny portable electronic devices and circuits.

