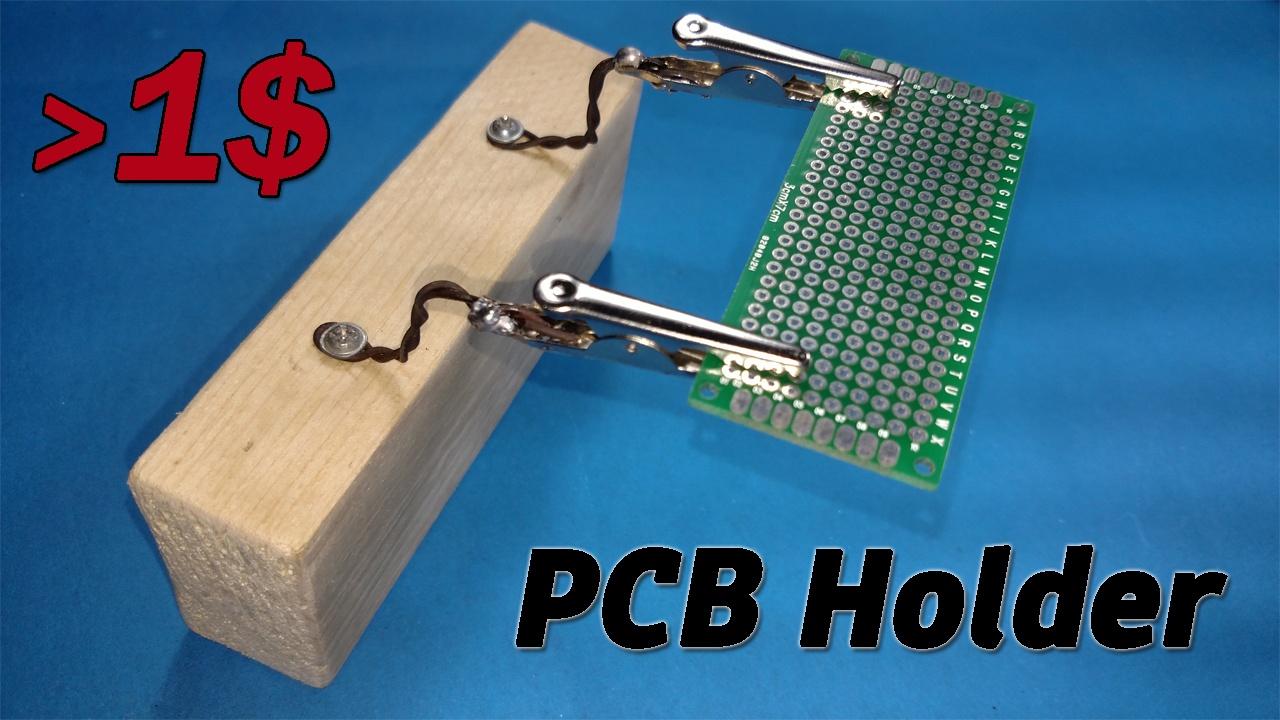
In this tutorial, we will show you how to make a simple PCB holder using cheap household items. The total cost of this project is around 1$. We can use this project for soldering and testing the circuit.
Unlike a bench clamp, you can place this holder anywhere and you don’ have to fix it to the table using screws.
Hardware Components
Following are the necessary hardware items required for DIY PCB Holder:
| S.NO | Component | Value | Qty |
| 1. | Wood piece | 12 x 5 x 2.5 cm | 1 |
| 2. | Alligator Clip | – | 2 |
| 3. | Screws | – | 4 |
| 4. | Hard Steel wire | – | 1 |
Working Explanation
This PCB holder is similar to a bench clamp and it can be easily built using scrap items available at home. We will use steel wire in this project so that we can adjust the height of the clip by bending the wire. Select the size of the clip according to the thickness of the board/PCB, If you want to hold thick board than use bigger clips.
Connection
- Twist two pieces of steel wire and connect them to the alligator clip.
- Drill 2 small holes in the wooden block using a PCB drill machine
- Mount both the steel wires on to the wooden block using screws.
- Now, you can adjust the height of the PCB holder by bending the wire.
Application
- This holder can be used for soldering and testing the circuit
Related posts:
 Top 5 Simple Printed Circuit Board(PCB) Projects for Beginners
 PCB Assembly And Production Process - Comprehensive Guide
 Top 5 PCB Design Tools & CAD Softwares For Beginners
 All about Routing of the Printed Circuit Board (PCB)
 Top 5 PCB Design Tricks And Tips For Complete Beginners
 PCBA-Online: Top PCB Manufacturing And Assembly Service


